How to Make a Designer Fabric D-Ring Belt
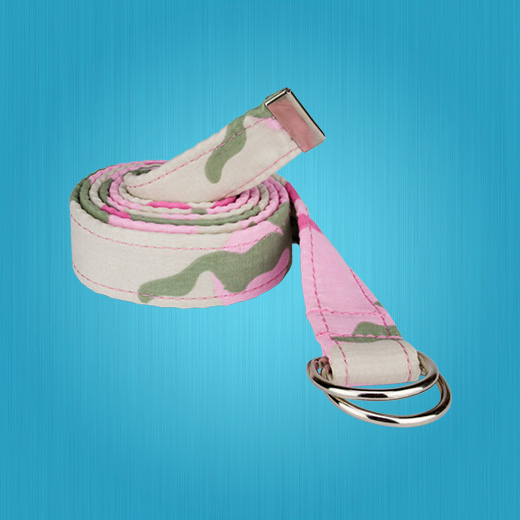
Belts can make or break an outfit. They're so much more than a way to keep your pants up, the perfect unique belt can make a bland outfit exciting. A fashionable D-Ring belt can cost you over $100, but today we're going to make one ourselves for a fraction of that price. And the best part is: it's so easy with this simple step by step how-to!
This how-to demonstrates how to make a D-Ring belt with your favorite designer fabric. If you want a beautiful solid color D-ring belt, visit this how-to instead.
Okay, let's get started! Here's what we need:
- 2 yards of 1" webbing (I used Lightweight Nylon Webbing, but almost any webbing will do.)
- A 2 yard strip of fabric, 3" wide
- Thread. You can choose a matching color, but sometimes a contrasting color looks great too. ( For example, a black fabric with white stitching. ) Experiment to see what looks best.
- 2 D-rings, 1 inch
- A metal belt tip - This gives us a nice finished edge without worrying about the fabric fraying.
- Scissors
- Pliers
- A piece of scrap fabric
- Fabric measuring tape
- A sewing machine
- An iron


1. Measure Your Waistline
Wrap the measuring tape around your navel. If you don't have a fabric measuring tape, use a piece of string instead. Then you can measure the string with a stiff utility measuring tape.
2. Cut The Webbing
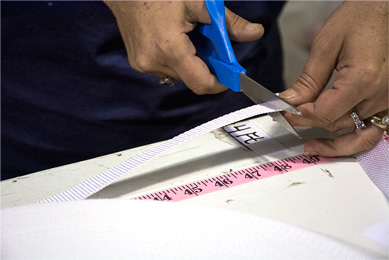
Add 8" to your waist measurement. This will be the length of the webbing. You'll need the extra length for the loop you make around the D-rings. Go ahead and cut the webbing to length.


3. Measure And Cut Your Fabric To Length
Now, add 10" to waist measurement. This is the length of the fabric you'll need. Go ahead and cut the fabric to length.


4. Fold And Iron Your Fabric
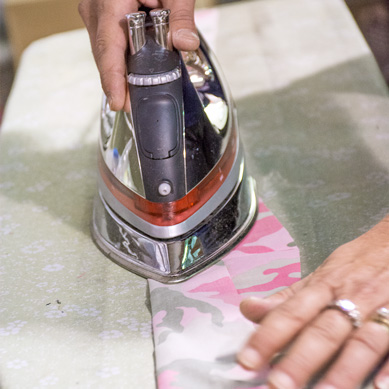
Fold the fabric strip lengthwise so that it is only 1 1/2" wide. Be sure to fold it with the nice side facing inward. Line up the edges very evenly and use pins to hold it in place. I recommend you iron the fabric here to keep everything nice and flat.


5. Sew a Tube
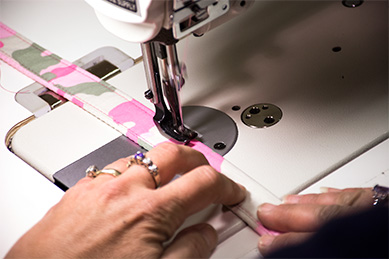
Alright, time to get sewing! Make a tube by sewing the fabric along the long edge. You'll need to leave about 1 1/8" room inside the tube for the webbing. That gives us about a 1/4" seam allowance. Don't sew either end shut.
6. Turn Fabric Right Side Out
Now you have an inside-out tube. Let's get it turned right side out! Here are 2 ways to turn the fabric right side out:
7. Iron the Tube
At this point, you should iron the fabric tube flat. This will make it easier to insert the webbing correctly.
8. Insert Webbing Into Fabric Tube
Fasten a large safety pin to one end of the webbing strip, so you have something rigid to hold onto. Insert the end into the fabric tube, and work it through. When the safety pin has been pushed through to the end, remove it and turn just a tiny bit of the fabric edges under and sew the end with a triple stitch. At the other end, there will be an extra 2" of fabric.
9. Iron The Belt
Iron the belt again on both sides.
10. Sew The Webbing And Fabric Together
Sew the webbing and fabric together with a seam close to each edge. I like to aim for it to be about 1/4" from the edge. It's very important to make sure the stitch goes through both the webbing and the fabric so the belt doesn't twist out of shape later.


11. Thread Belt Through D-Rings
Take the end with the extra 2" of fabric and thread it through the two D-rings.


12. Create Loop Around D-Rings
Fold the flap back around so it creates a closed loop surrounding the D-rings.
13. Triple-Stitch
Triple-stitch the flap to the body of the belt for a tight hold.
14. Attach The Belt Tip
At the other end of the belt, attach your belt tip. I do this by covering it in a piece of scrap fabric, then squeezing it with pliers. The scrap fabric is used to protect the belt tip from getting scratched by the pliers.


Congratulations, you've created your own D-Ring belt! That wasn't too difficult was it? Your belt is a simple way to accessorize your outfit, and it will certainly draw attention. When you feel comfortable with making this belt, you might want to try your hand at the patterned fabric belt.
 Review and Win! Share your verified review and get a chance to win a $25 store credit!