
How to Make a Dog Collar: Step-by-Step DIY Guide
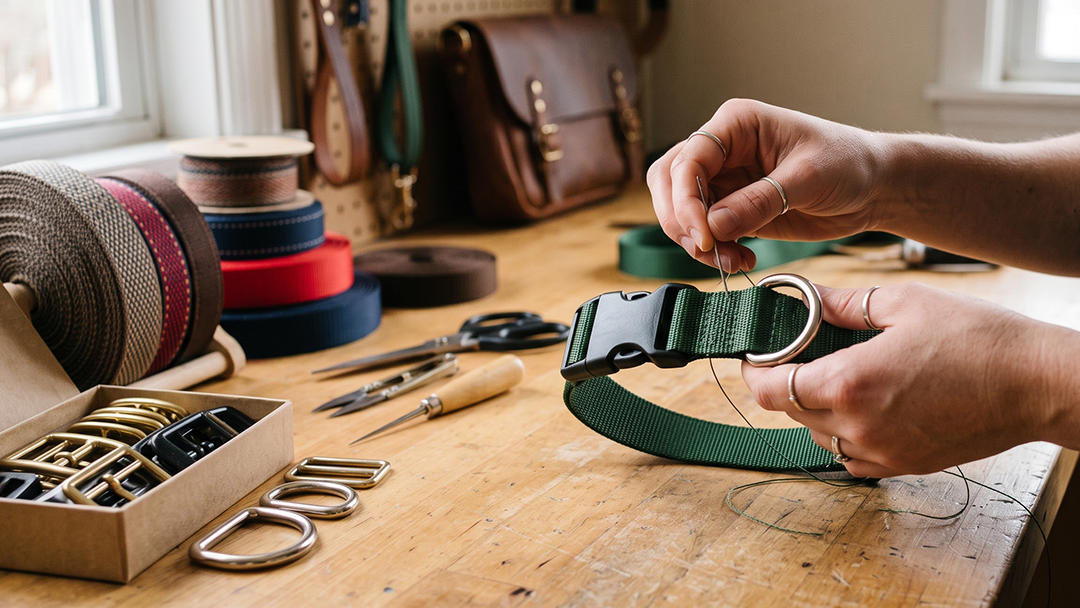
Store-bought collars are made to fit a range of dogs, which means they're optimized for no dog in particular. The webbing is often polypropylene because it's cheap. The buckles are frequently stamped metal or thin-wall plastic. The D-rings, in many cases, are not welded.
When you build the collar yourself, you know exactly what's in it. You chose the webbing width and weave. You know whether the buckle is acetal or cast. You know the D-ring is welded because you held it in your hand and confirmed it before you started sewing.
For makers who think about what things are made of, that knowledge matters. It changes how you evaluate your work and how much you trust it.
Materials You'll Need
A dog collar has four components: webbing, a buckle, a D-ring, and a slider. Every one of them contributes to whether the finished collar holds up or doesn't.
Webbing is the foundation of the build. Nylon is the right choice for a collar that will be worn daily. It's strong, colorfast, weather-resistant, and it doesn't fray the way polypropylene does. Polypropylene is lighter and cheaper, but it becomes brittle with prolonged sun exposure and loses its integrity faster. For a collar, that tradeoff isn't worth it.
Width determines both strength and proportion. For small dogs under 20 pounds, 5/8-inch webbing is appropriate. Medium dogs typically wear 3/4-inch or 1-inch. Large dogs need 1-inch to 1.5-inch. The width should look proportional to the dog, and wider webbing distributes pressure more evenly across the neck.
We carry nylon webbing in dozens of colors and every useful width, all of it tightly woven and tested for strength. At our shop in Moulton, we can cut to length, so you're not ordering a 50-yard spool when you need three feet.
Buckles for most collars are side-release plastic, which allows for quick fastening and removal. Look for buckles made from acetal plastic or cast metal. Stamped metal buckles can deform under load. For large or very active dogs, a center-bar or roller buckle in cast metal is worth considering.
D-rings need to be welded. The D-ring is where the leash attaches, and it absorbs the full force of any sudden movement. An unwelded ring can open under stress. That's a safety failure, not a minor inconvenience. Welded D-rings are not the expensive option; they're the only reasonable option.
Sliders allow the collar to be adjusted once it's built. A slider should move along the webbing with moderate resistance, enough to stay where you set it, but not so tight that you can't move it in the field.
Thread should be heavyweight polyester. It holds up under UV exposure better than cotton and handles stress loading better than standard thread weight. Use it at every seam.
Measuring Your Dog
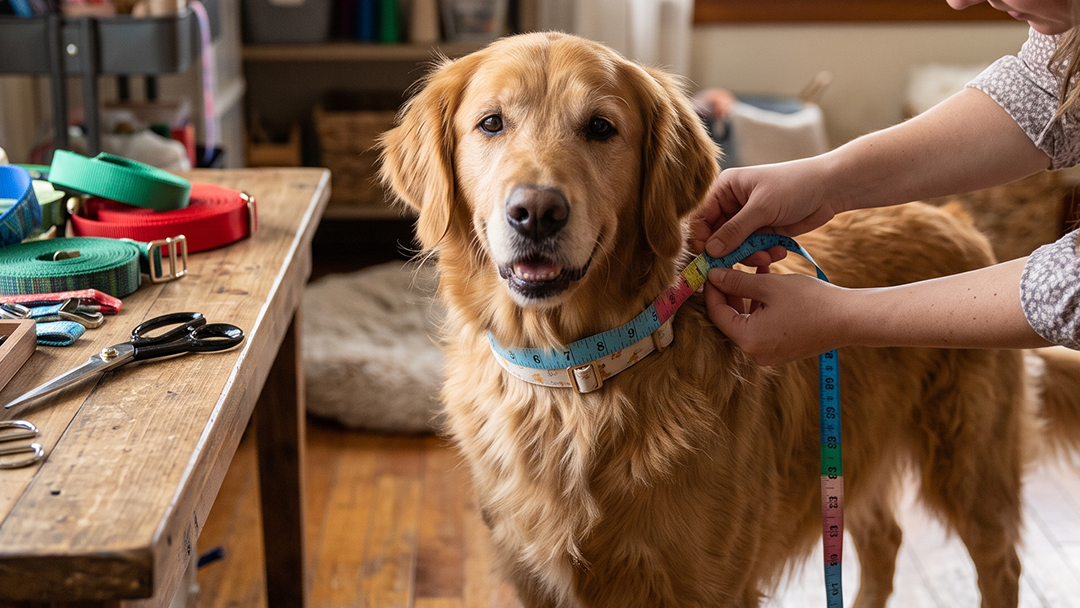
Measure around your dog's neck where the collar will sit, typically just behind the ears and above the shoulders. Use a flexible tape measure or a piece of string you can lay against a ruler afterward.
The finished collar should allow two fingers to slide comfortably between the collar and your dog's neck. Tighter than that risks restricting breathing. Looser, and the dog may be able to back out of it.
Take your neck measurement and add 4 to 6 inches for adjustment range and hardware allowance. A 14-inch neck means cutting your webbing to 18 to 20 inches. That gives you room for the folded stitching points, the slider travel, and the buckle overlap.
Cutting and Preparing the Webbing
Cut the webbing to your calculated length using sharp scissors or a hot knife. A hot knife is the cleaner tool for nylon because it cuts and seals the edge in one pass. If you're using scissors, run the cut end briefly through a flame until it melts slightly and fuses. Keep the edge moving near the heat rather than holding it in place. You want a smooth sealed edge, not a scorched one.
Sealed edges are not a finishing touch. Unsealed nylon webbing will fray continuously and will eventually compromise the collar's strength. Seal every cut end before you start threading hardware.
Assembling the Collar
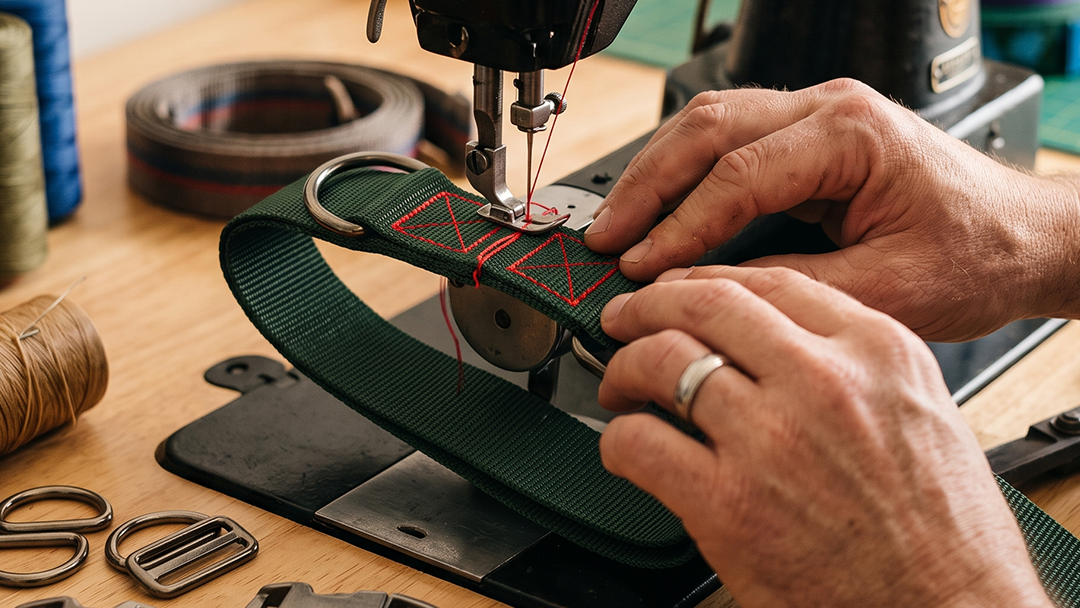
Thread one end of the webbing through the female half of the side-release buckle. Pull 1.5 to 2 inches through, fold it back on itself so the cut edge is tucked inside, and stitch it down. This fold should be stitched with a box stitch or box-X pattern, which distributes stress across a larger surface area than a straight line of stitching. This is the highest-stress attachment point on the collar. Stitch it like it has to hold.
On the other end, thread the webbing through the D-ring, then through the slider, then through the male half of the buckle. Leave enough length at this end to fold back and stitch, routing the tail back through the slider to create the adjustment loop.
The slider should now sit between the two buckle halves and be able to travel freely along the webbing to tighten or loosen the collar.
Stitch the second fold with the same reinforced pattern. Both stitched points take stress when the collar is in use, and both should be built accordingly.
Position the D-ring so it faces upward when the collar is worn. A D-ring that migrates to the side or underside causes the leash to sit at an awkward angle and puts uneven stress on the collar.
Stitching Considerations
Stitching is where most homemade collars fail. A single straight stitch through folded webbing is not sufficient for a piece of equipment that takes real load.
- Use a heavy-duty sewing machine and a heavy-duty needle sized for webbing or canvas.
- A walking foot helps feed multi-layer webbing evenly and keeps it from slipping under the presser foot.
- Set your tension for the material thickness, and backstitch at the start and end of every seam.
- Box stitching and box-X stitching create a reinforced rectangle at load-bearing attachment points.
- This pattern is standard in any webbing application where failure has consequences.
If you're hand-stitching, use a heavy needle and waxed polyester thread. It's slower and more labor-intensive, but it's fully workable if you're patient and use reinforced patterns at every stress point.
A Note for the Makers Who Want to Go Deeper
If you've gotten this far and you're already thinking about making a second collar, a matching leash, or trying a martingale design, that instinct is worth following. Dog collars are genuinely good learning projects for anyone interested in working with webbing. They're small enough to complete in a single session, they require real problem-solving around hardware and load, and the finished object has to actually work.
At Country Brook, we see customers who started with one collar for their own dog and ended up with a small business selling handmade pet accessories. The craft is approachable, but it also has depth. Martingale collars, reflective builds, padded leather-backed designs, two-tone woven patterns… there's a lot of room to grow inside this one project.
Building something that has to perform and choosing every component with intention is exactly what slow making looks like in practice. That connection between function and craft is what keeps makers coming back to projects like this one.
Testing the Collar
Before the collar goes on your dog, test every part of it by hand. Click the buckle and tug on both sides to confirm it seats firmly and doesn't release under moderate tension. Pull on the D-ring to check the stitching at that fold. Run the slider along the full adjustment range to make sure it moves without binding and stays where you set it.
Run your hand along the inside surface of the collar and feel for rough edges, exposed thread ends, or anything that could cause irritation against the neck.
Fit the collar, check the two-finger gap, and watch your dog move in it for a few minutes. A well-built collar sits still. It doesn't shift, rotate, or prompt the dog to scratch at it.
Where Quality Materials Make a Difference
Inexpensive webbing frequently looks fine on the spool. It doesn't look fine after six months of daily wear, rain, and a dog that swims. It stretches, fades, and frays at every point where it contacts hardware. The same principle applies to buckles and D-rings. A buckle that feels thin probably is.
The webbing and hardware we stock at Country Brook are sourced for applications where failure isn't acceptable. Tightly woven nylon, colorfast through weather and washing, welded rings, buckles with a real click. We've been supplying makers, pet accessory businesses, and gear builders from our Moulton, Alabama shop for over two decades, and the products we carry reflect what we've learned about what holds up and what doesn't.
Troubleshooting Common Issues
- The slider won't hold its position. The slider is likely too large for the webbing width, or the webbing surface is too smooth for the slider to grip. Try a snugger-fitting slider, or thread the webbing back through a second time to increase friction.
- Stitching is skipping or bunching. Check the needle first. A dull needle or one sized for lighter fabric will skip on webbing. Switch to a heavy-duty needle and adjust machine tension for the material thickness.
- The collar twists when worn. The D-ring is probably not centered on the collar, or the webbing is threading unevenly through the hardware. Rethread carefully, keeping the webbing flat through every piece of hardware before you stitch.
- The buckle releases with too little pressure. Some side-release buckles have lighter mechanisms than others. For large or strong dogs, look for a buckle rated for higher loads, or switch to a center-bar or roller buckle in cast metal.
Variations and Customization
Once the basic build is solid, there's room to adapt it. A second layer of webbing on the underside adds strength and gives you a place to add contrast color. Reflective webbing is available and makes a practical difference for dogs walked at dawn or dusk. Embroidered webbing with a name or pattern is available and changes the whole character of the finished collar.
Martingale-style collars, which tighten slightly under tension without choking, are a natural next step. They require an additional loop of webbing and a different hardware arrangement, but the underlying principles are identical to what's covered here.
The process of making a collar teaches you what functional construction actually requires. That knowledge carries into every project after it.
Frequently Asked Questions
What type of webbing is best for dog collars?
Nylon webbing is the reliable choice. It's strong, weather-resistant, colorfast, and holds up to daily wear without fraying or becoming brittle. Polypropylene is lighter and less expensive, but it degrades faster under UV exposure and doesn't hold up as well over time. For a collar that gets worn every day, nylon is the better material.
How do I know what width of webbing to use?
Match the width to the dog's size. Small dogs under 20 pounds do well with 5/8-inch webbing. Medium dogs in the 20 to 60 pound range typically wear 3/4-inch to 1-inch. Large dogs over 60 pounds need 1-inch to 1.5-inch. Wider webbing is stronger and distributes pressure more evenly, but it should be proportional to the dog's neck.
Can I make a dog collar without a sewing machine?
Yes. Hand-stitching with a heavy needle and waxed polyester thread works. It's slower and takes more effort, but the results can be just as strong if you use reinforced stitch patterns at every load-bearing point. The box stitch is achievable by hand with patience.
How tight should a dog collar be?
Two fingers should slide comfortably between the collar and your dog's neck. Tighter than that risks restricting breathing. Looser, and a determined dog can back out of it. Check the fit regularly, especially with puppies who are still growing.
Why does the D-ring need to be welded?
The D-ring carries the full force of leash tension and any sudden pulling. An unwelded ring can open under that load, which means the leash detaches when you need it most. Welded D-rings are a basic safety requirement for any collar that will be used with a leash.
Troy has helped Country Brook Craft Supply support their community of makers, crafters, sewers, small businesses, and DIYers from the Moulton, Alabama shop for over 15 years.


