 Our offices will be closed Monday, September 7th for Labor Day. Orders can still be placed online, and both customer service and shipping will resume Tuesday, September 8th.
  Review and Win! Share your verified review and get a chance to win a $25 store credit!
How to Make a Durable Handmade Dog Collar
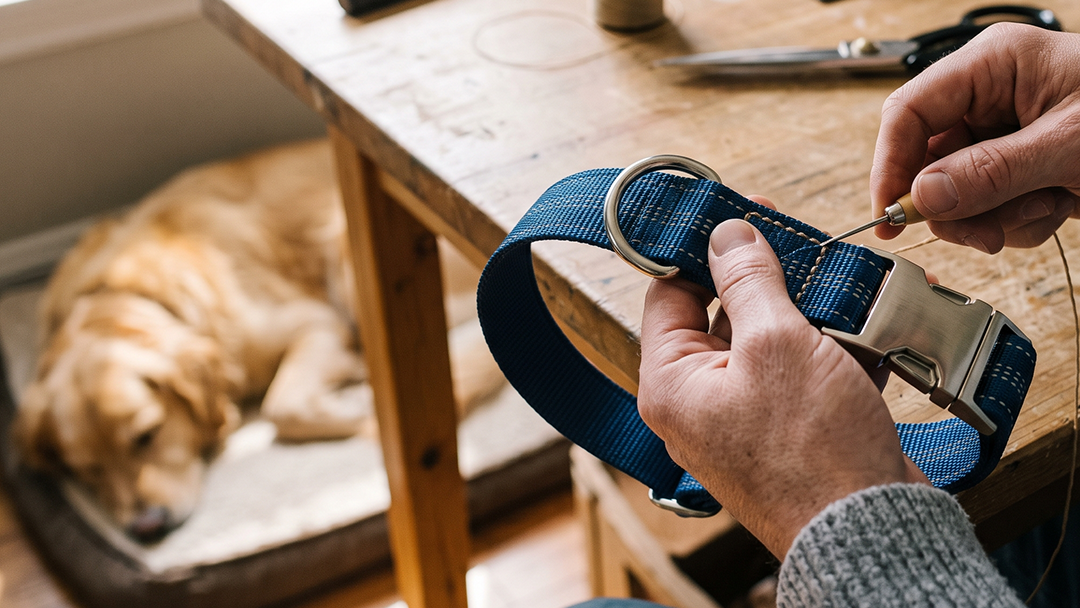
Before you gather materials, think about what a collar actually experiences in daily use.
It sits against a dog's neck for hours at a time. It gets wet and dries, repeatedly. It picks up dirt, skin oils, and whatever a dog walks through on a Tuesday morning. The hardware handles constant low-level stress from the weight of tags and periodic high stress when a leash goes taut or a dog lunges at a squirrel.
That means the materials need to resist moisture, wear, and UV exposure. The hardware needs to hold under real load, not just look the part. The edges need to be finished so they don't irritate skin or snag fur. A handmade collar doesn't need to look like it came off a factory line. It does need to be safe and functional. Everything else is a bonus.
Choosing the Right Webbing for a Dog Collar
Webbing is the foundation of the collar, and choosing the right type matters more than most first-time builders expect.
Nylon webbing is the standard for good reason. It's strong, moisture-resistant, holds up to UV exposure, and comes in a range of widths and weights. For a medium to large dog, 1-inch webbing is the go-to. For smaller breeds under 20 pounds, 5/8-inch works well. Very large or powerful dogs can benefit from 1.5-inch webbing, which spreads pressure more evenly across the neck.
The thickness of the webbing matters more than beginners typically realize. Lightweight webbing is easier to handle on a first project, but it can dig into a dog's neck under tension. Heavier webbing provides more surface area and better load distribution, which is what you want in a collar that sees daily use.
Polypropylene webbing is lighter and less expensive than nylon, but it degrades faster under UV exposure and frays more readily. For a collar worn every day, it's not the better investment.
Cotton and canvas webbing come up occasionally because they look beautiful and feel soft. They do absorb moisture and dry slowly, which means more frequent replacement. Some makers use them intentionally for dogs who spend most of their time indoors, accepting the tradeoff for the aesthetic.
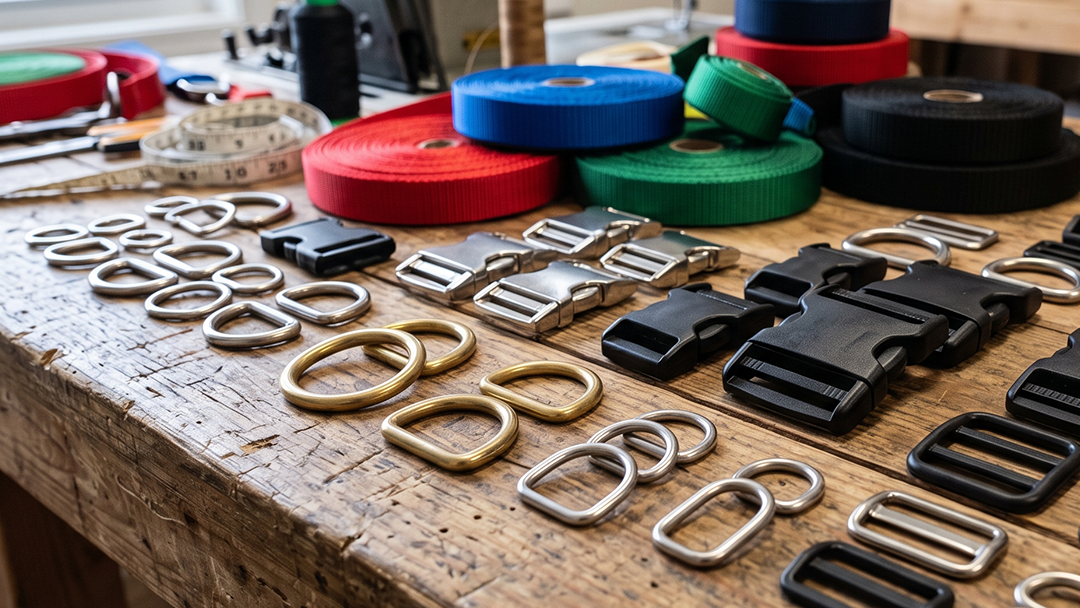
At Country Brook, we stock nylon webbing in a wide range of widths, weights, and colors because we've watched what holds up over time across real projects including collars, leashes, harnesses, and bag straps. The webbing that works for a dog collar is the same webbing that works across that whole family of builds. Learning to work with it once gives you a foundation that transfers.
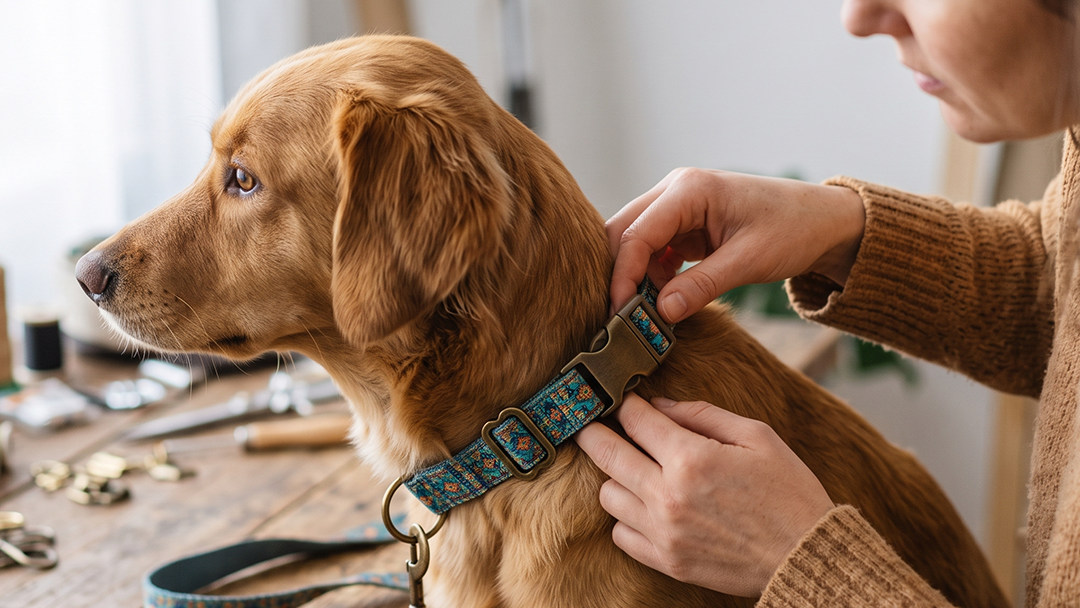
Hardware That Holds Up
The hardware on a dog collar takes more abuse than the webbing, and it's where a lot of cheap builds fail.
For a standard adjustable collar, you'll need three components: a buckle, a D-ring for leash attachment, and a tri-glide or slide adjuster to allow for size changes.
Plastic side-release buckles are popular because they're quick and easy to use. The quality gap between cheap and reliable is significant, though. Bargain buckles can crack under load, especially in cold weather. Look for buckles made from acetal or nylon resin with a published weight rating. A 50-pound dog pulling hard can generate well more than 50 pounds of force, so that rating matters.
Metal buckles in pin-style or quick-release add weight but offer more durability. For larger dogs or working situations, the tradeoff is worth it.
D-rings should be welded, not cast. A welded D-ring is formed from a single piece of metal with the seam fused closed, which makes it structurally far stronger than a cast ring that can fracture under stress. Stainless steel resists rust well. Brass develops a patina over time that some people prefer, and it's a legitimate choice rather than a compromise.
Tri-glide sliders are simple pieces, but placement and fit matter. The slider should move along the webbing without slipping on its own under the collar's weight.
Essential Tools for Assembly
You don't need a full workshop, but the tools you use should match the material.
A hot knife is the cleanest way to cut nylon webbing because it melts the edge as it cuts, sealing it against fraying. If you don't have one, sharp fabric shears work. Follow the cut by carefully running a lighter flame along the edge just until the nylon melts slightly. Keep the flame moving, work in a ventilated space, and don't linger in one spot.
A heavy-duty sewing machine with a needle rated for heavy fabrics is the standard method for securing webbing. Use bonded polyester or nylon thread because standard sewing thread won't hold at the stress points this collar will experience. Backstitch at every attachment point, and add a box stitch or bar tack at the buckle and D-ring locations. Those are where collars fail, and reinforcing them is the difference between a collar that lasts and one that doesn't.
If you don't have a machine capable of handling heavy webbing, hand-stitching with a saddle stitch method and waxed thread is a real alternative. It takes longer and requires an awl, but it produces a strong, durable seam. Rivets are another option and are faster than stitching but less forgiving if you need to adjust placement.
A measuring tape is not optional. Fit matters for safety, and there's no guessing your way to a collar that fits correctly.
Measuring and Fitting a Handmade Dog Collar
A collar should fit with two fingers of slack between the collar and the dog's neck. That's the standard, and it's a reliable starting point.
Measure around the widest part of the neck, then add 2 inches to account for adjustment range and hardware overlap at the buckle. That gives you your total webbing length.
For an adjustable collar, the webbing threads through the female end of the buckle, loops around a tri-glide, passes through the D-ring, and threads back through the tri-glide before connecting to the male buckle end. This configuration allows the collar to be sized up or down as the dog grows or as the webbing settles slightly with use.
When placing the D-ring, position it off-center so it sits on the top or side of the neck when worn. A ring that hangs underneath can catch on things during normal movement.
Common Mistakes to Avoid
The buckle and D-ring attachment points are where most handmade collars fail first. Reinforcing these locations with box stitching or bar tacks isn't optional. It's the step that separates a collar that holds from one that doesn't.
Using standard sewing thread instead of bonded nylon or polyester thread is a close second on the list of things that cause early failures. The thread has to match the demands of the material.
Skipping edge sealing feels like saving 30 seconds. What it actually does is start a fray that works its way up the webbing over the following weeks. Seal every cut end.
Decorative additions such as charms, rivets, and fabric overlays are worth thinking through before adding them. Anything that creates a pressure point or sits against the dog's skin needs to be reconsidered or repositioned on the outer face of the collar only.
Making Your Dog Collar as a Craft Practice
For makers who work with intention, who care about provenance, about understanding what their materials are and where they come from, and about building something that will actually last, a dog collar is a genuinely worthwhile first project in webbing and hardware construction. It's small enough to finish in a single session but complex enough to teach you something real about how load distributes across a sewn joint, how hardware tolerances affect fit, and how material choices compound over time.
The collar your dog wears every day is a real object under real use conditions. Building it yourself means you know exactly what it's made of and how it's held together. That knowledge matters when it's time to inspect it, repair it, or make the next one better.
Frequently Asked Questions
What width of webbing should I use for my dog's collar?
For dogs under 20 pounds, 5/8-inch webbing works well. Medium to large dogs are typically best served by 1-inch webbing. Very large or strong dogs benefit from 1.5-inch, which distributes pressure more evenly.
Can I make a collar without a sewing machine?
Yes. A saddle stitch with an awl and waxed thread produces a durable seam and is used in leatherwork and heavy fabric construction for exactly that reason. Rivets are faster but less forgiving if placement needs to be adjusted.
How do I know if my hardware is strong enough?
Check the weight rating on buckles and D-rings. Hardware should be rated for at least three times your dog's weight to account for the force generated during sudden pulls. Welded metal hardware is stronger than cast or stamped.
What's the best way to clean a handmade nylon dog collar?
Hand-wash with mild soap and warm water, rinse thoroughly, and air dry. Keep plastic buckles out of the dryer because heat weakens the resin over time. Wipe metal hardware down with a damp cloth to clear oils and debris.
How often should I replace a handmade dog collar?
Inspect it regularly for fraying webbing, cracks in plastic components, or stress on the stitching at attachment points. Replace it at any of those signs. Even without visible wear, UV exposure and moisture degrade nylon gradually. A collar seeing heavy outdoor use is worth replacing every one to two years.
Troy has helped Country Brook Craft Supply support a community of makers, crafters, sewers, small businesses, and DIYers from the Moulton, Alabama shop for over 15 years.


