How To Make A Lanyard
Making your own lanyard is a simple and practical DIY project that requires just a few basic supplies. In this step-by-step guide, we’ll show you how to make a lanyard using 1-inch polyester webbing, a side-release buckle, and a snap hook. Whether you’re creating a lanyard for keys, ID badges, or everyday accessories, this method produces a strong, professional-looking result that’s built to last.
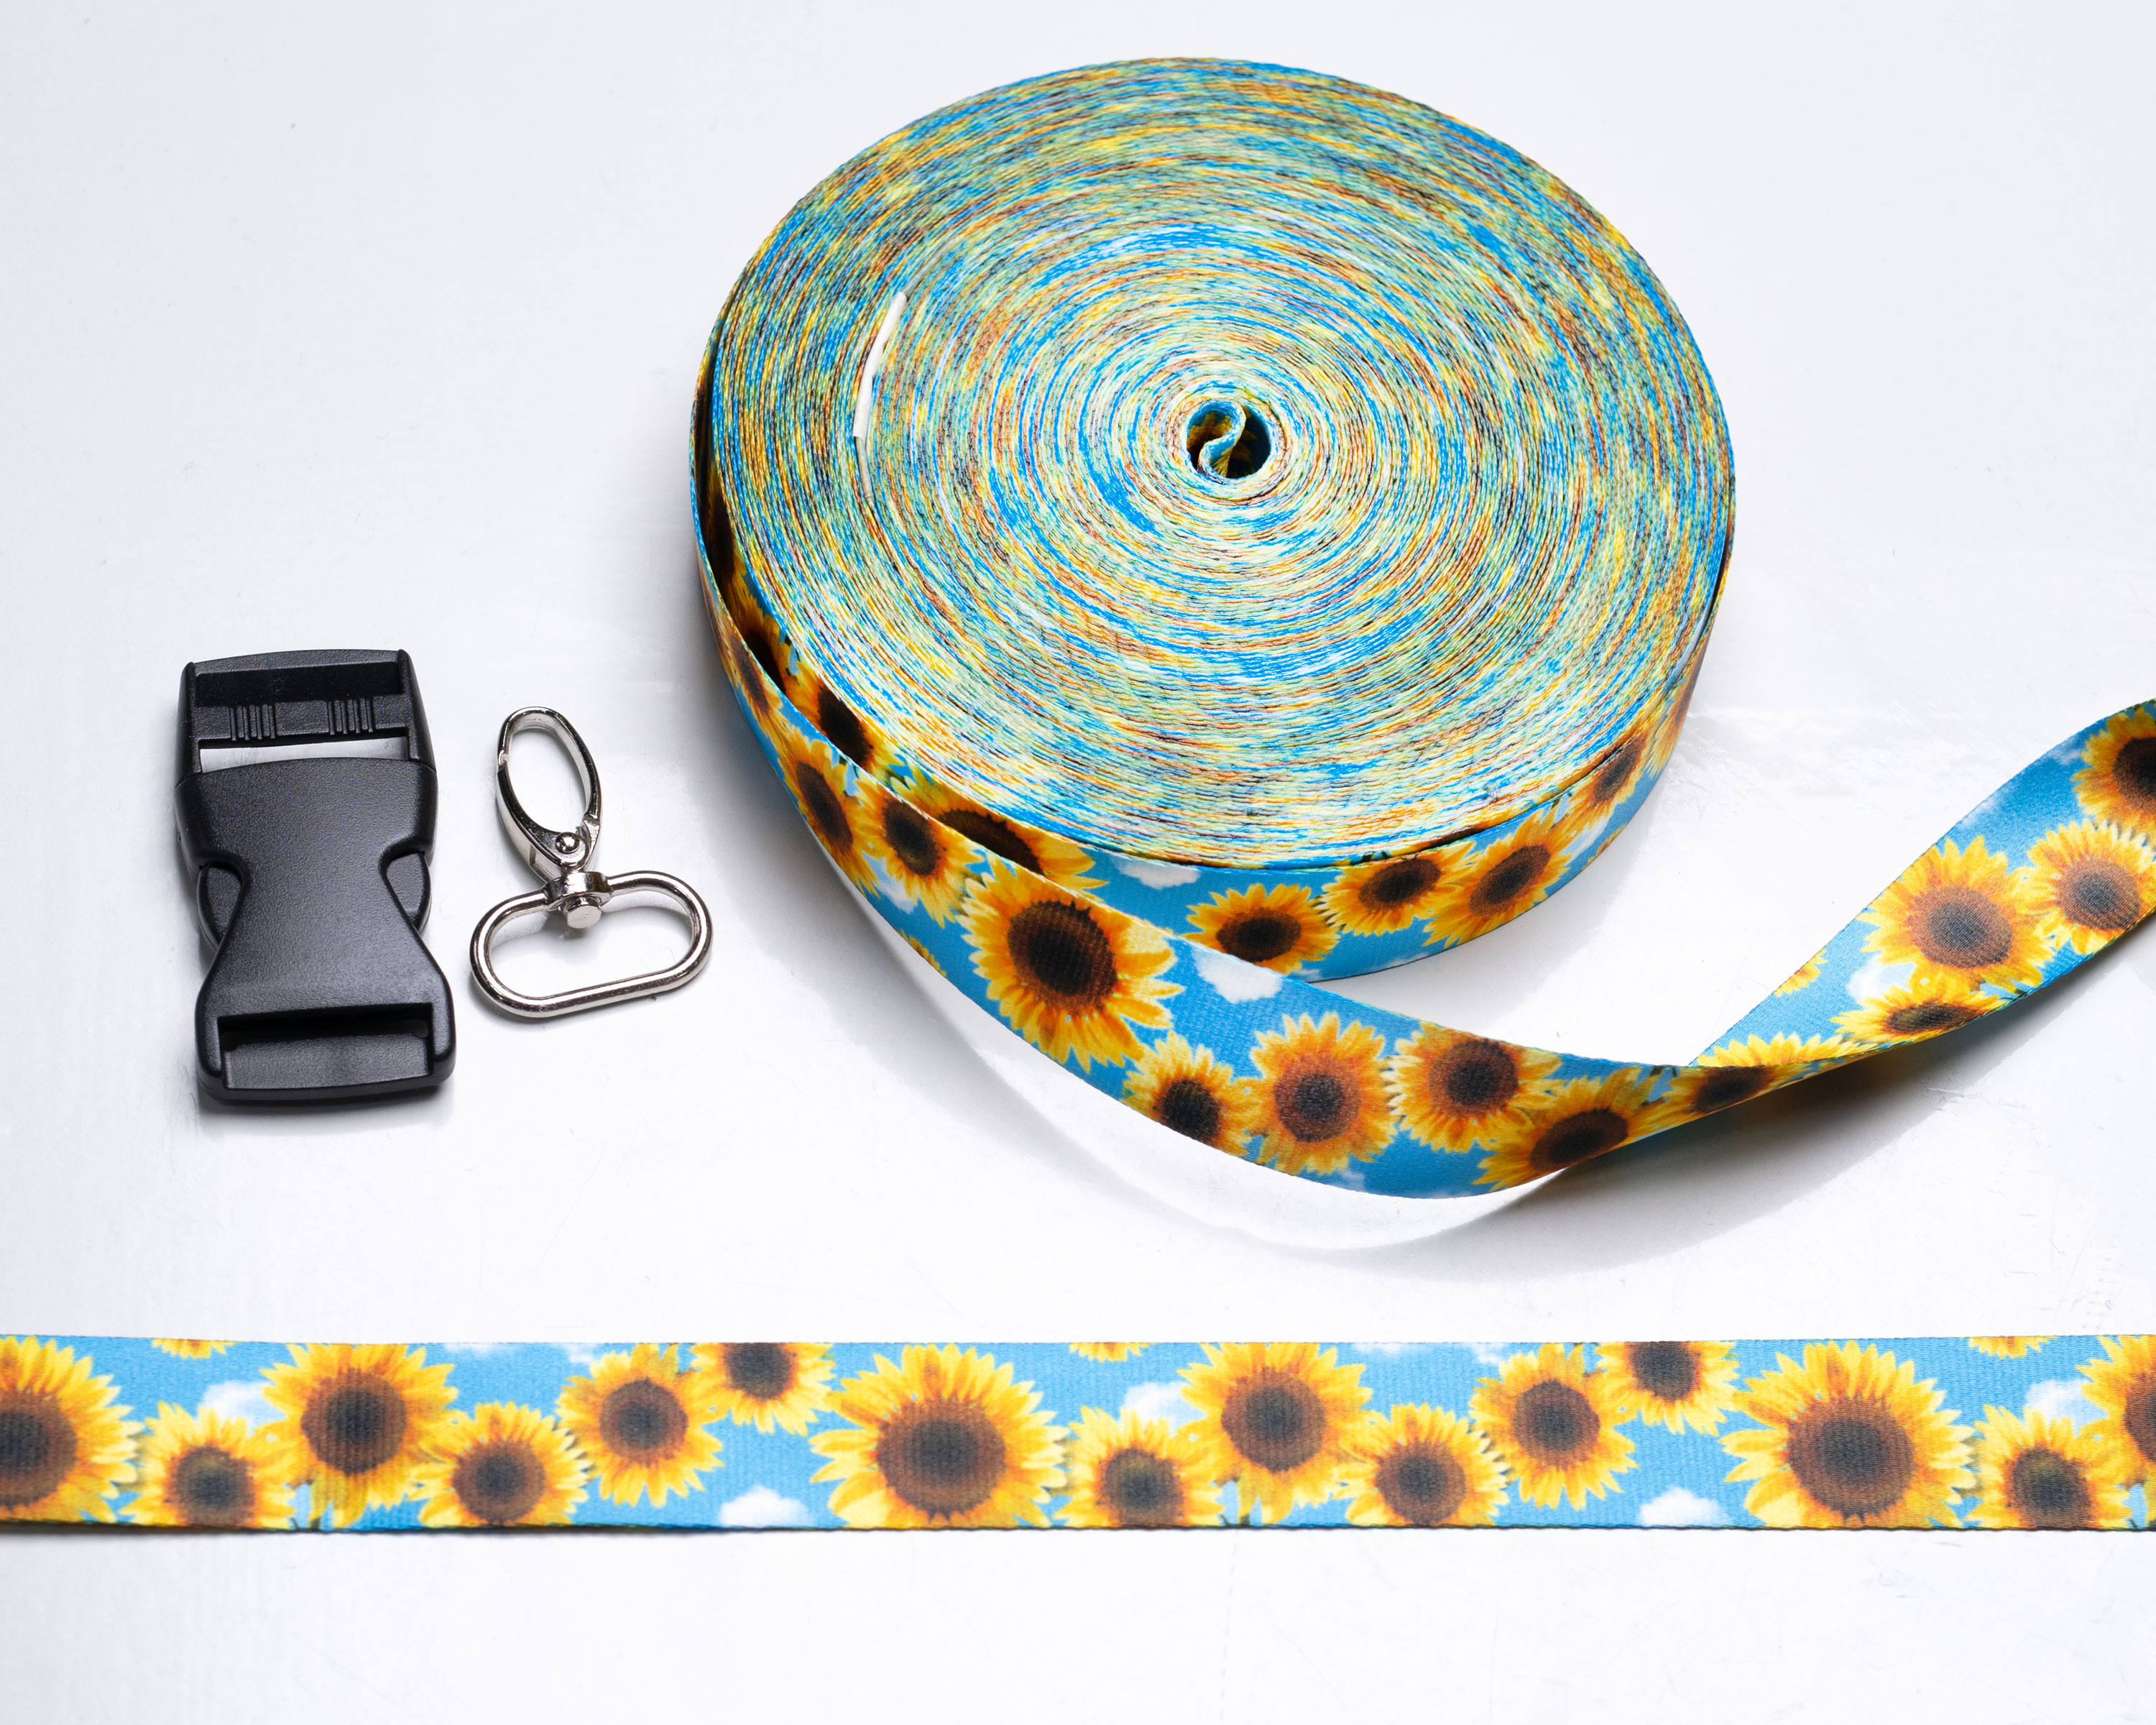
What You'll Need:
• 1 inch Snap Hook (Lobster Claw)
• Lighter (for sealing edges)
• Sewing Machine
• Thread
• Scissors
• Measuring Tape or Ruler
Choosing The Right Webbing & Hardware
For this tutorial, we are using 1-inch polyester webbing paired with 1-inch hardware (side-release buckle and snap hook). This is a very popular size for lanyards because it offers durability and a comfortable width for everyday use.
You can also make lanyards using ¾-inch webbing or other sizes, depending on your preference. There are many styles of buckles and snap hooks available — including metal, plastic, swivel, and decorative options.
The most important thing to remember is:
Your webbing width must match your hardware width.
For example:
- 1" webbing requires 1" buckle and 1" snap hook
- ¾" webbing requires ¾" buckle and ¾" snap hook
If the sizes don’t match, the hardware will either be too loose or too tight, and the lanyard will not function properly.
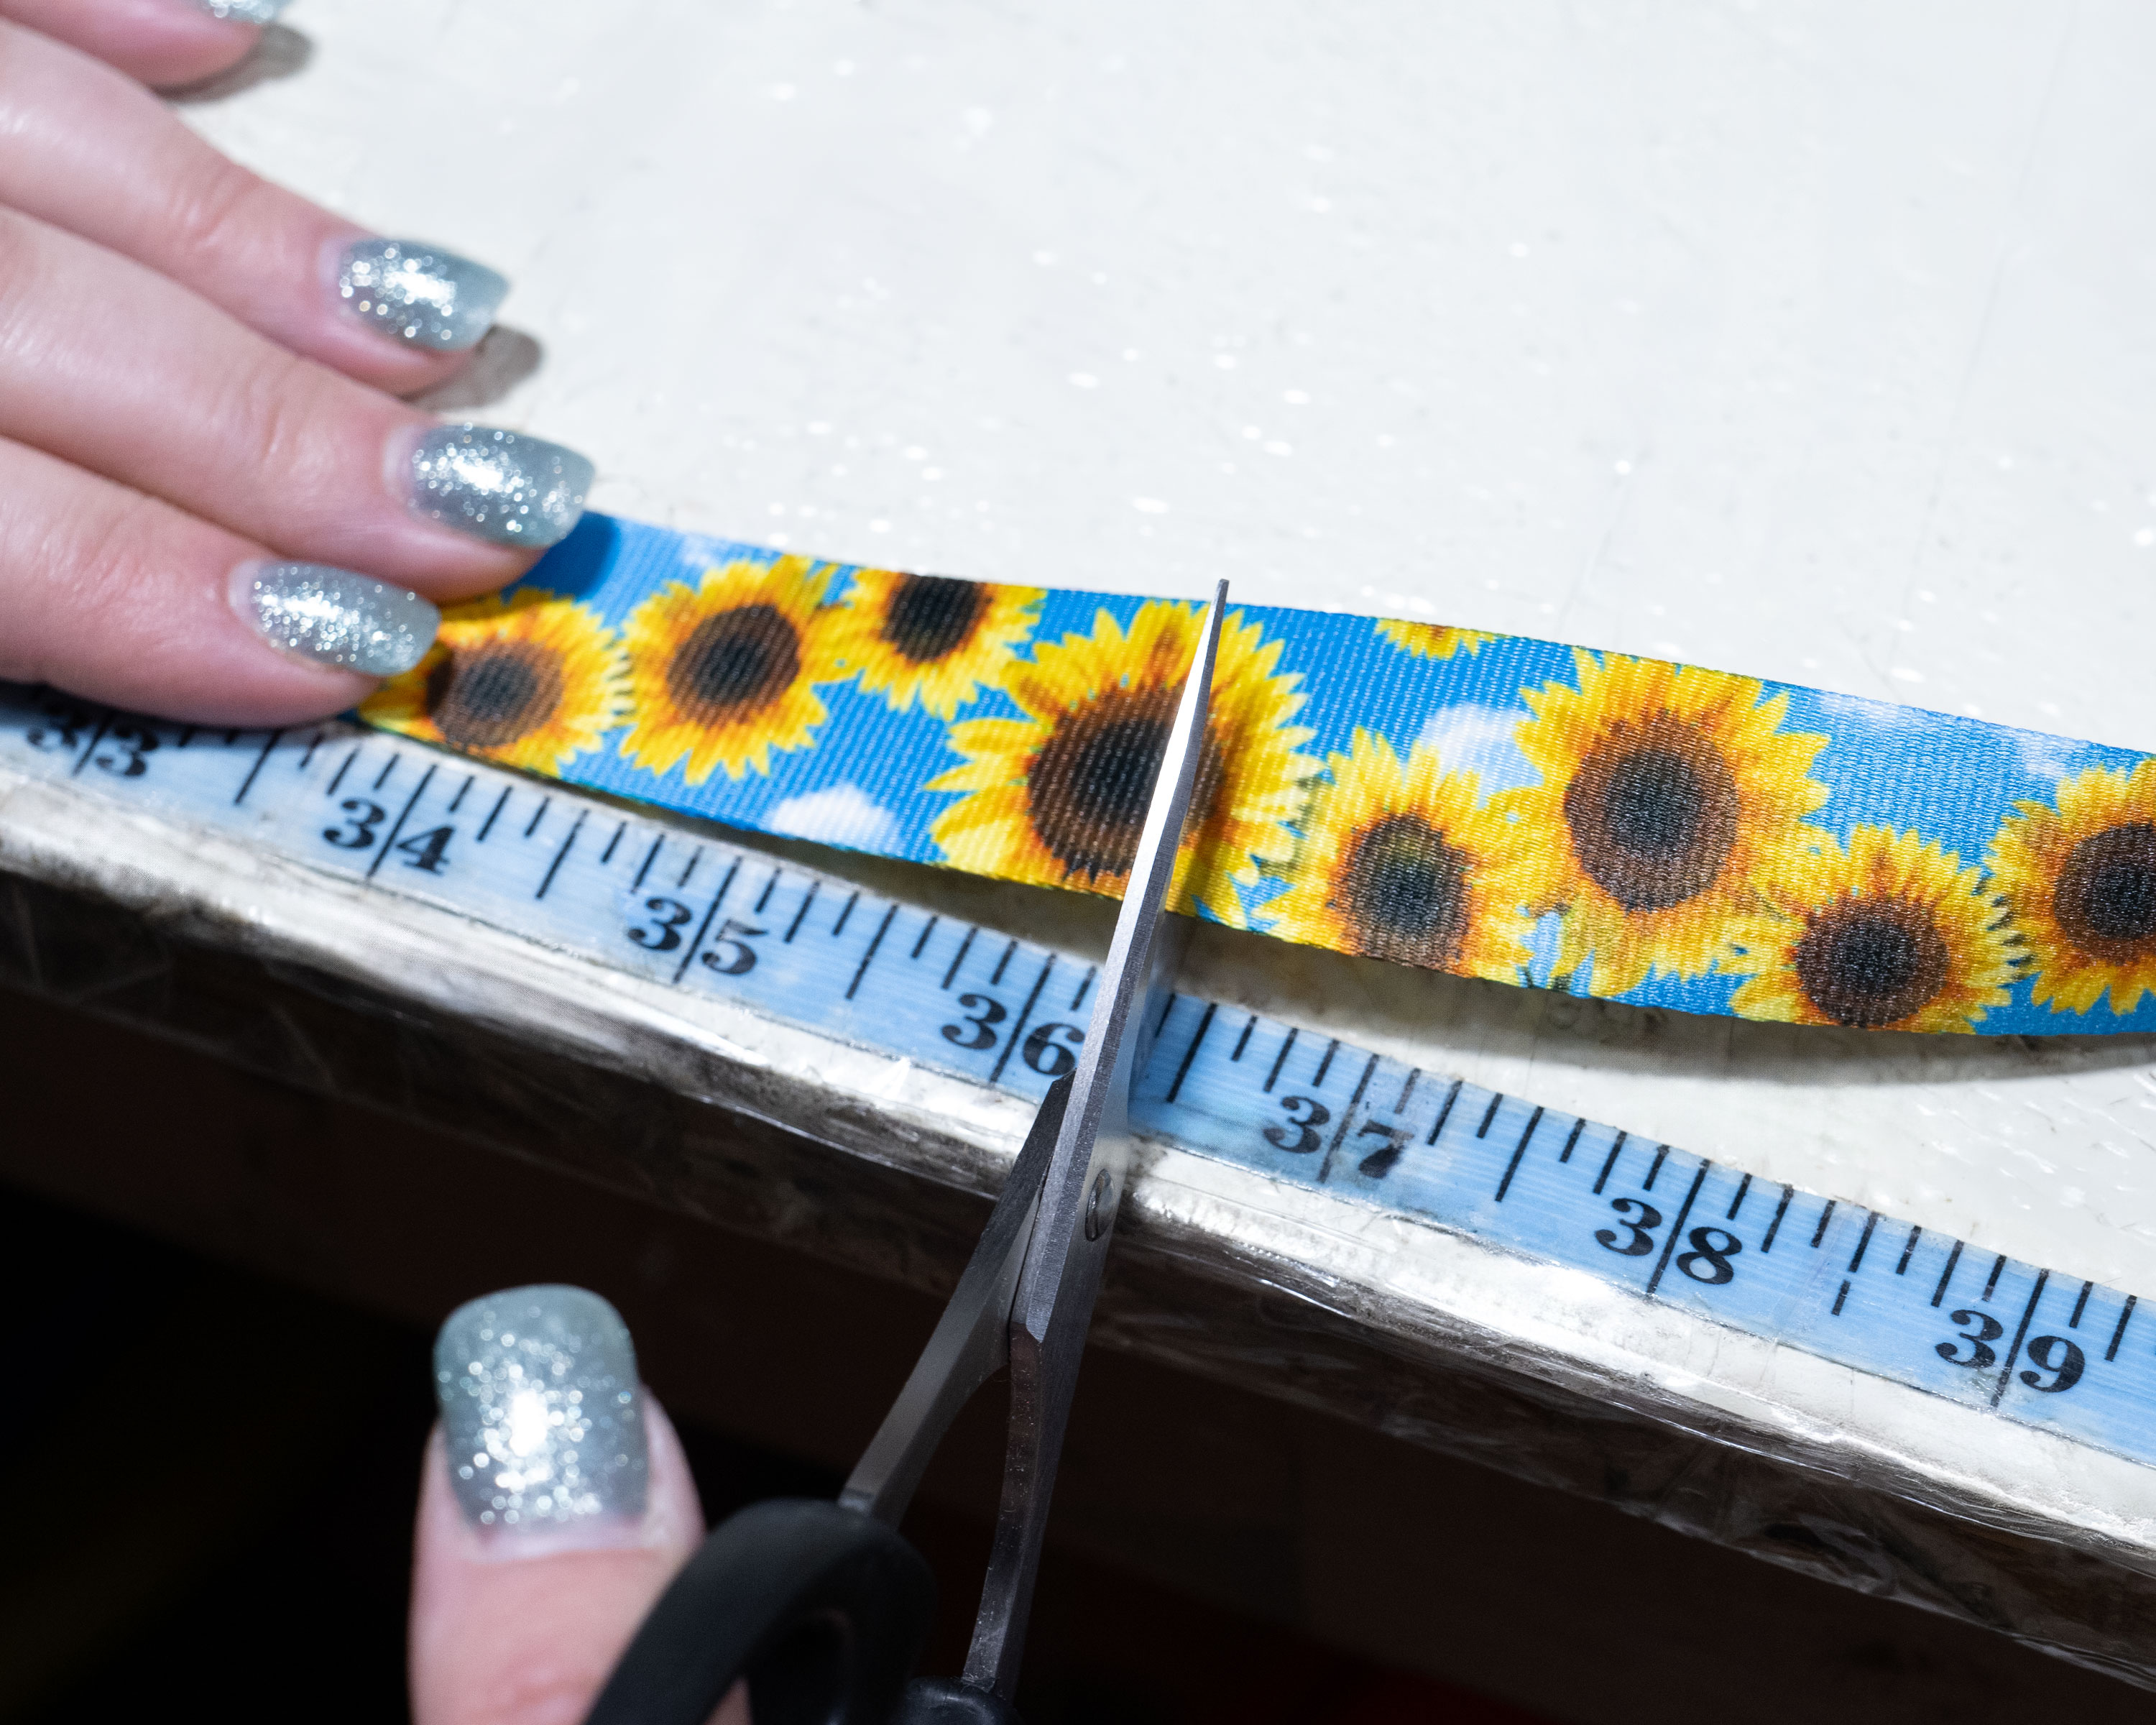
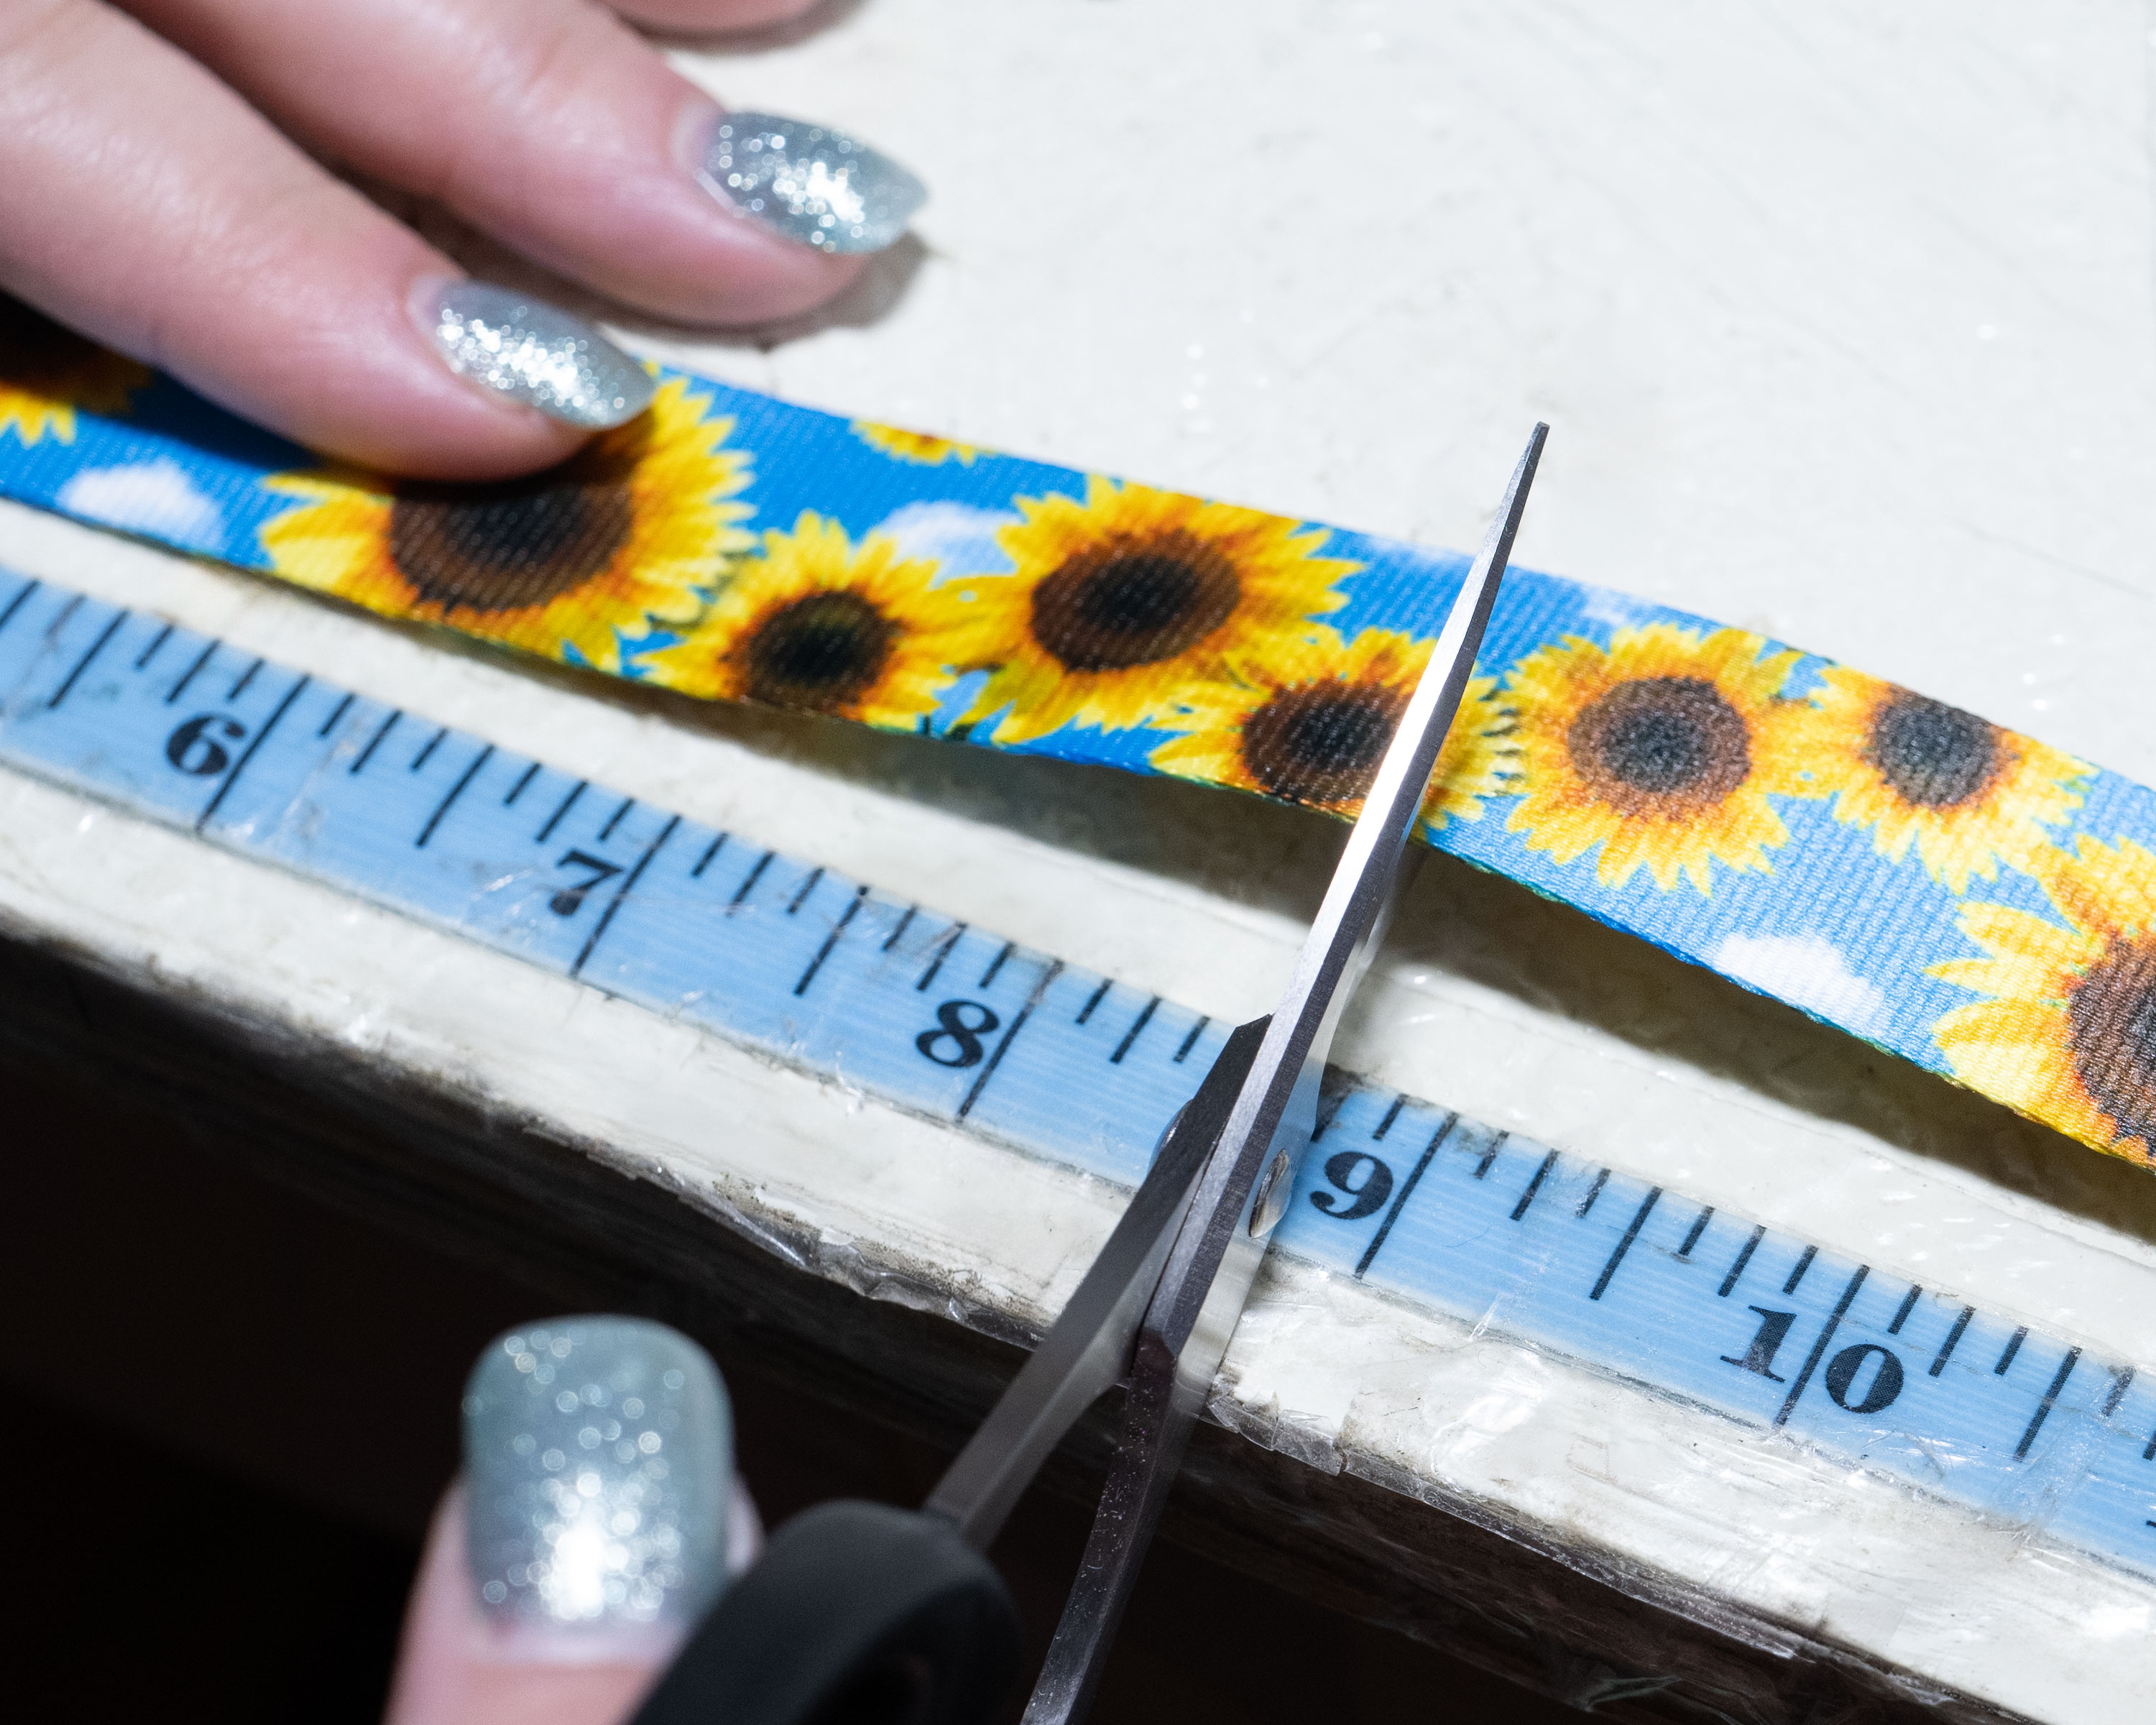
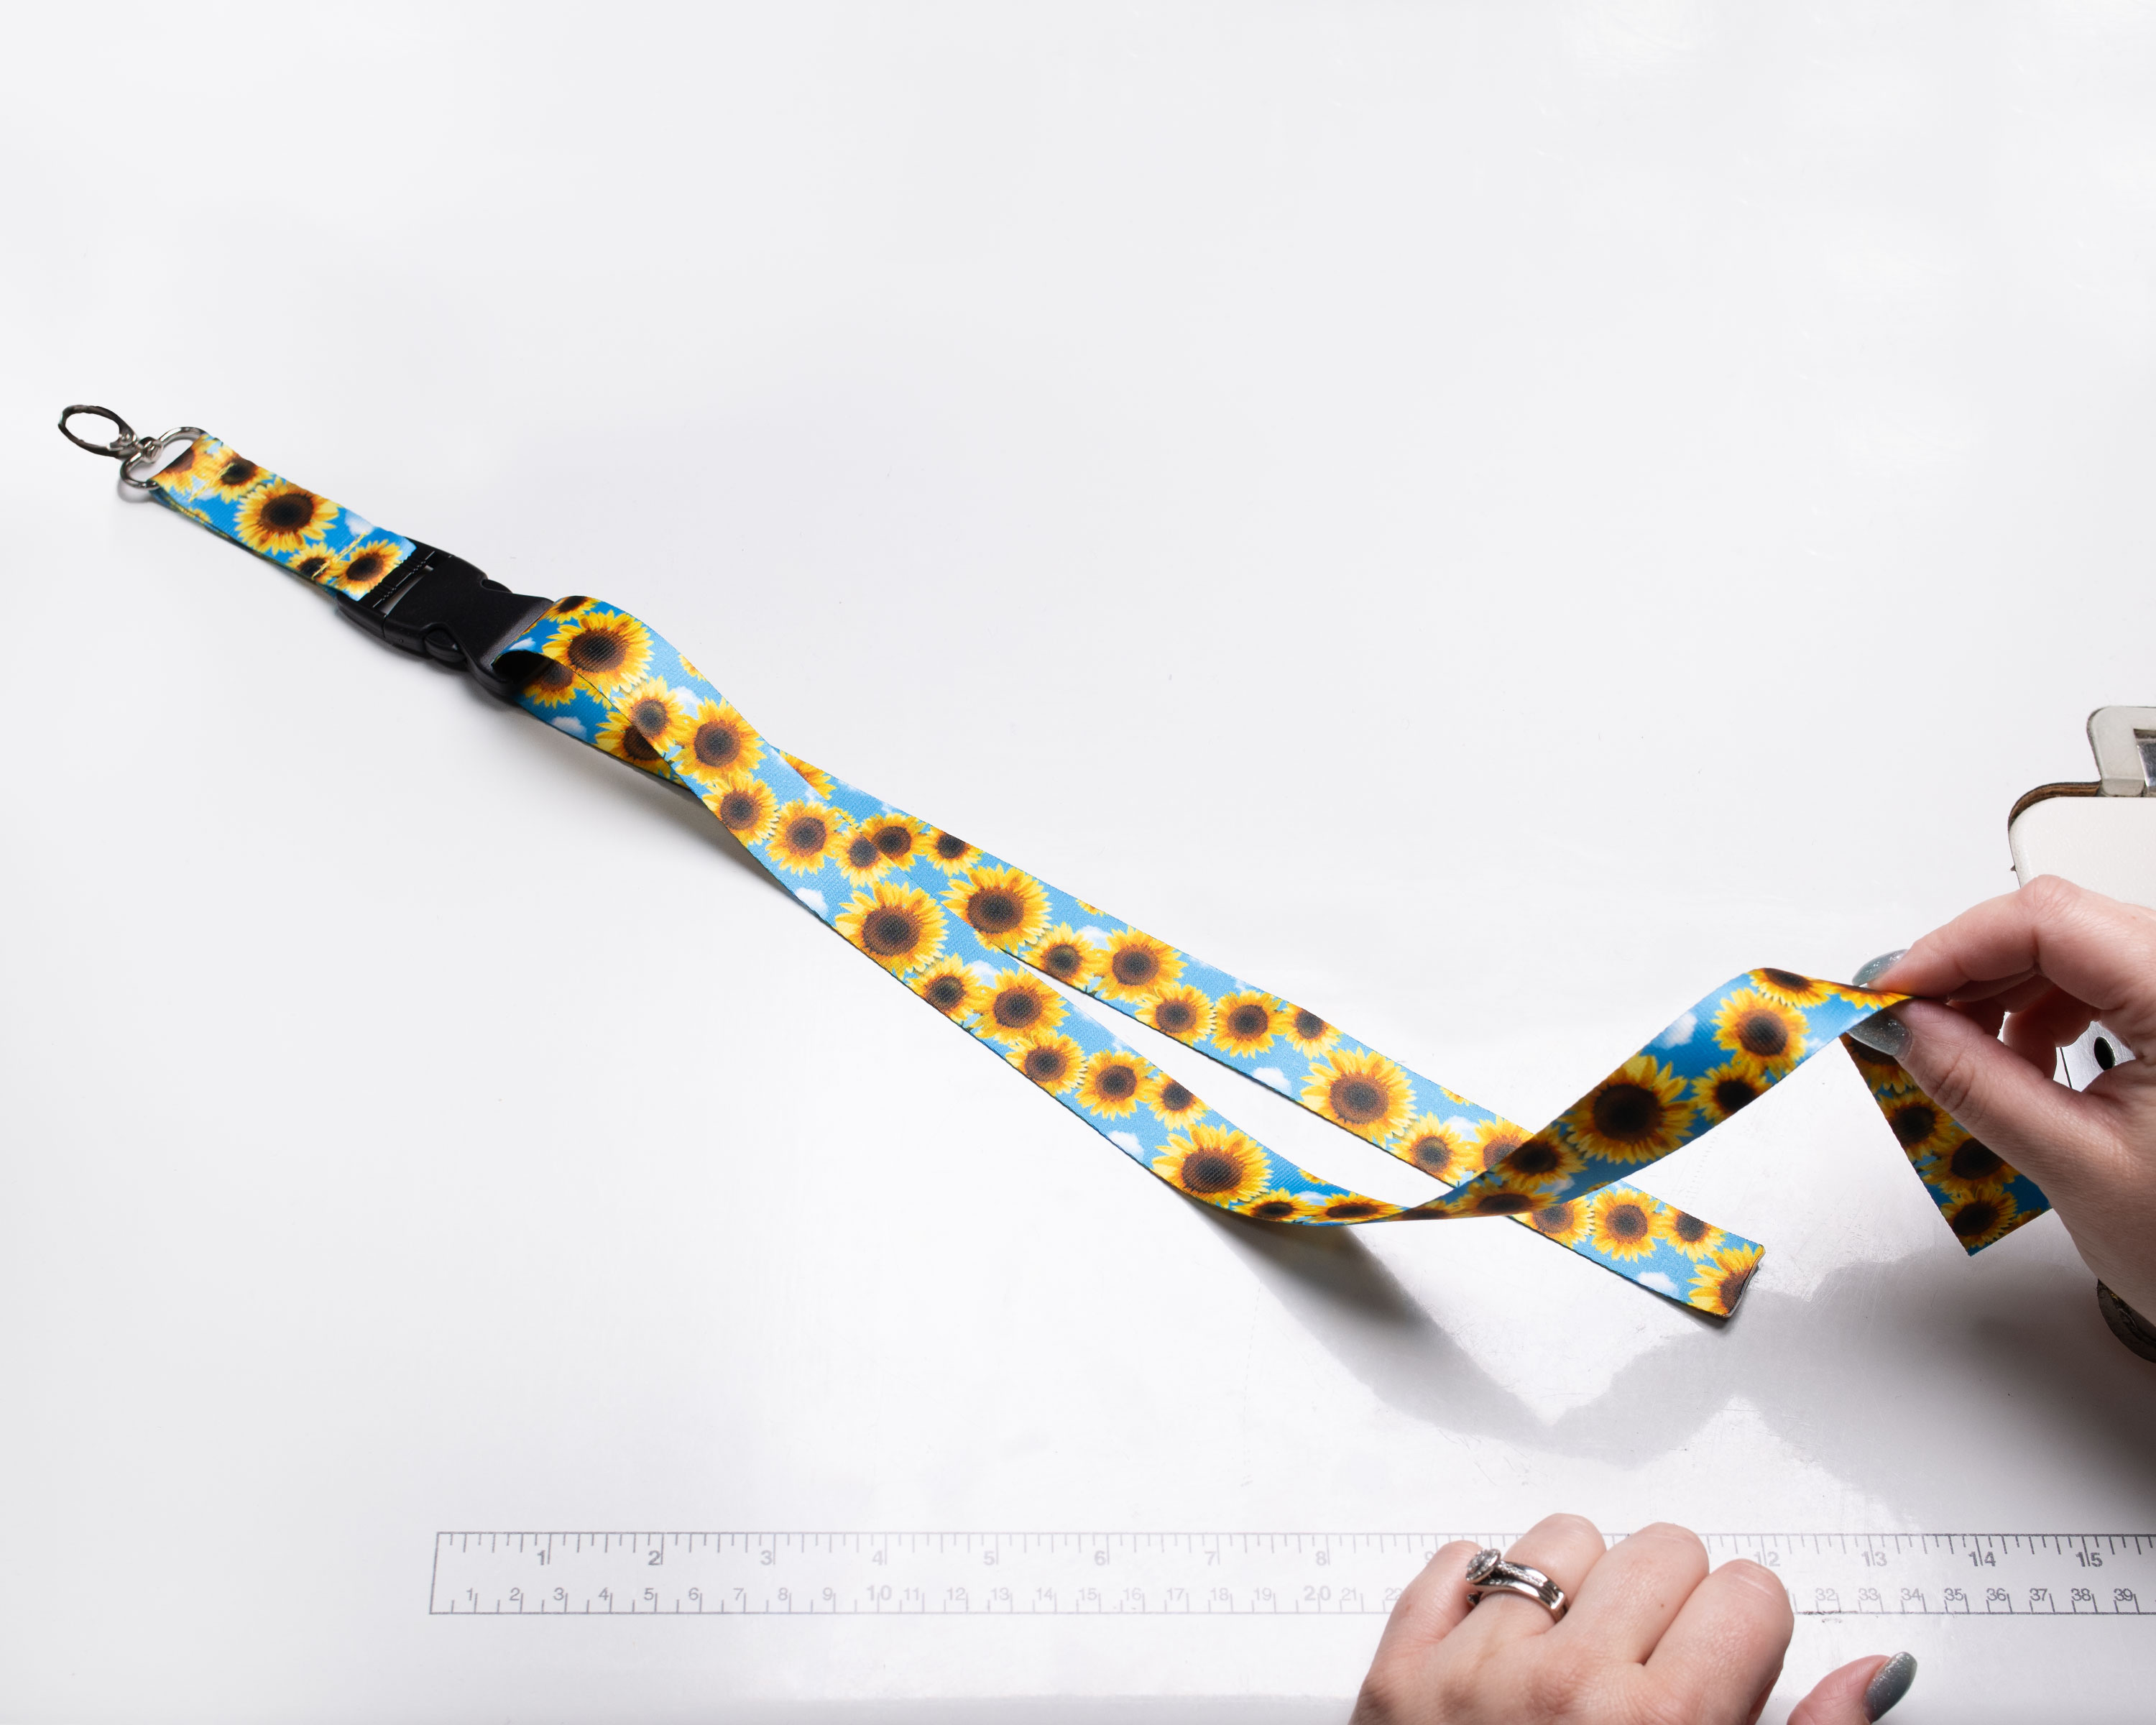
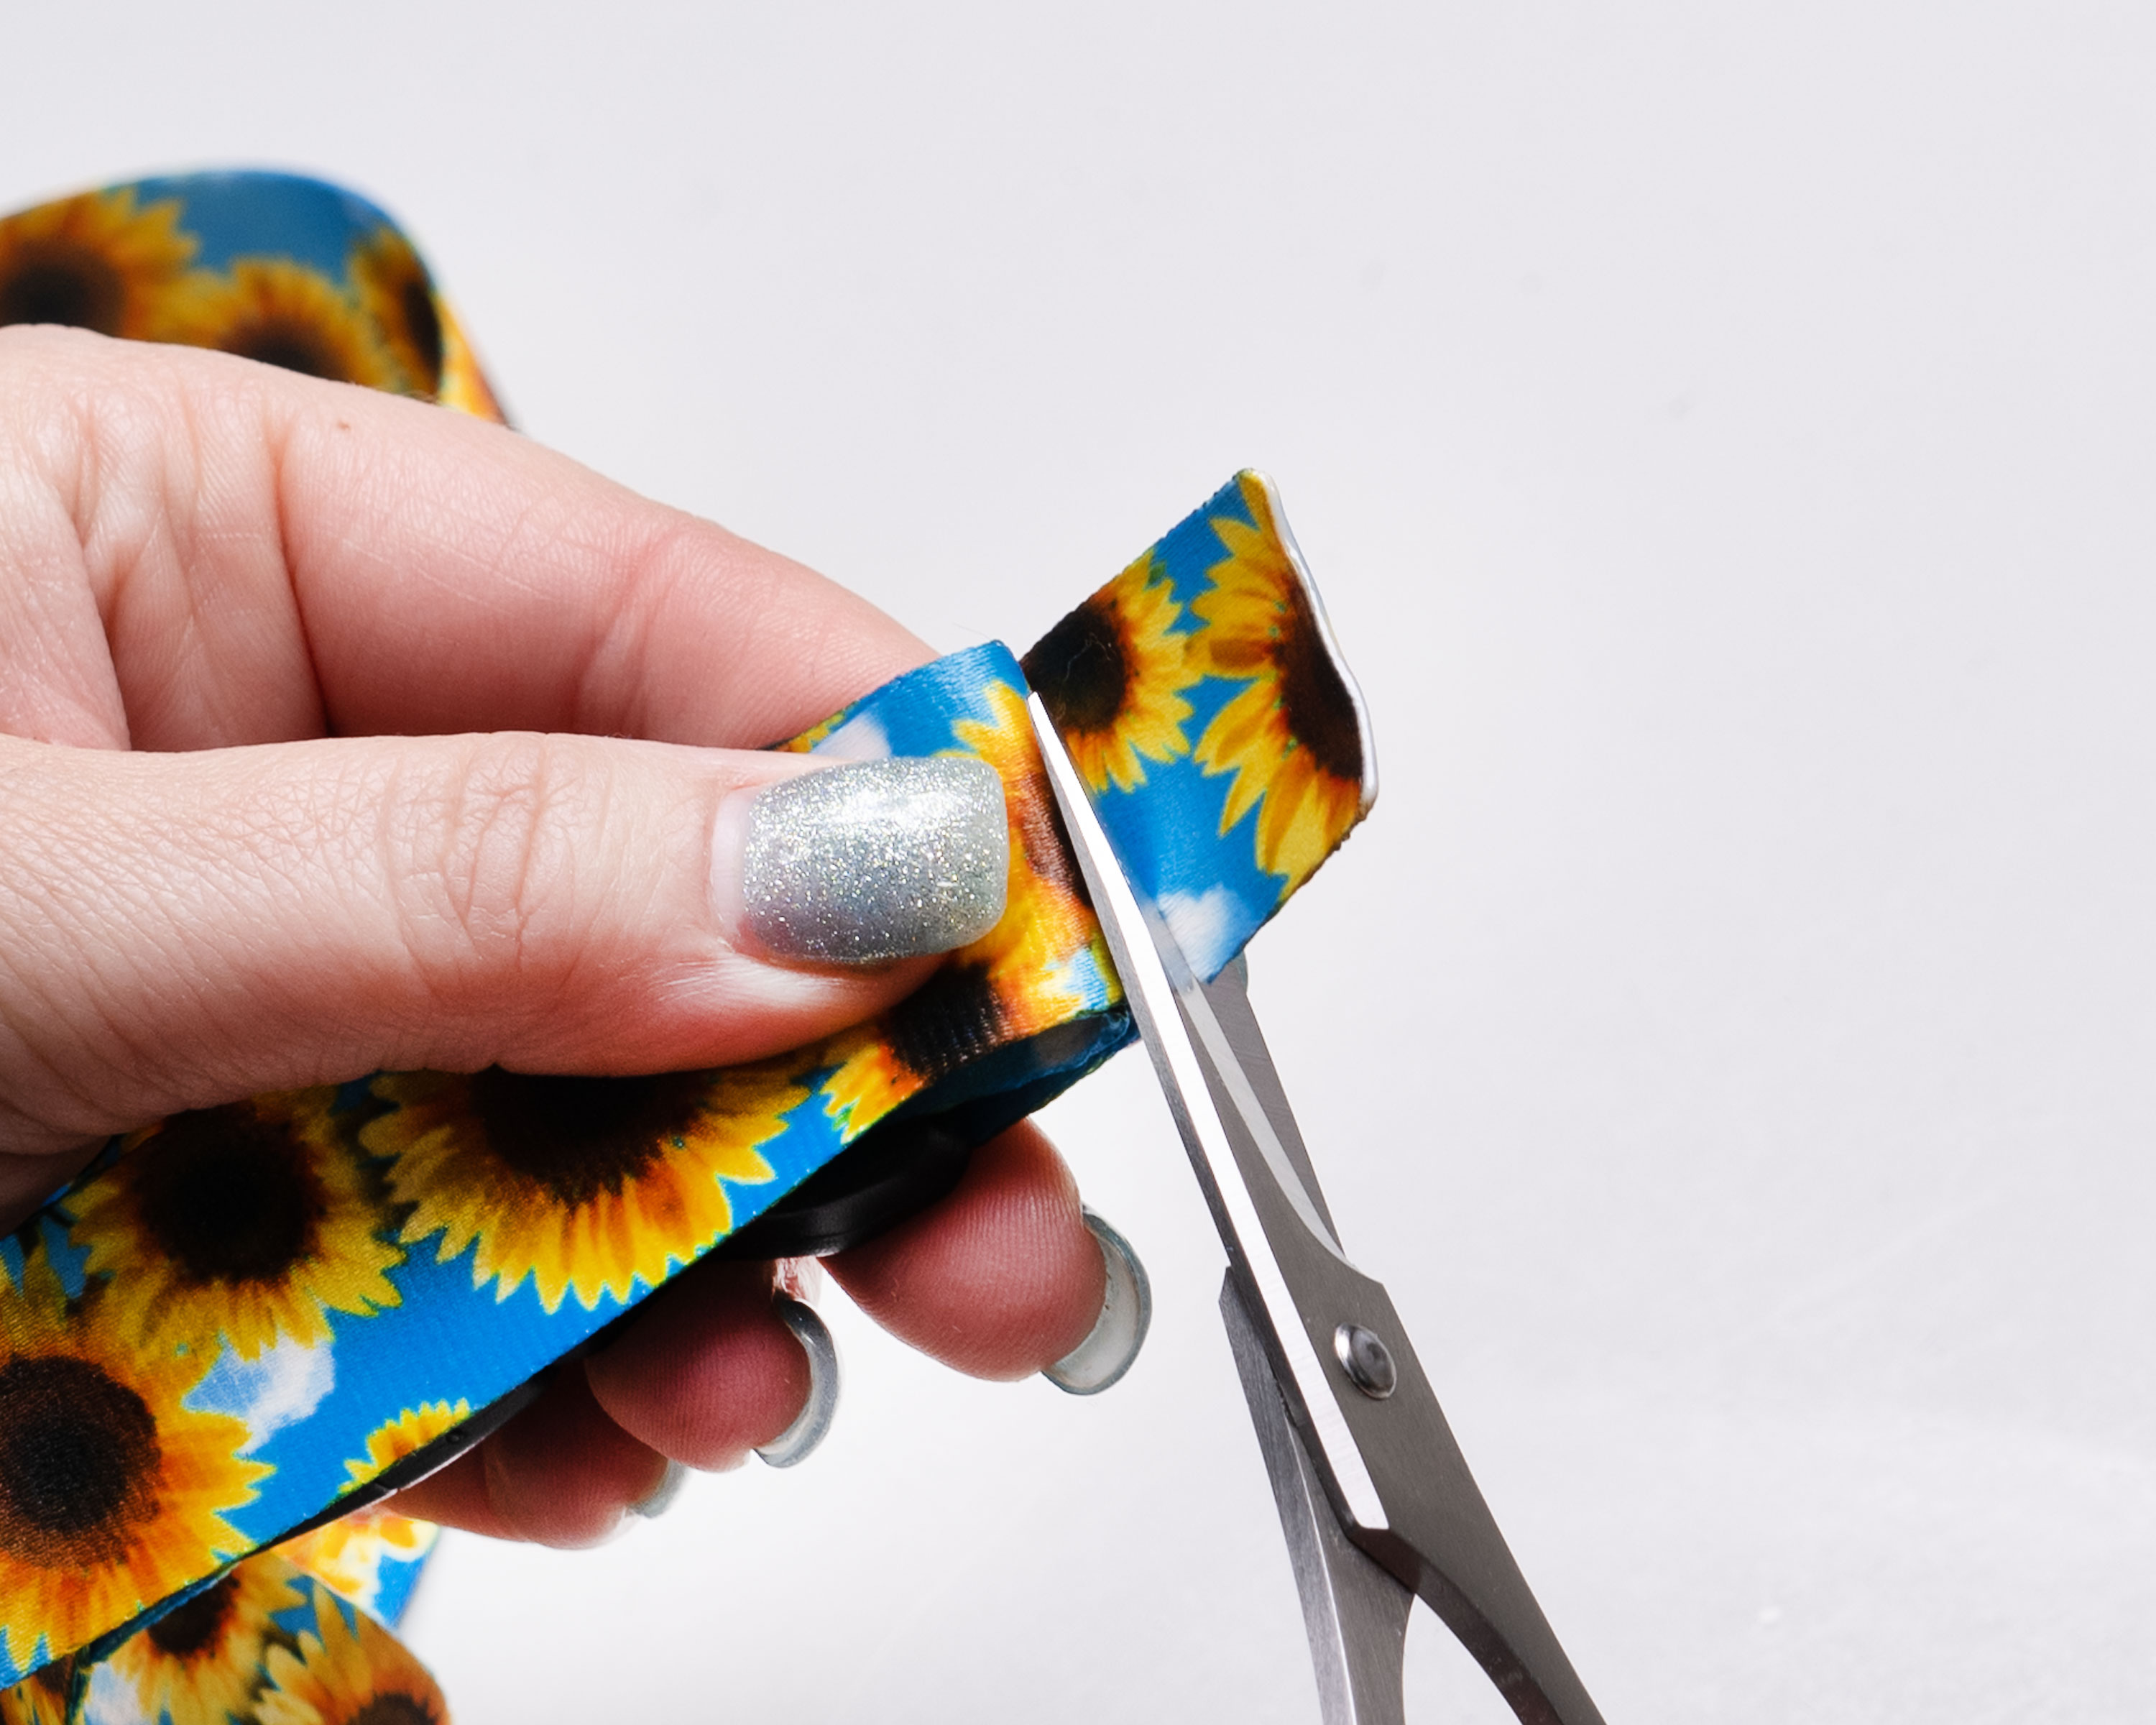
Step 1: Measure And Cut Your Webbing
![]() Take your time when measuring — even small differences in length can affect the final size, alignment, and overall appearance of your lanyard.
Take your time when measuring — even small differences in length can affect the final size, alignment, and overall appearance of your lanyard.
Measure and cut your webbing to the following lengths:
One piece of webbing to 36 inches
Use a measuring tape or ruler to carefully measure the full 36 inches before cutting. Make sure the webbing is laying flat and straight on your work surface to ensure an accurate measurement. This length will create a finished lanyard that measures approximately 16 ½ inches long when completed.
One piece of webbing to 8 ½ inches
Measure and mark 8 ½ inches on the webbing, then cut straight across. This shorter piece will be used to attach the buckle and snap hook assembly, so precision here helps everything line up properly in later steps
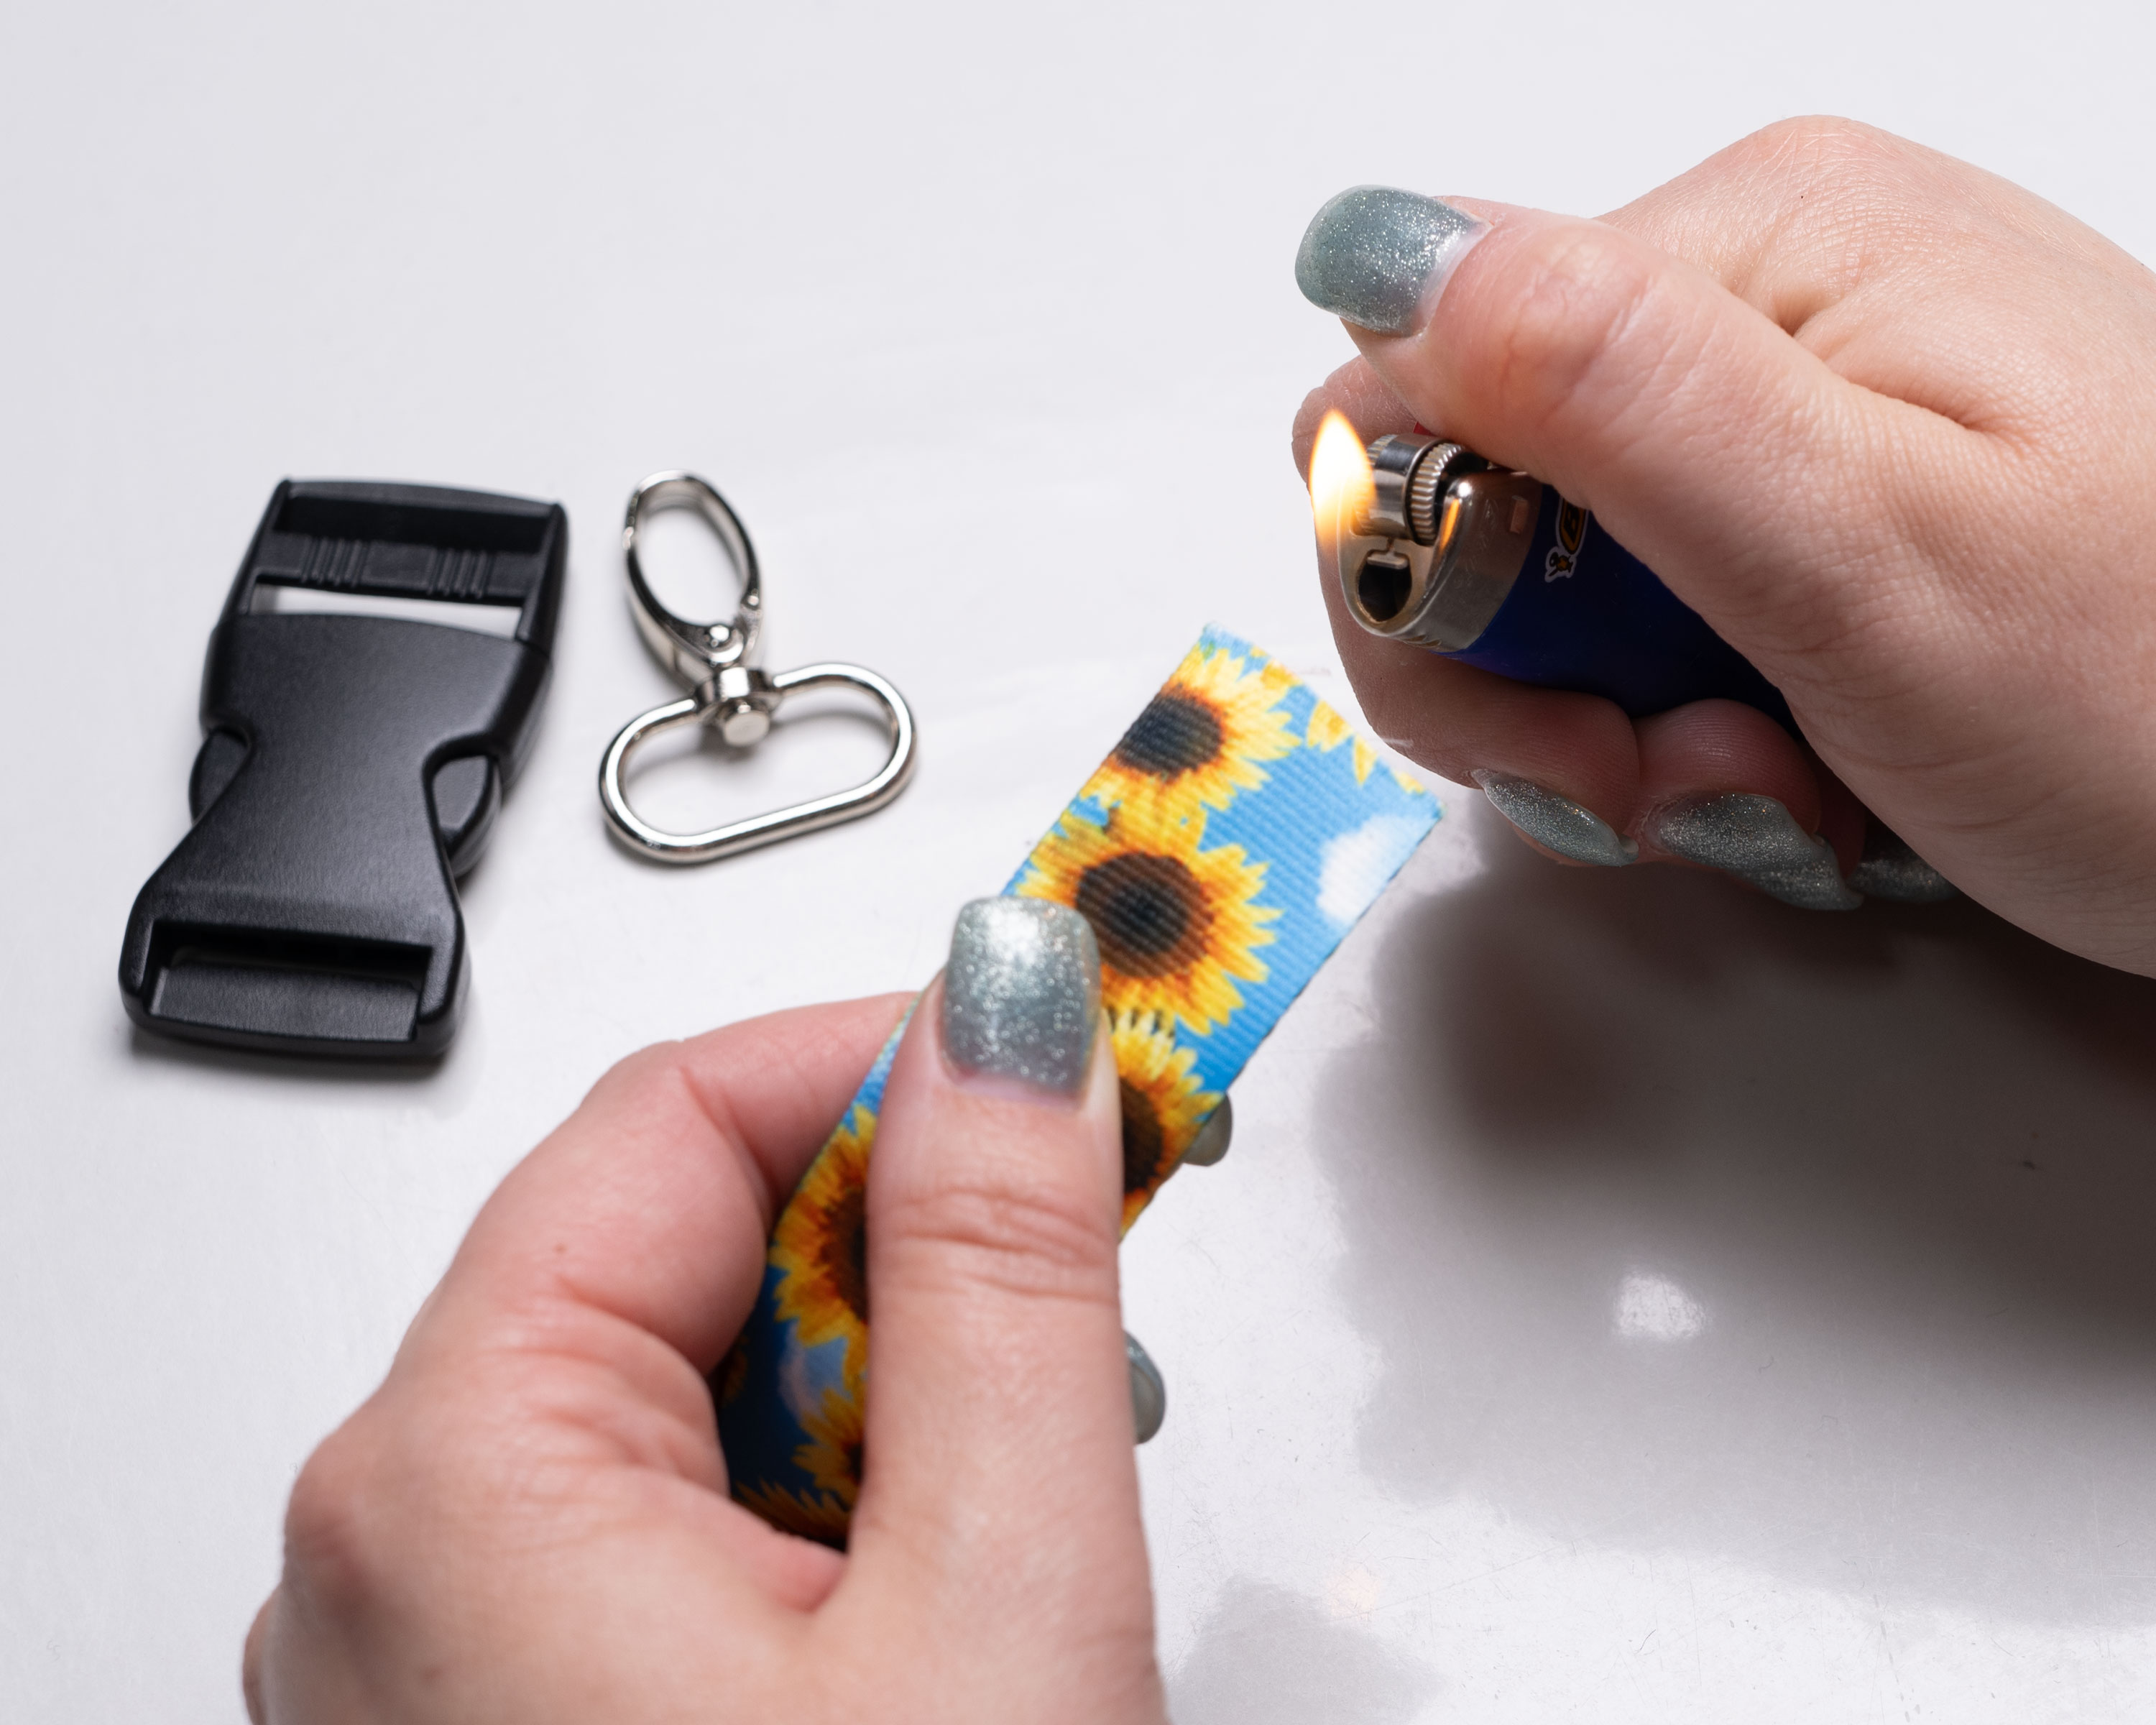
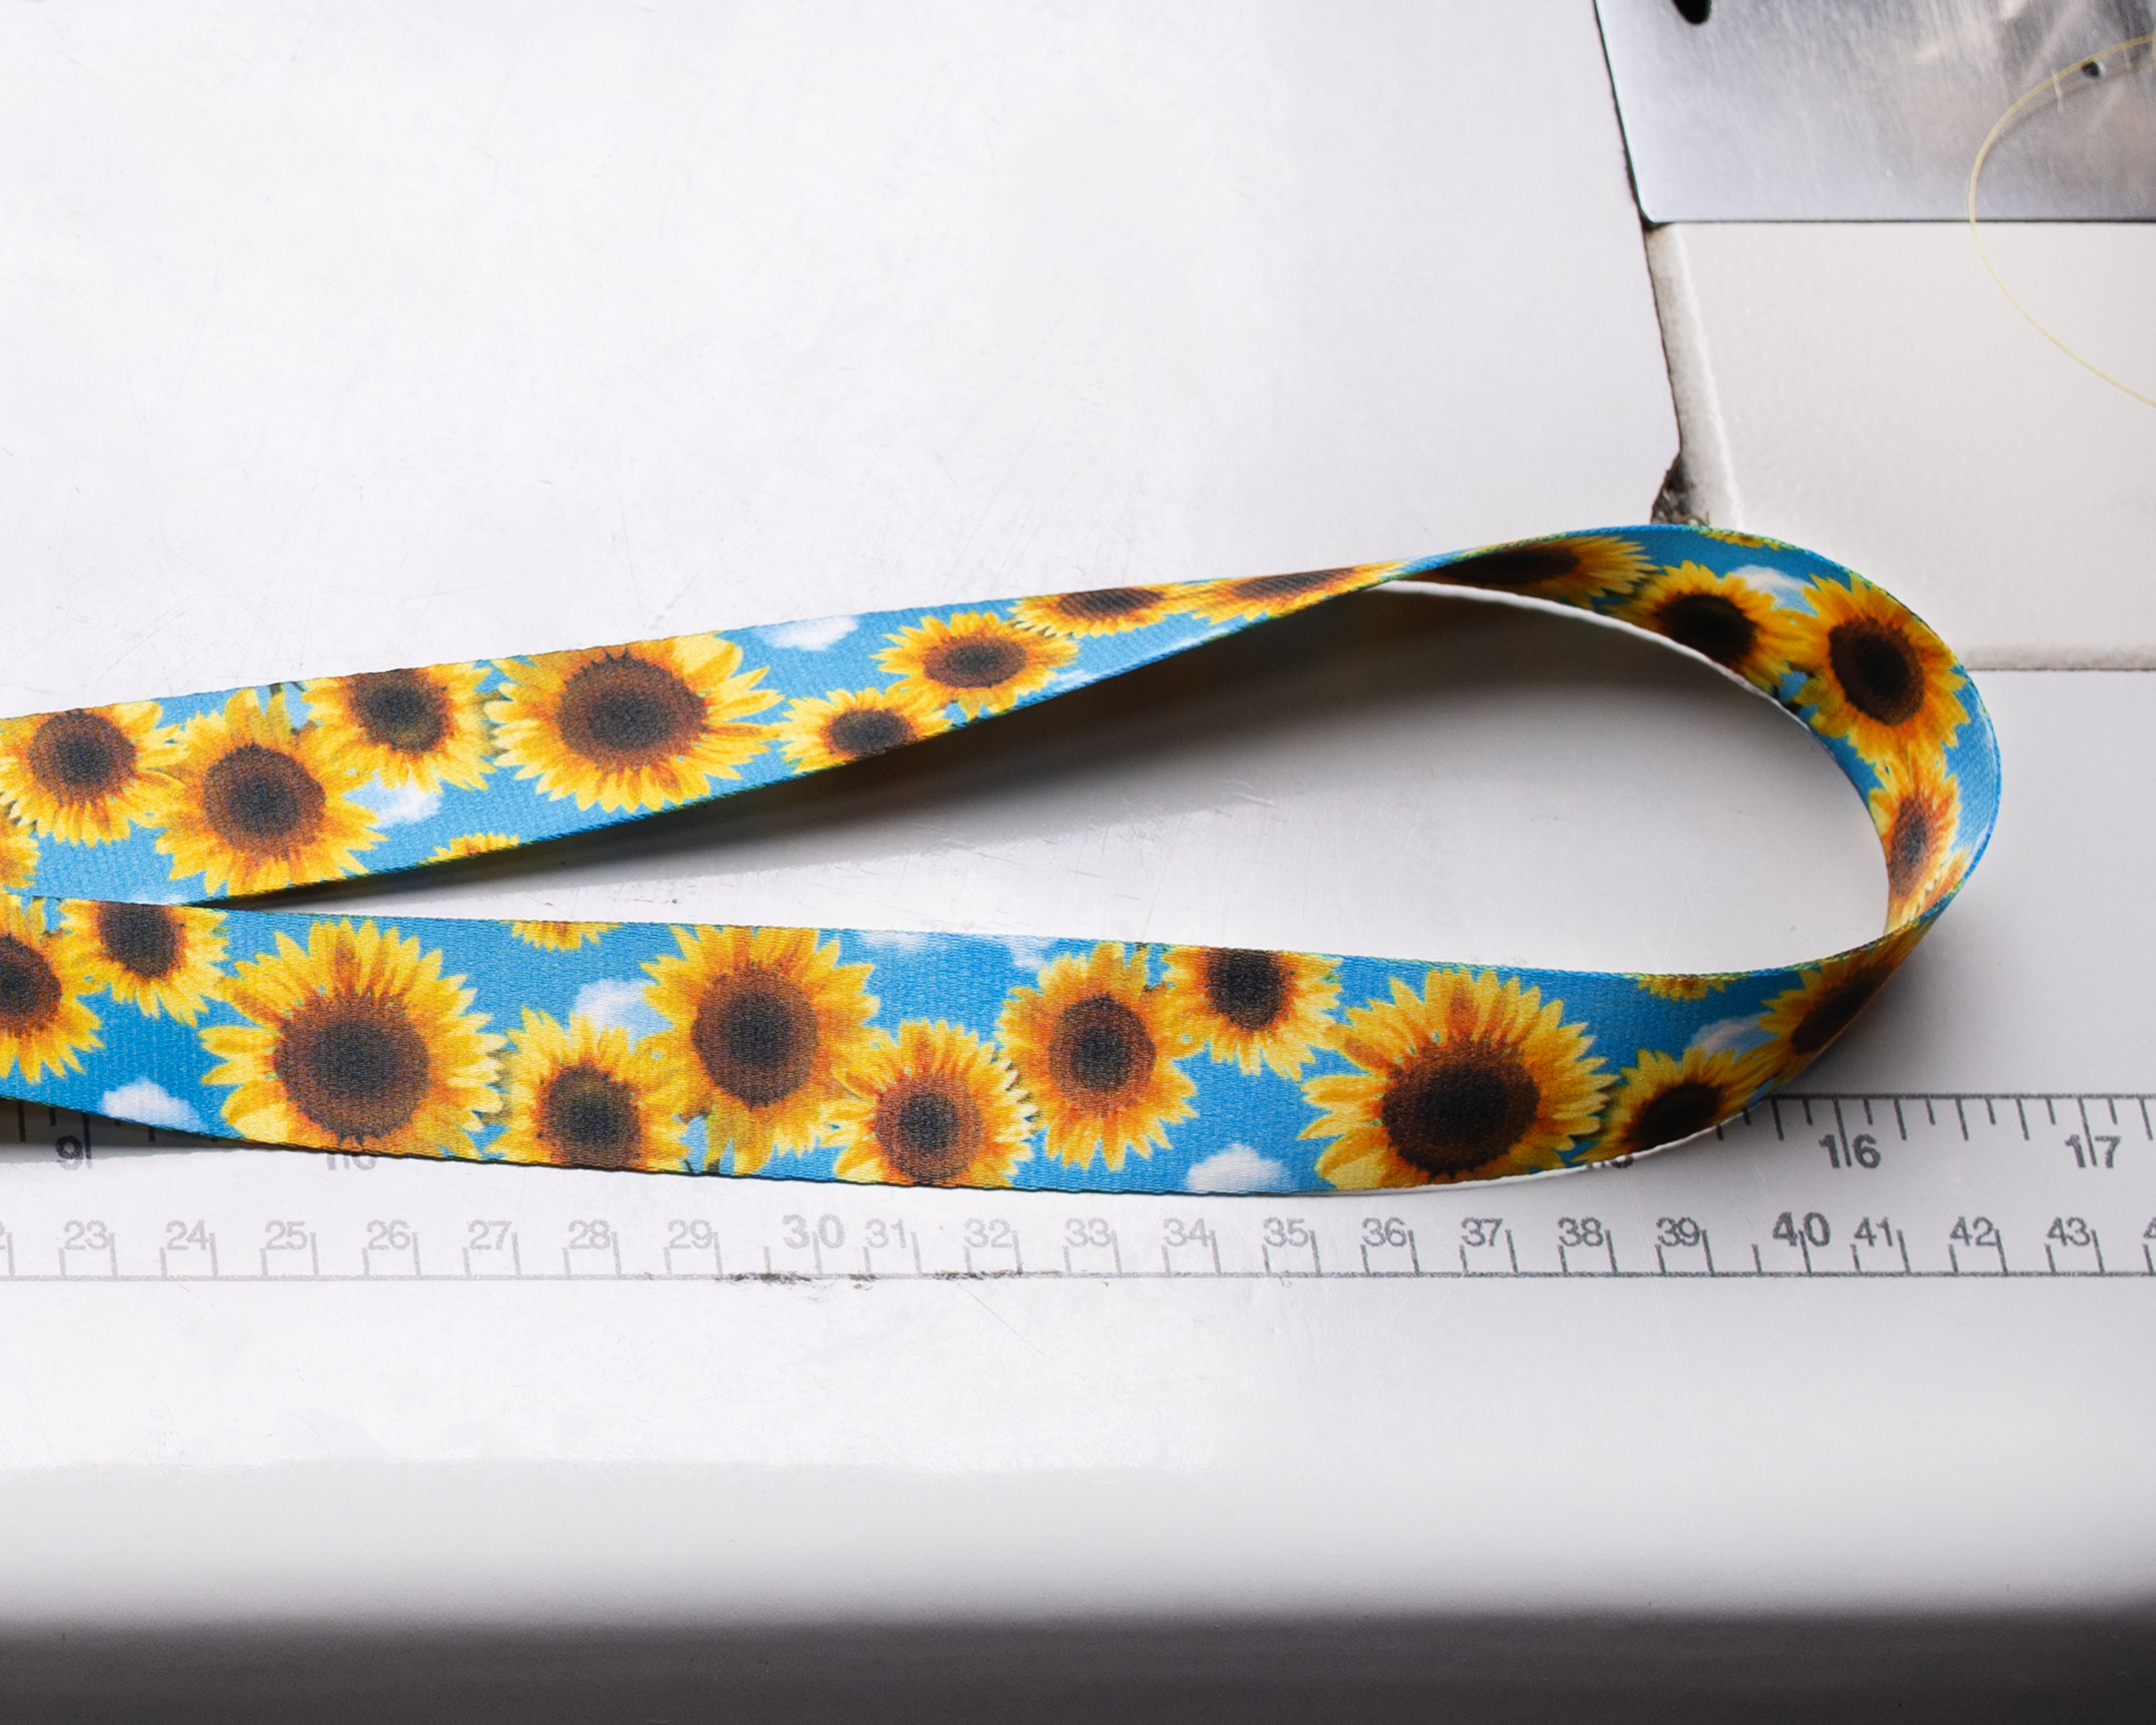
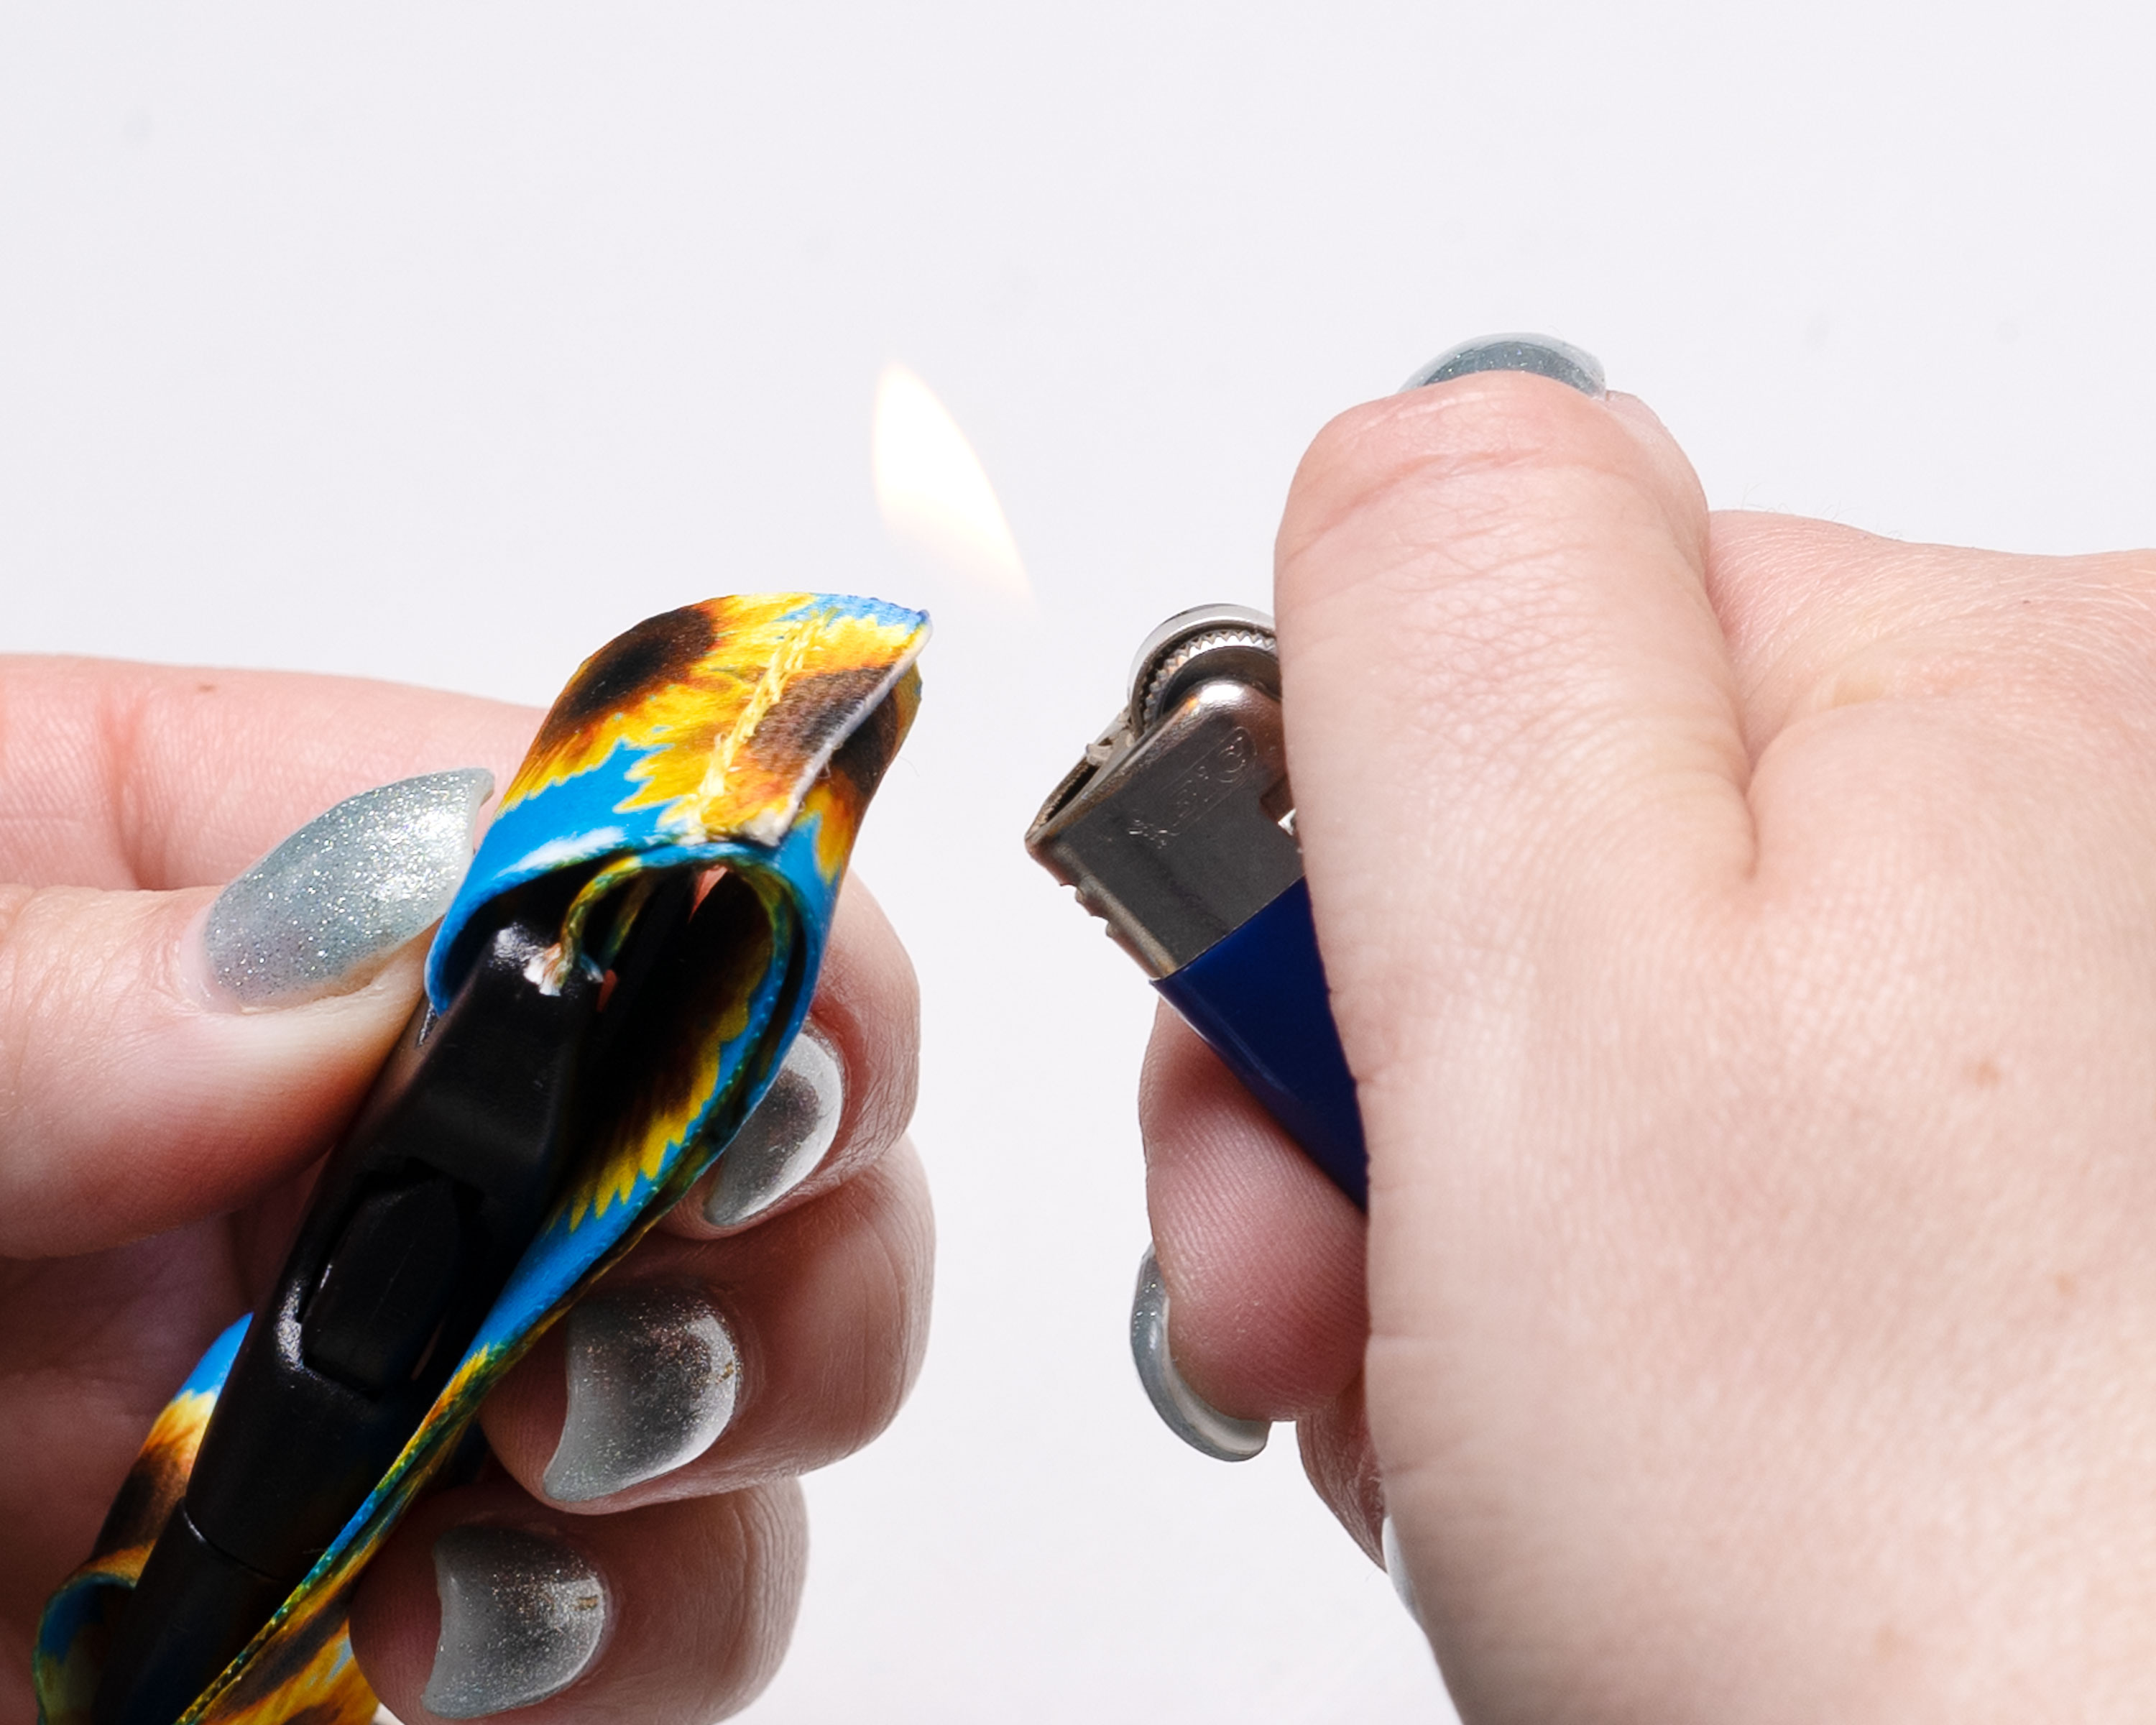
Step 2: Seal The Edges
Using a lighter, carefully apply heat to each cut end of the webbing until the fibers melt slightly. This prevents fraying.
⚠️ Be careful not to overheat or burn the webbing.
For more detailed instructions, see our article: How To Cut Webbing.
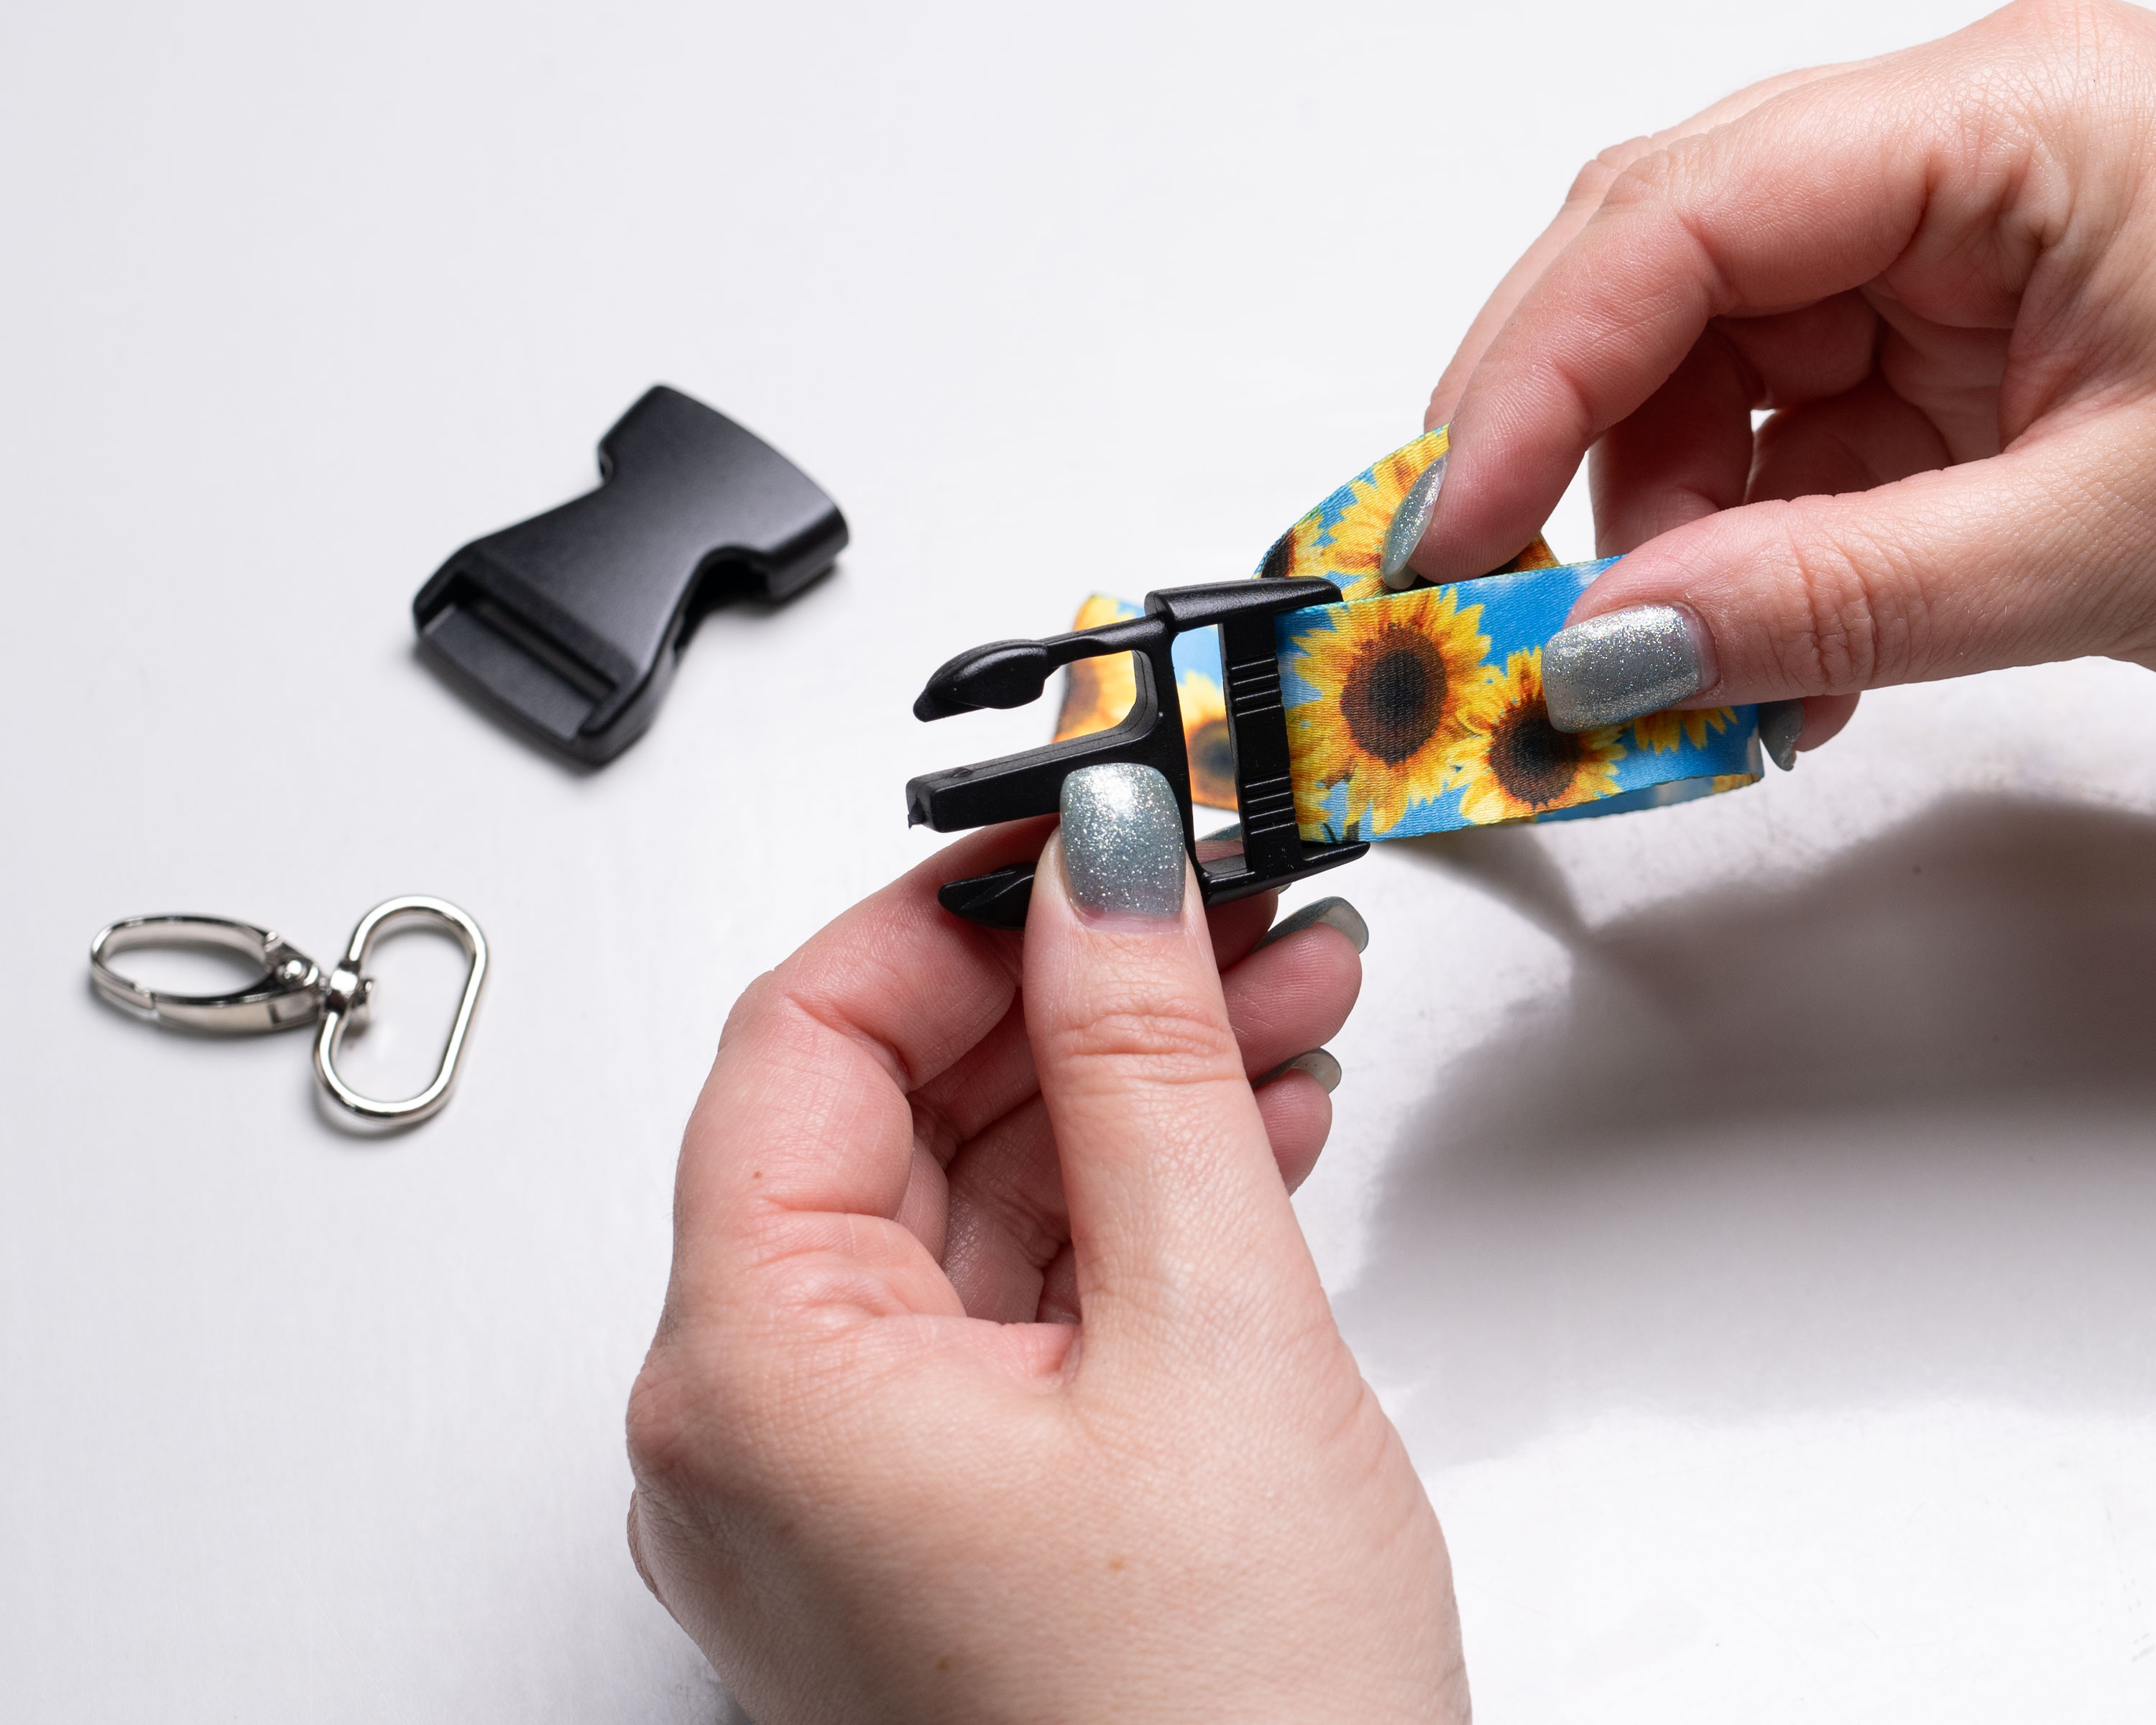
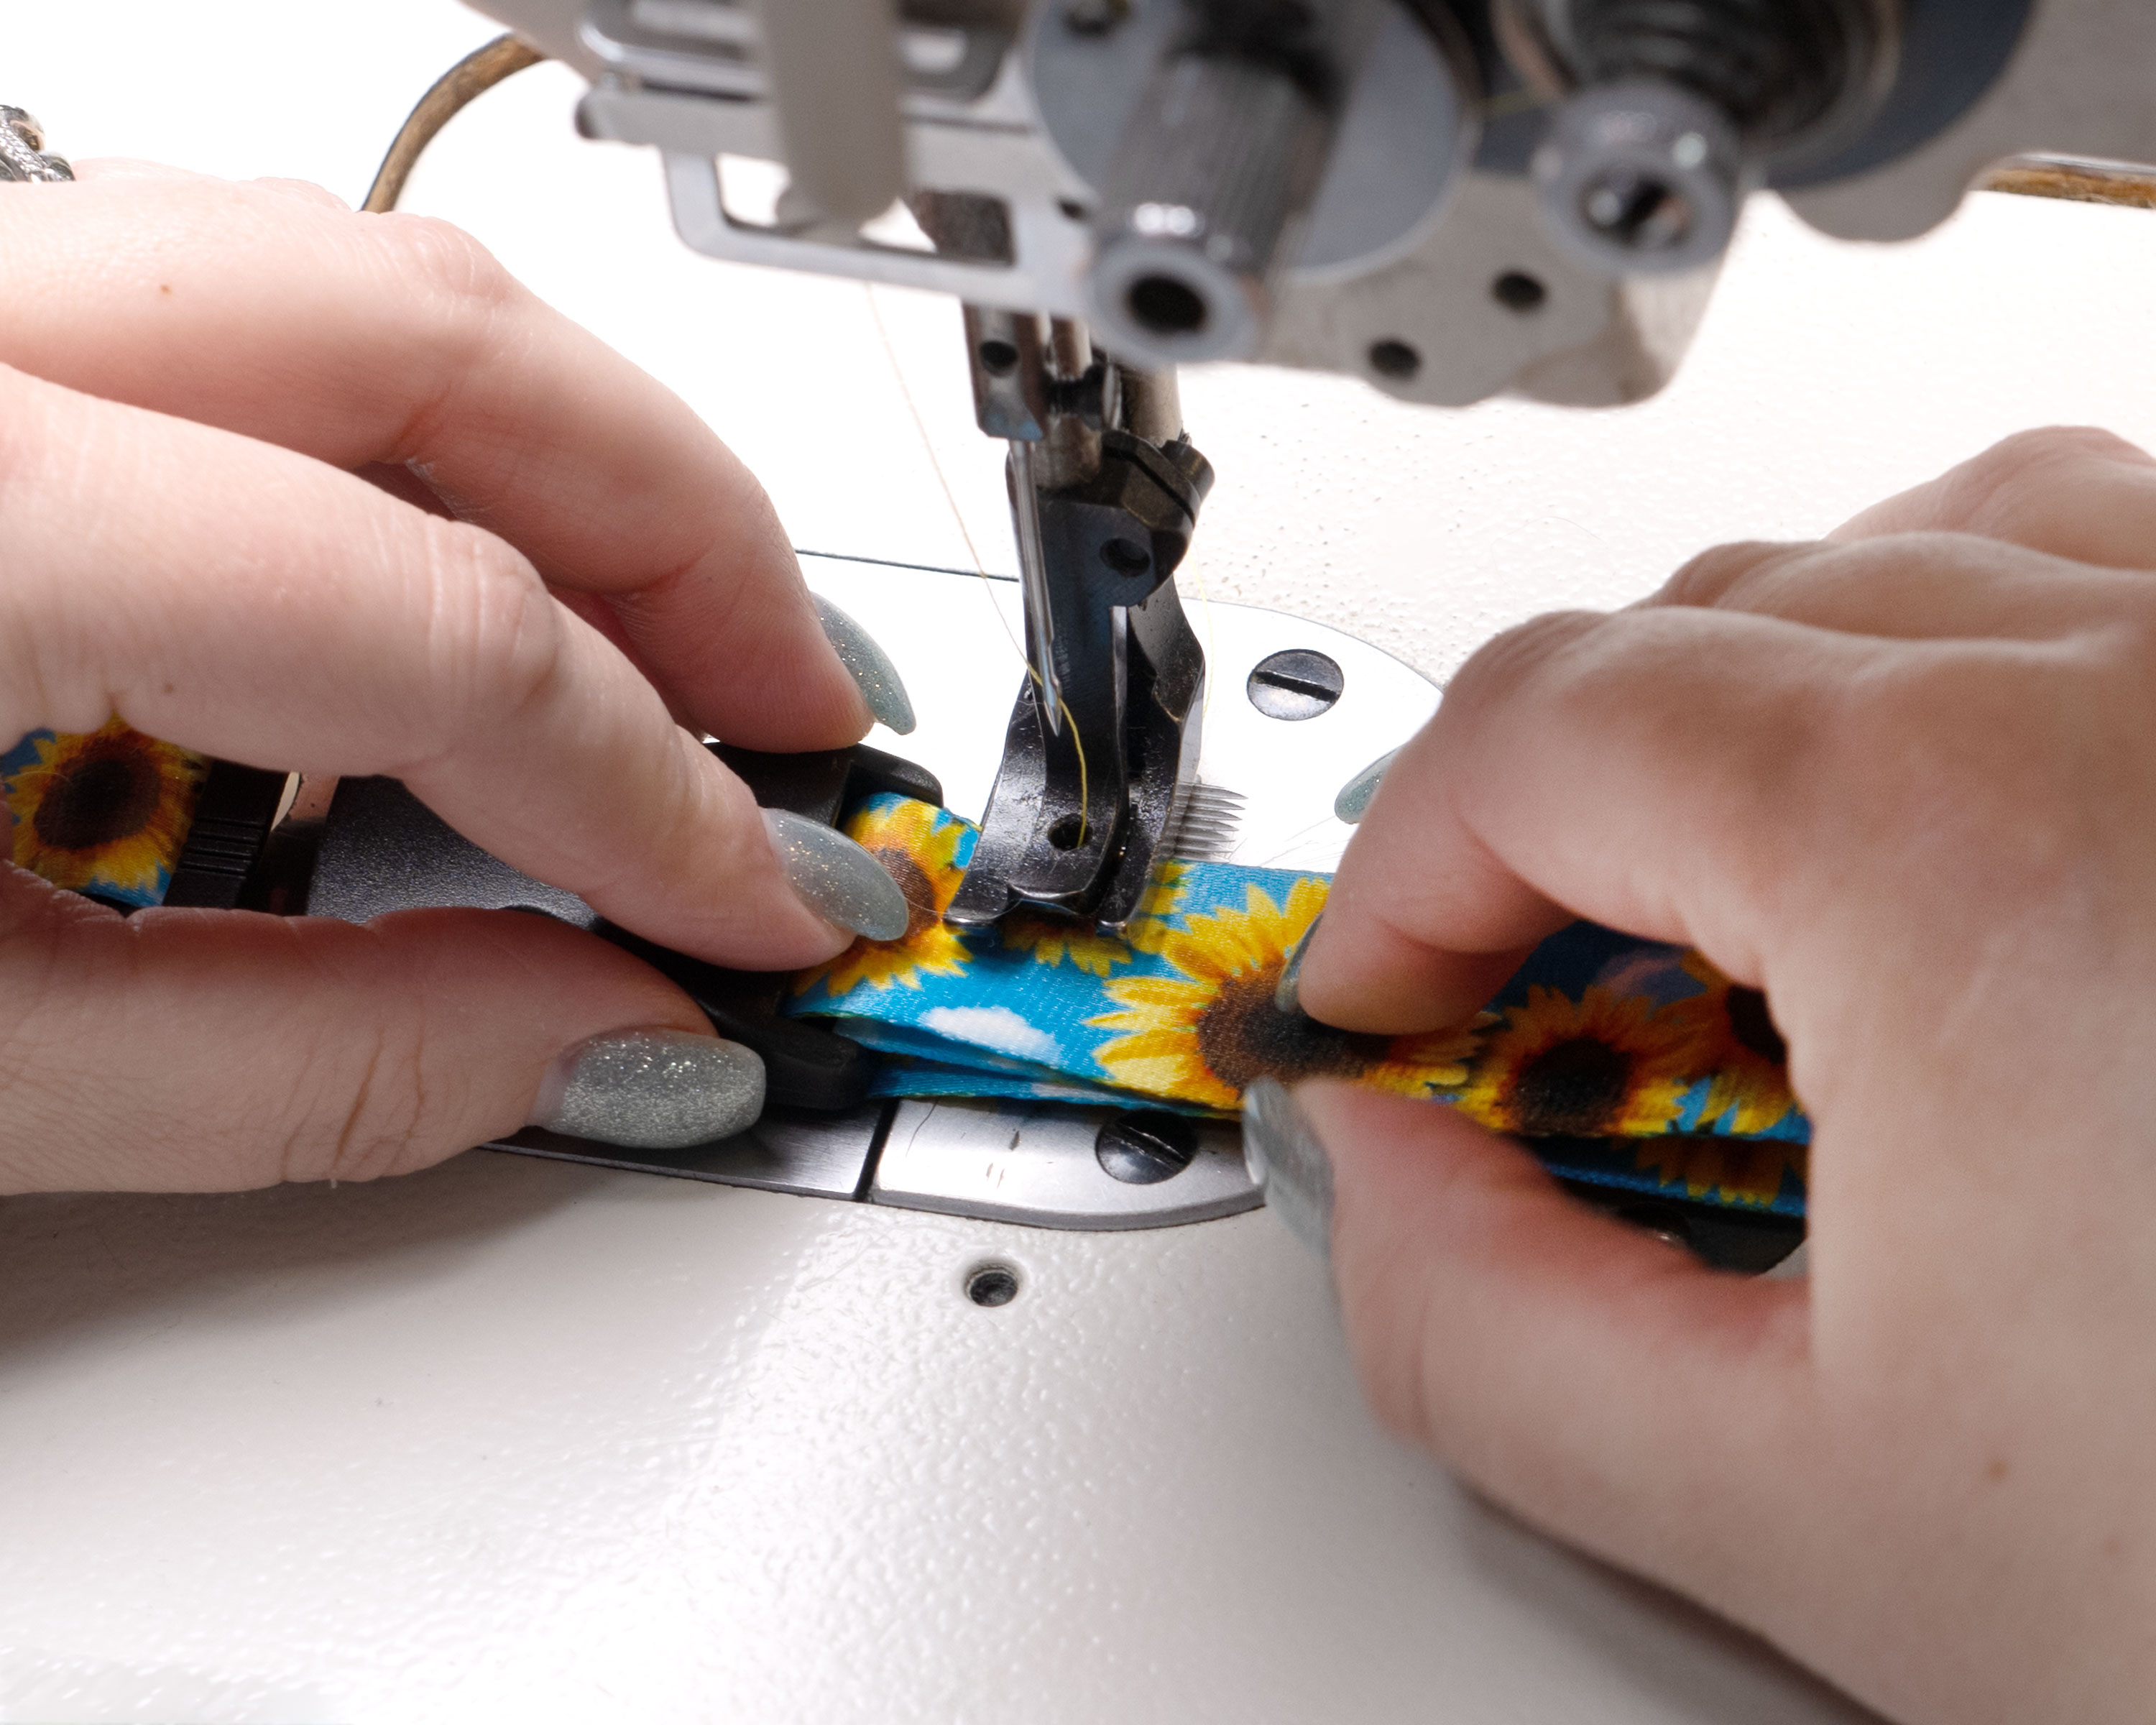
Step 3: Attach The Buckle (Small Webbing Piece)
Take the 8 ½ inch piece of webbing and begin attaching it to the male side of the side-release buckle.
1. Insert one end into the outer slot of the male side of the buckle.
Slide the webbing through the outer slot, making sure the webbing is lying flat and not twisted. If your webbing has a patterned or finished side, double-check that it is facing the correct direction before moving on.
2. Fold the webbing back onto itself.
Bring the loose end back toward the main length of webbing to create a loop around the buckle. Pull it snug so the buckle sits firmly at the end without excess slack.
3. Measure 3 inches from the fold.
Using a ruler or measuring tape, measure from the folded edge down the length of the webbing. This measurement ensures there is enough material to securely hold the buckle in place while maintaining a clean, professional look.
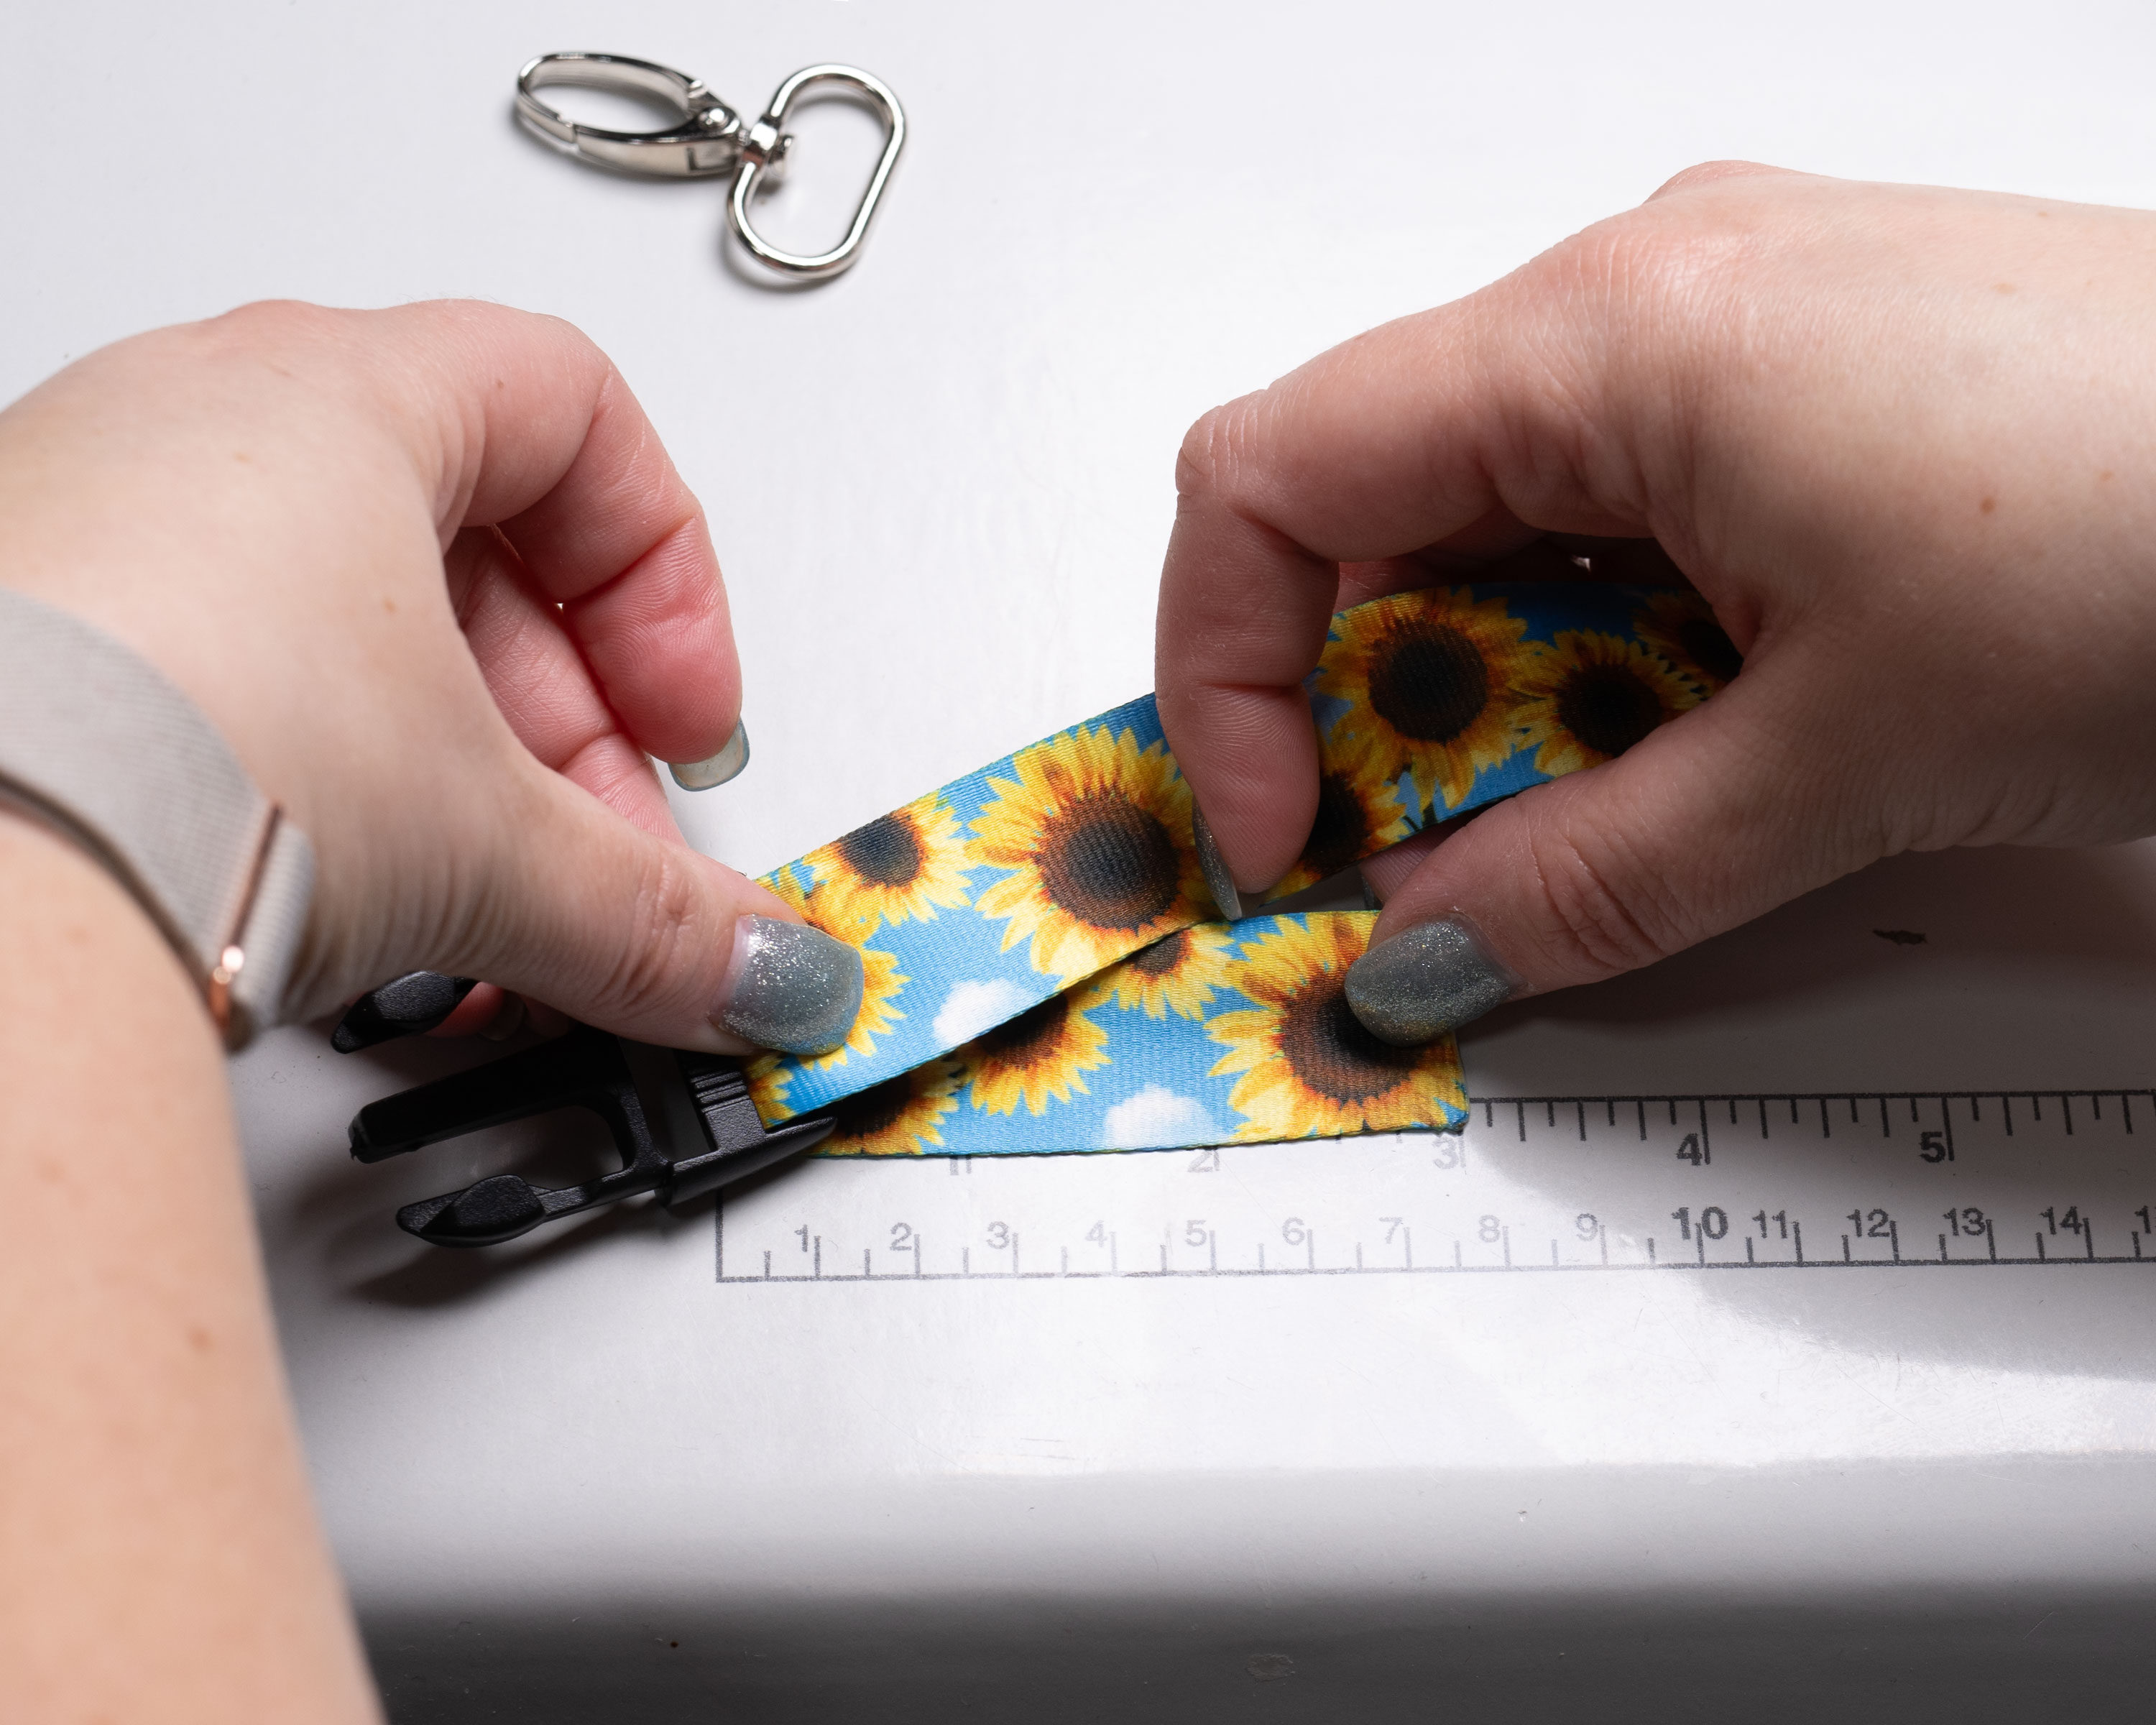
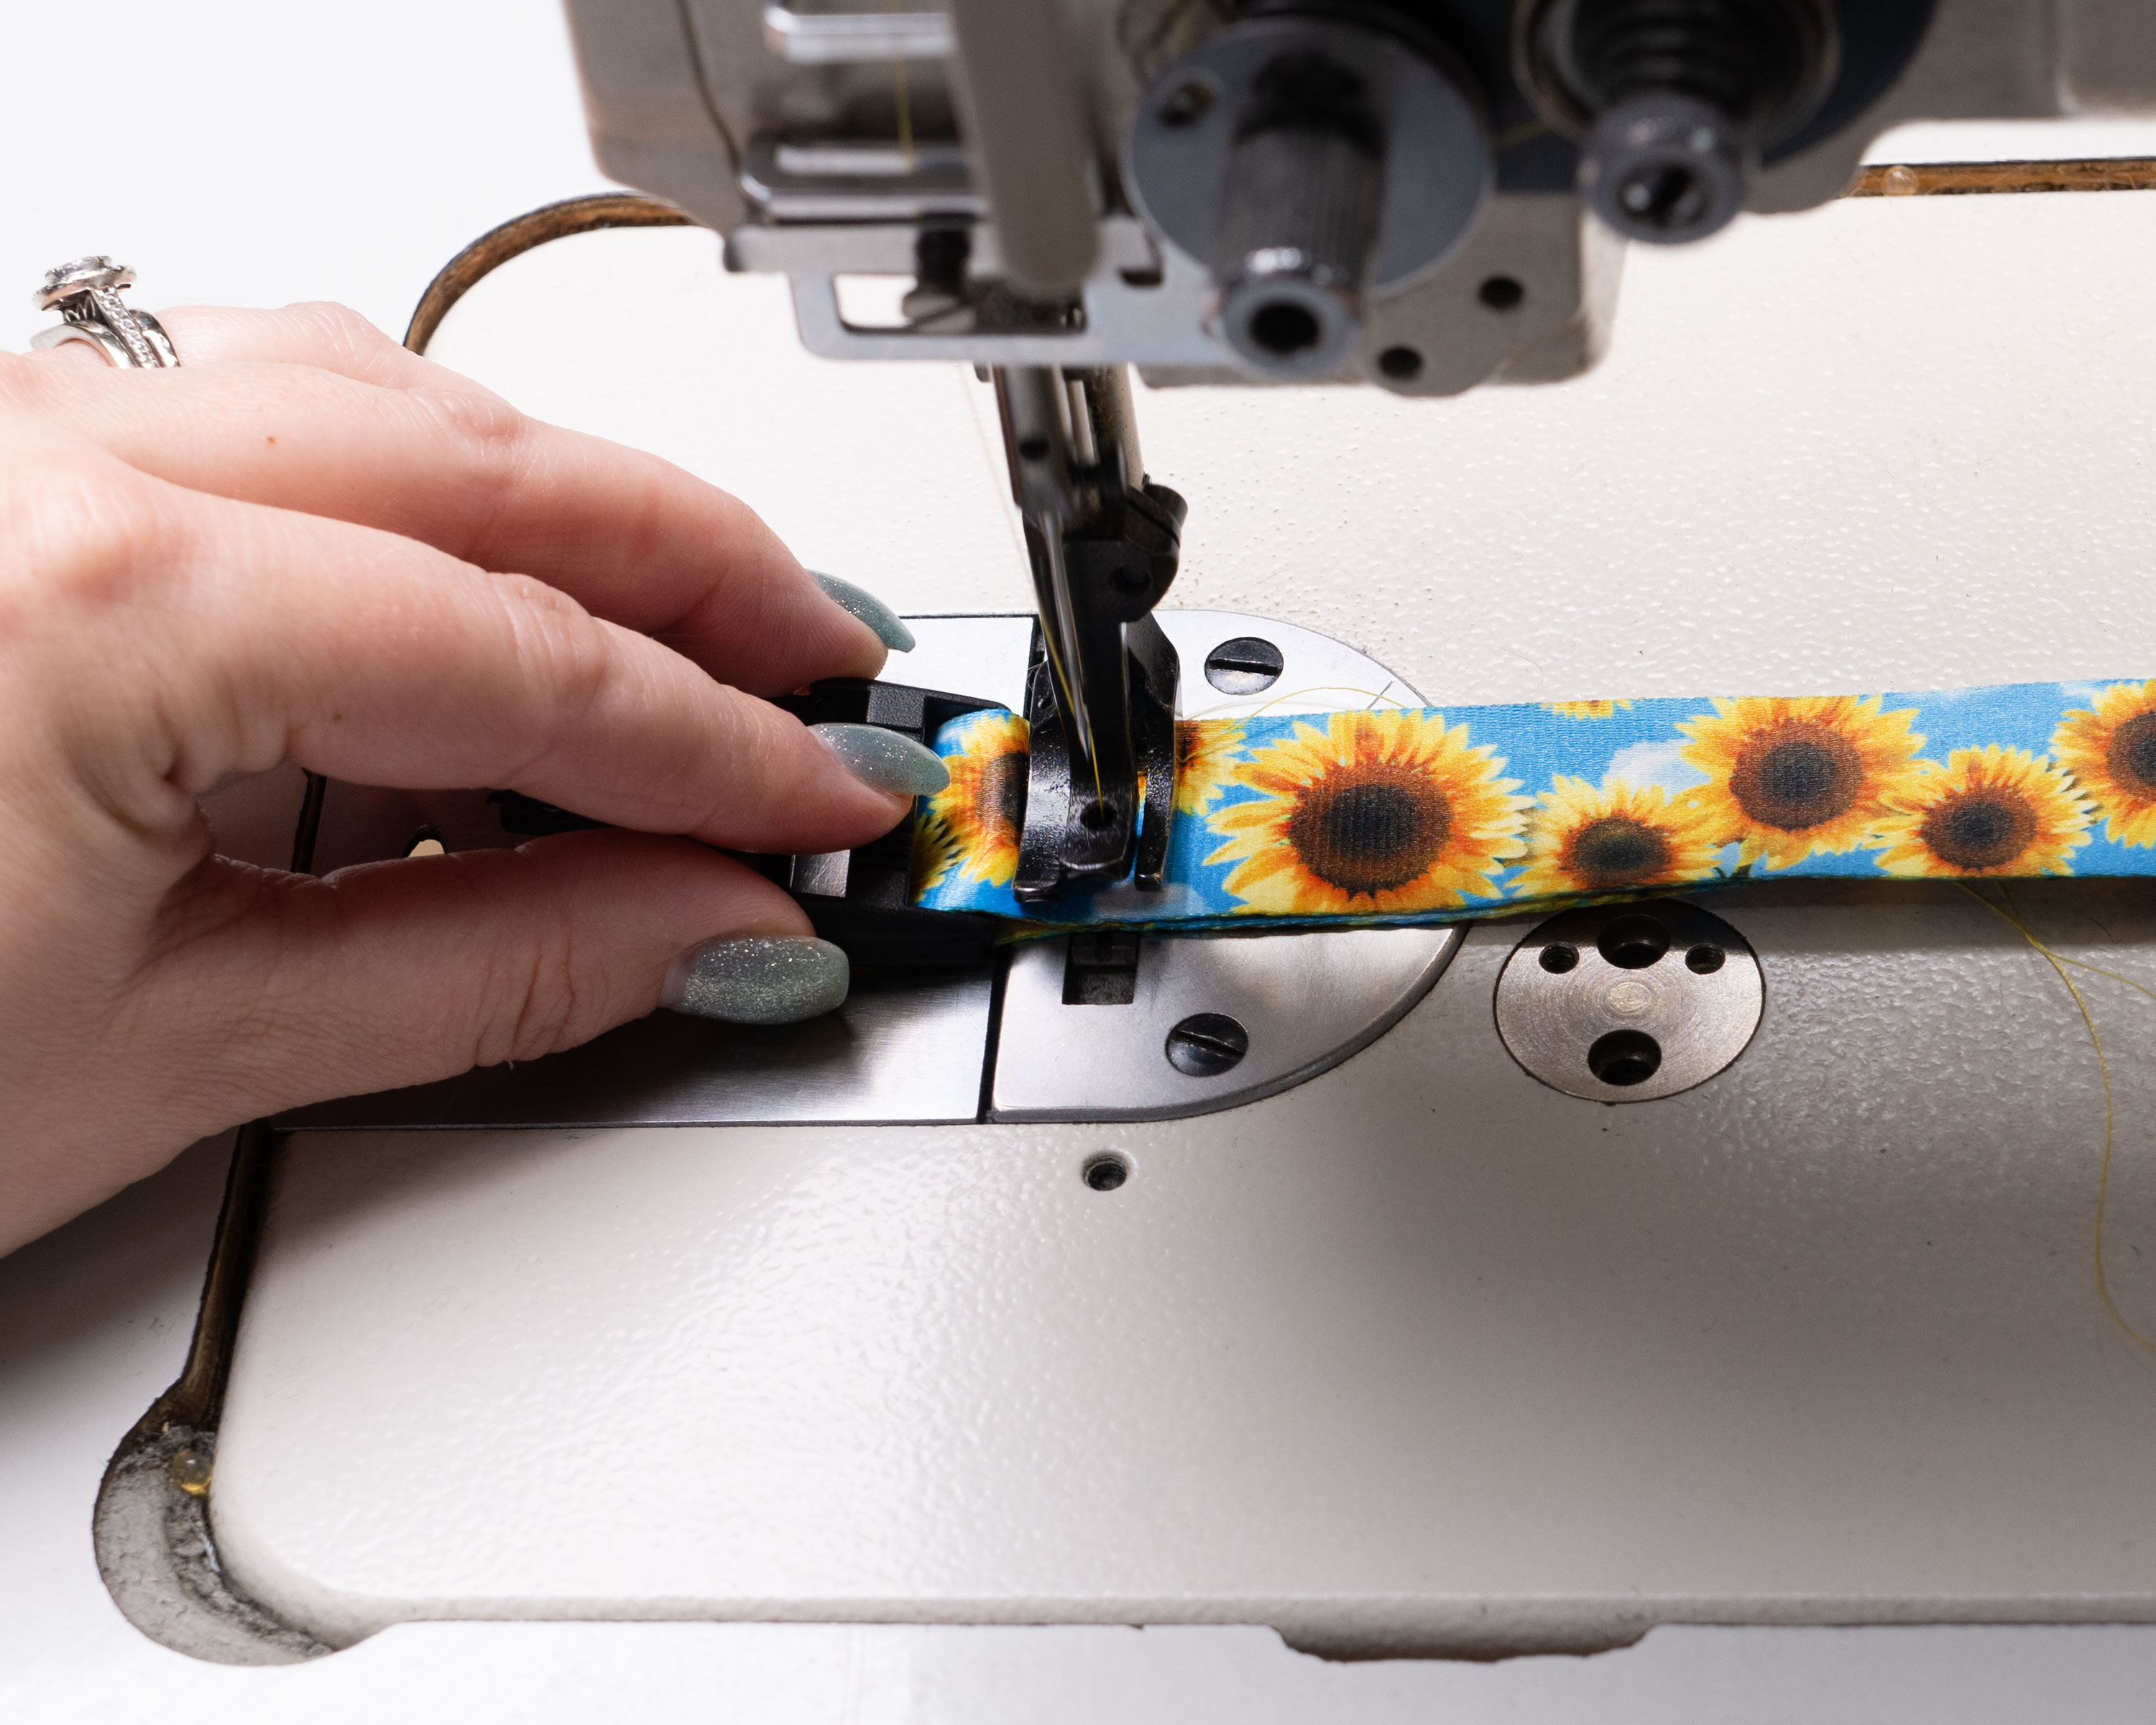
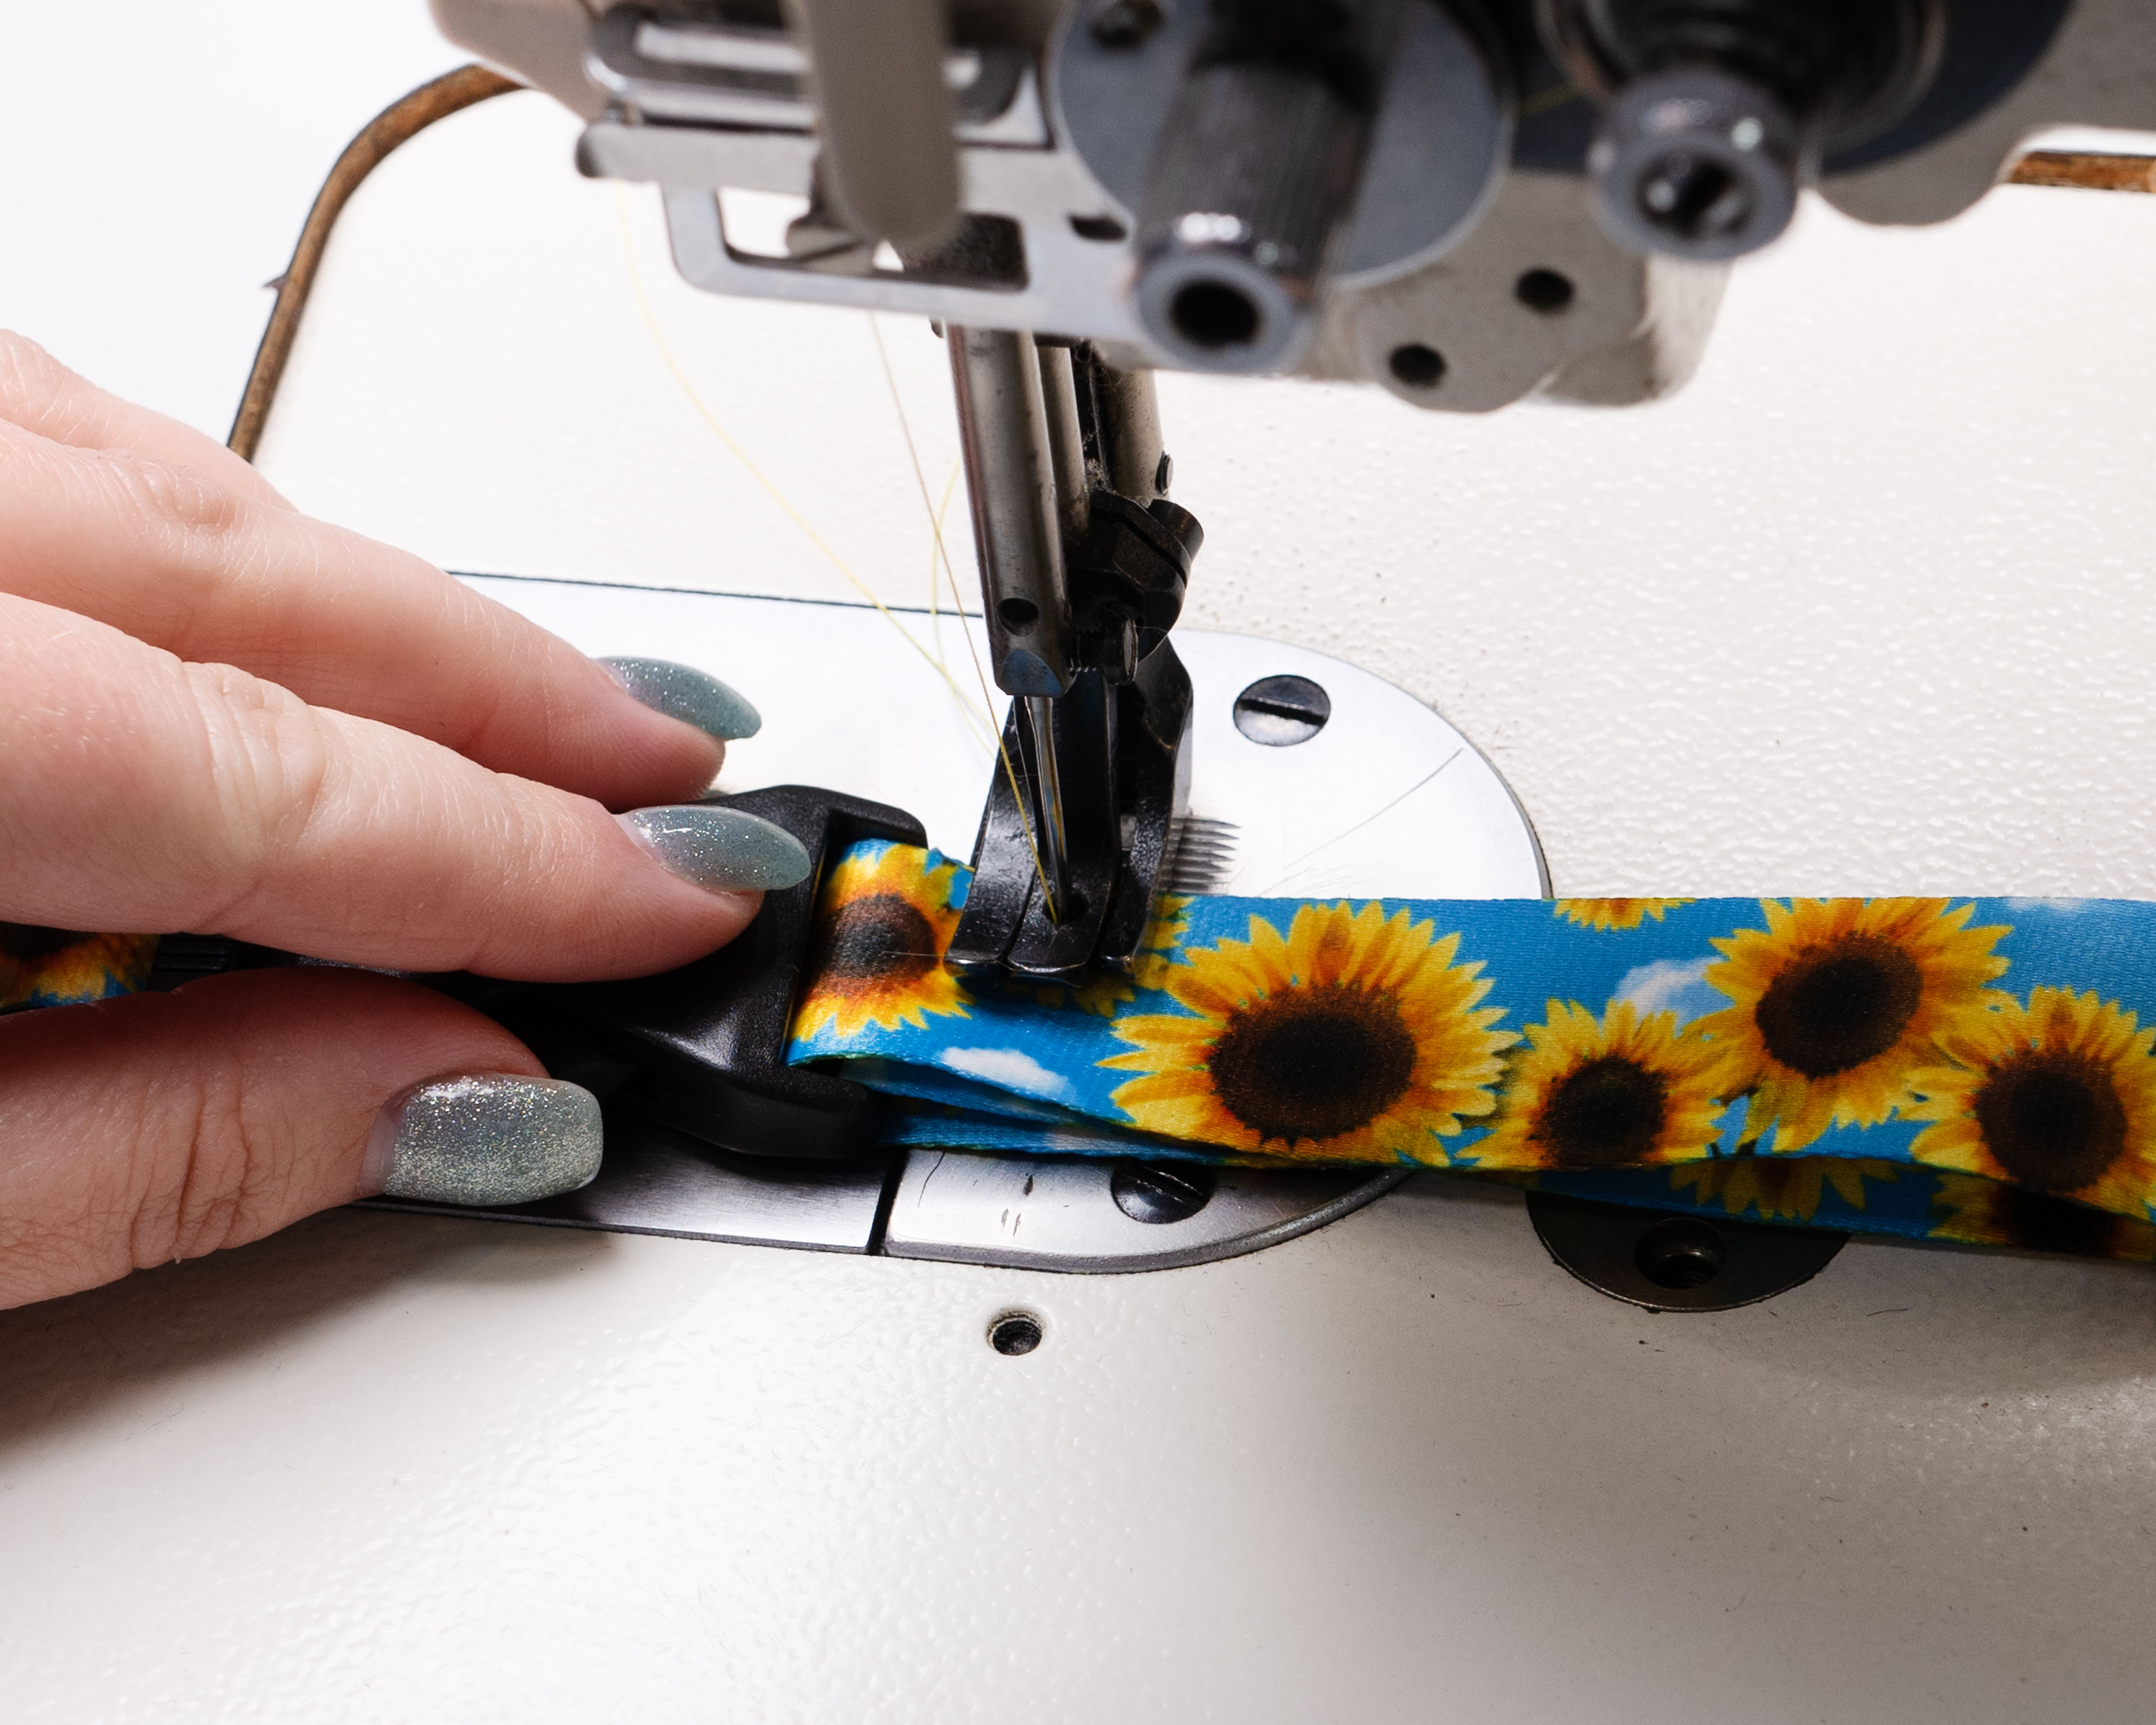
4. Sew across the webbing at the 3-inch mark.
Stitch straight across both layers of webbing at the measured point, making sure your stitch line is even and secure.
Be Sure to:
- Stitch forward and back three times for strength. This reinforcement helps the lanyard withstand daily use and weight from keys or badges.
- Trim any excess thread once you have finished sewing for a clean finish.
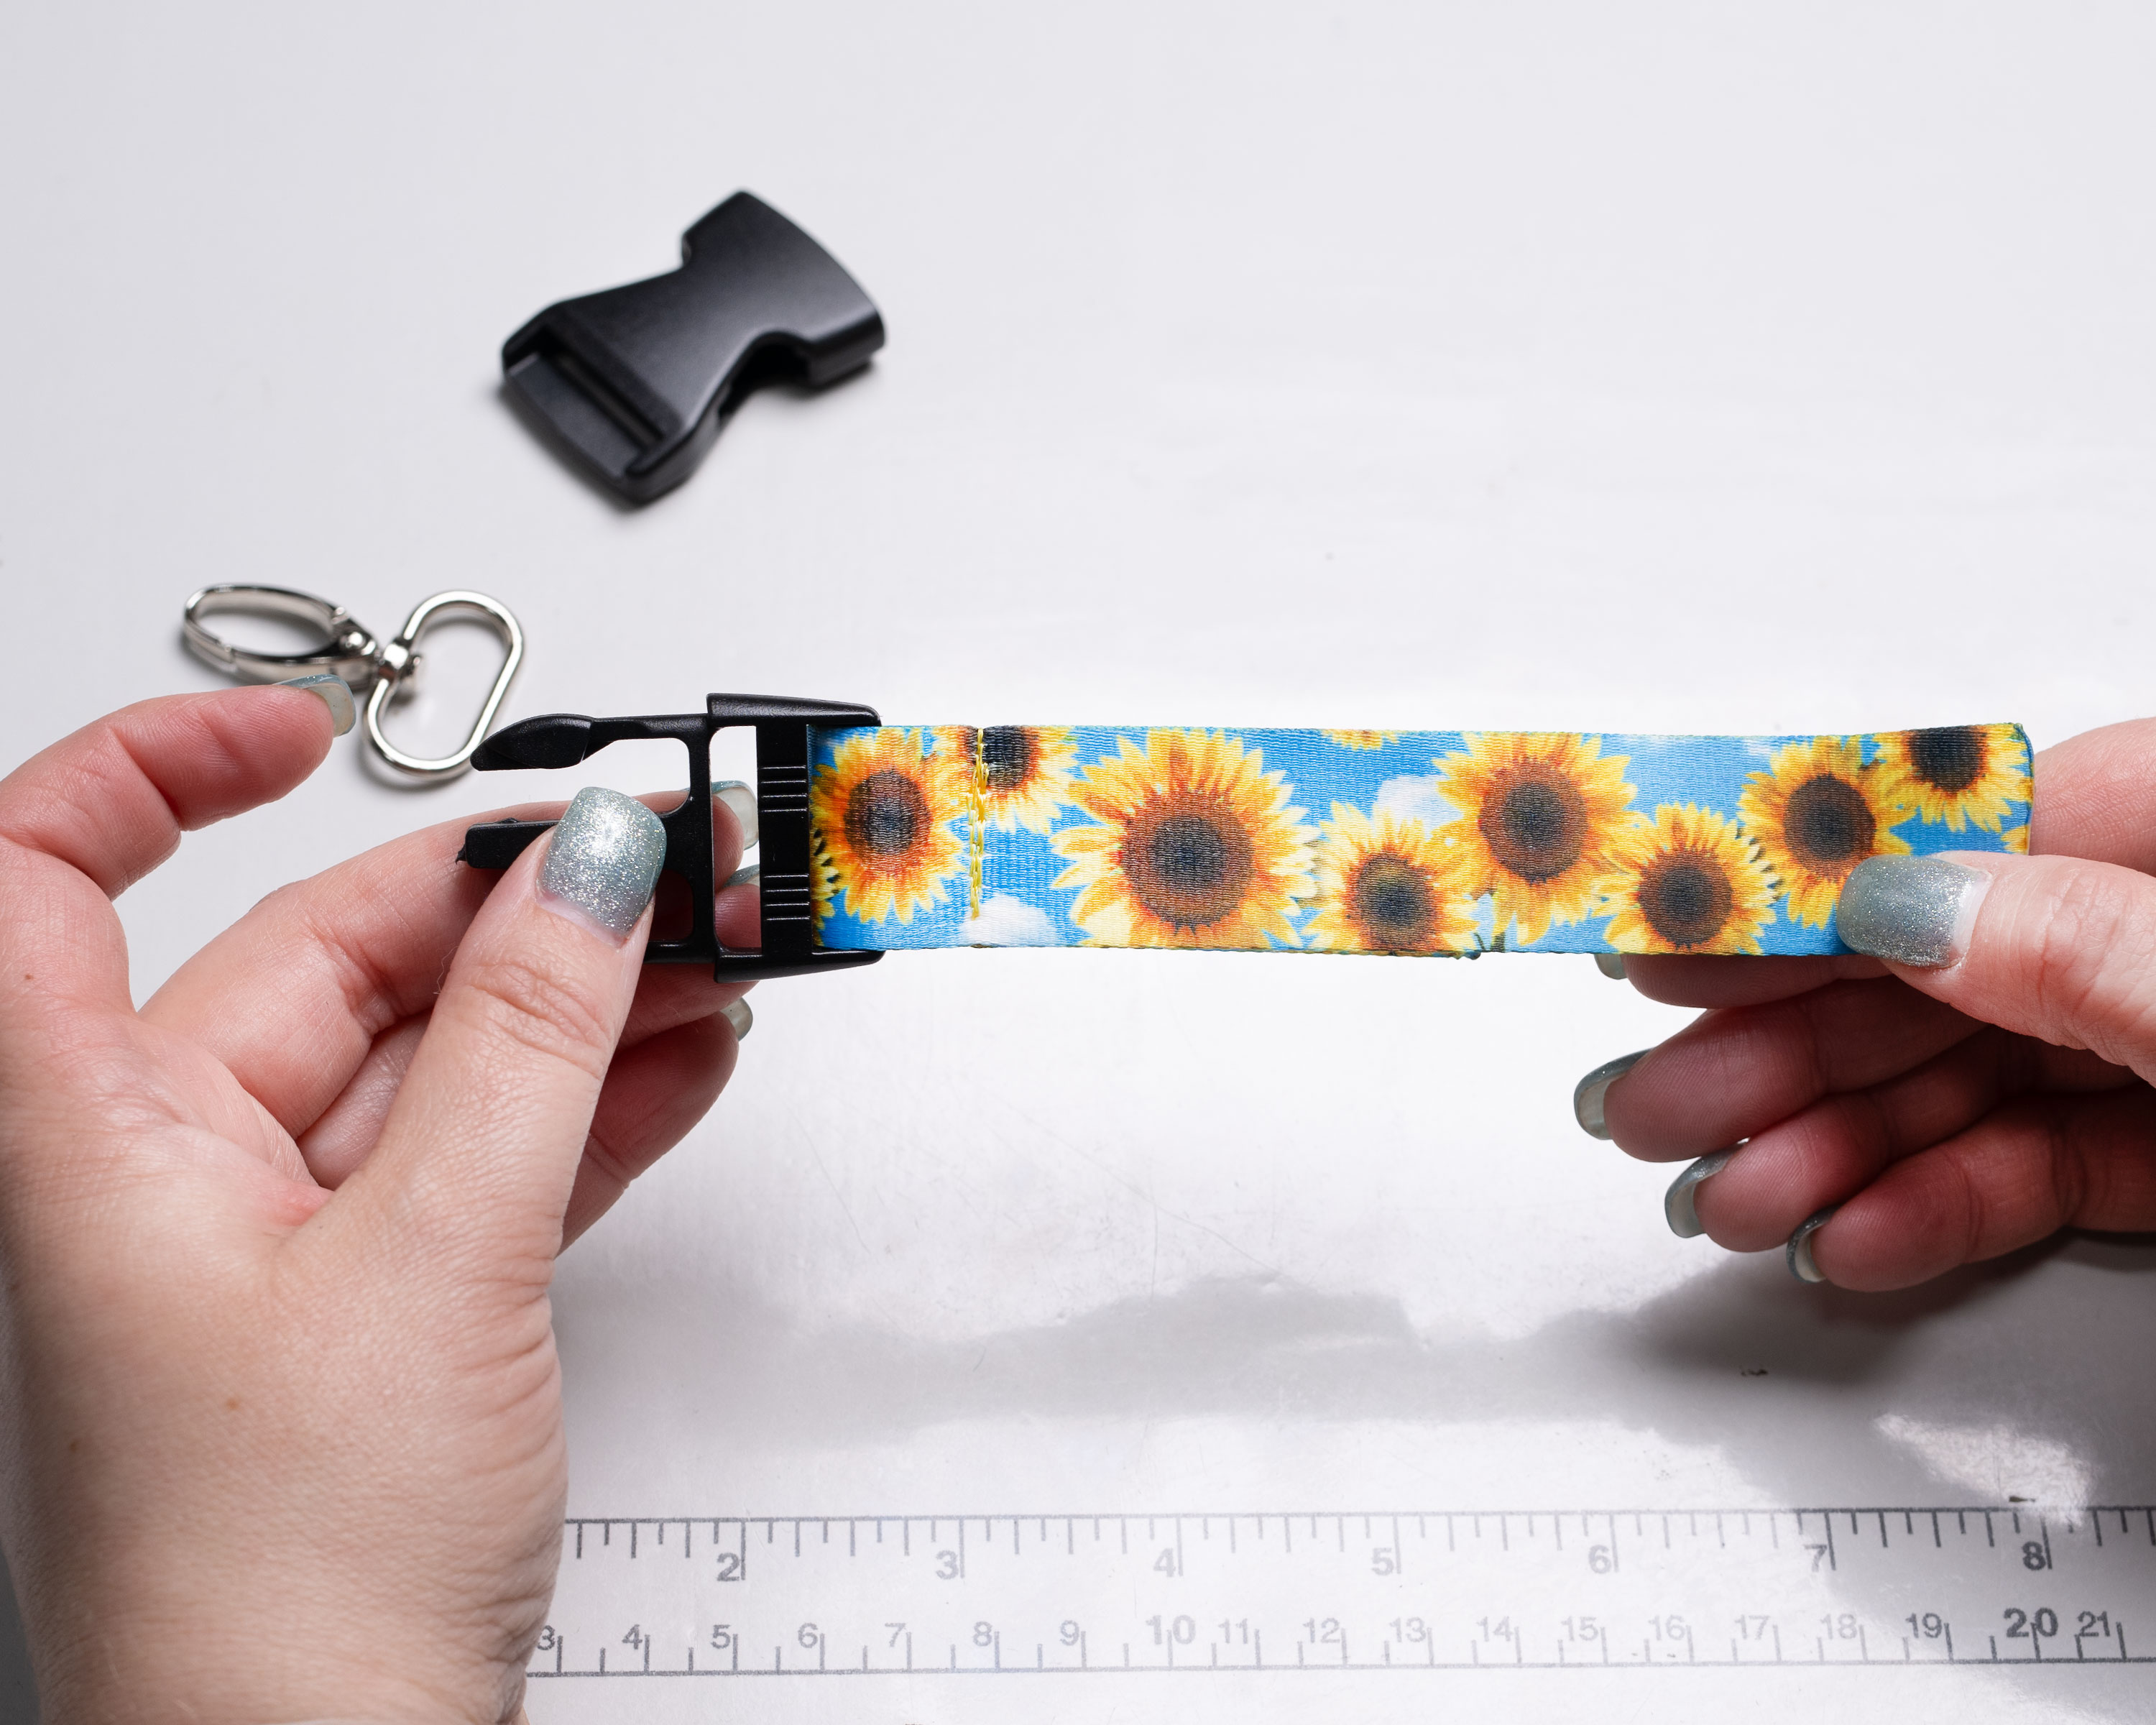
At this point, the small piece should now be securely attached to the male end of the buckle.
Step 4: Attach The Snap Hook
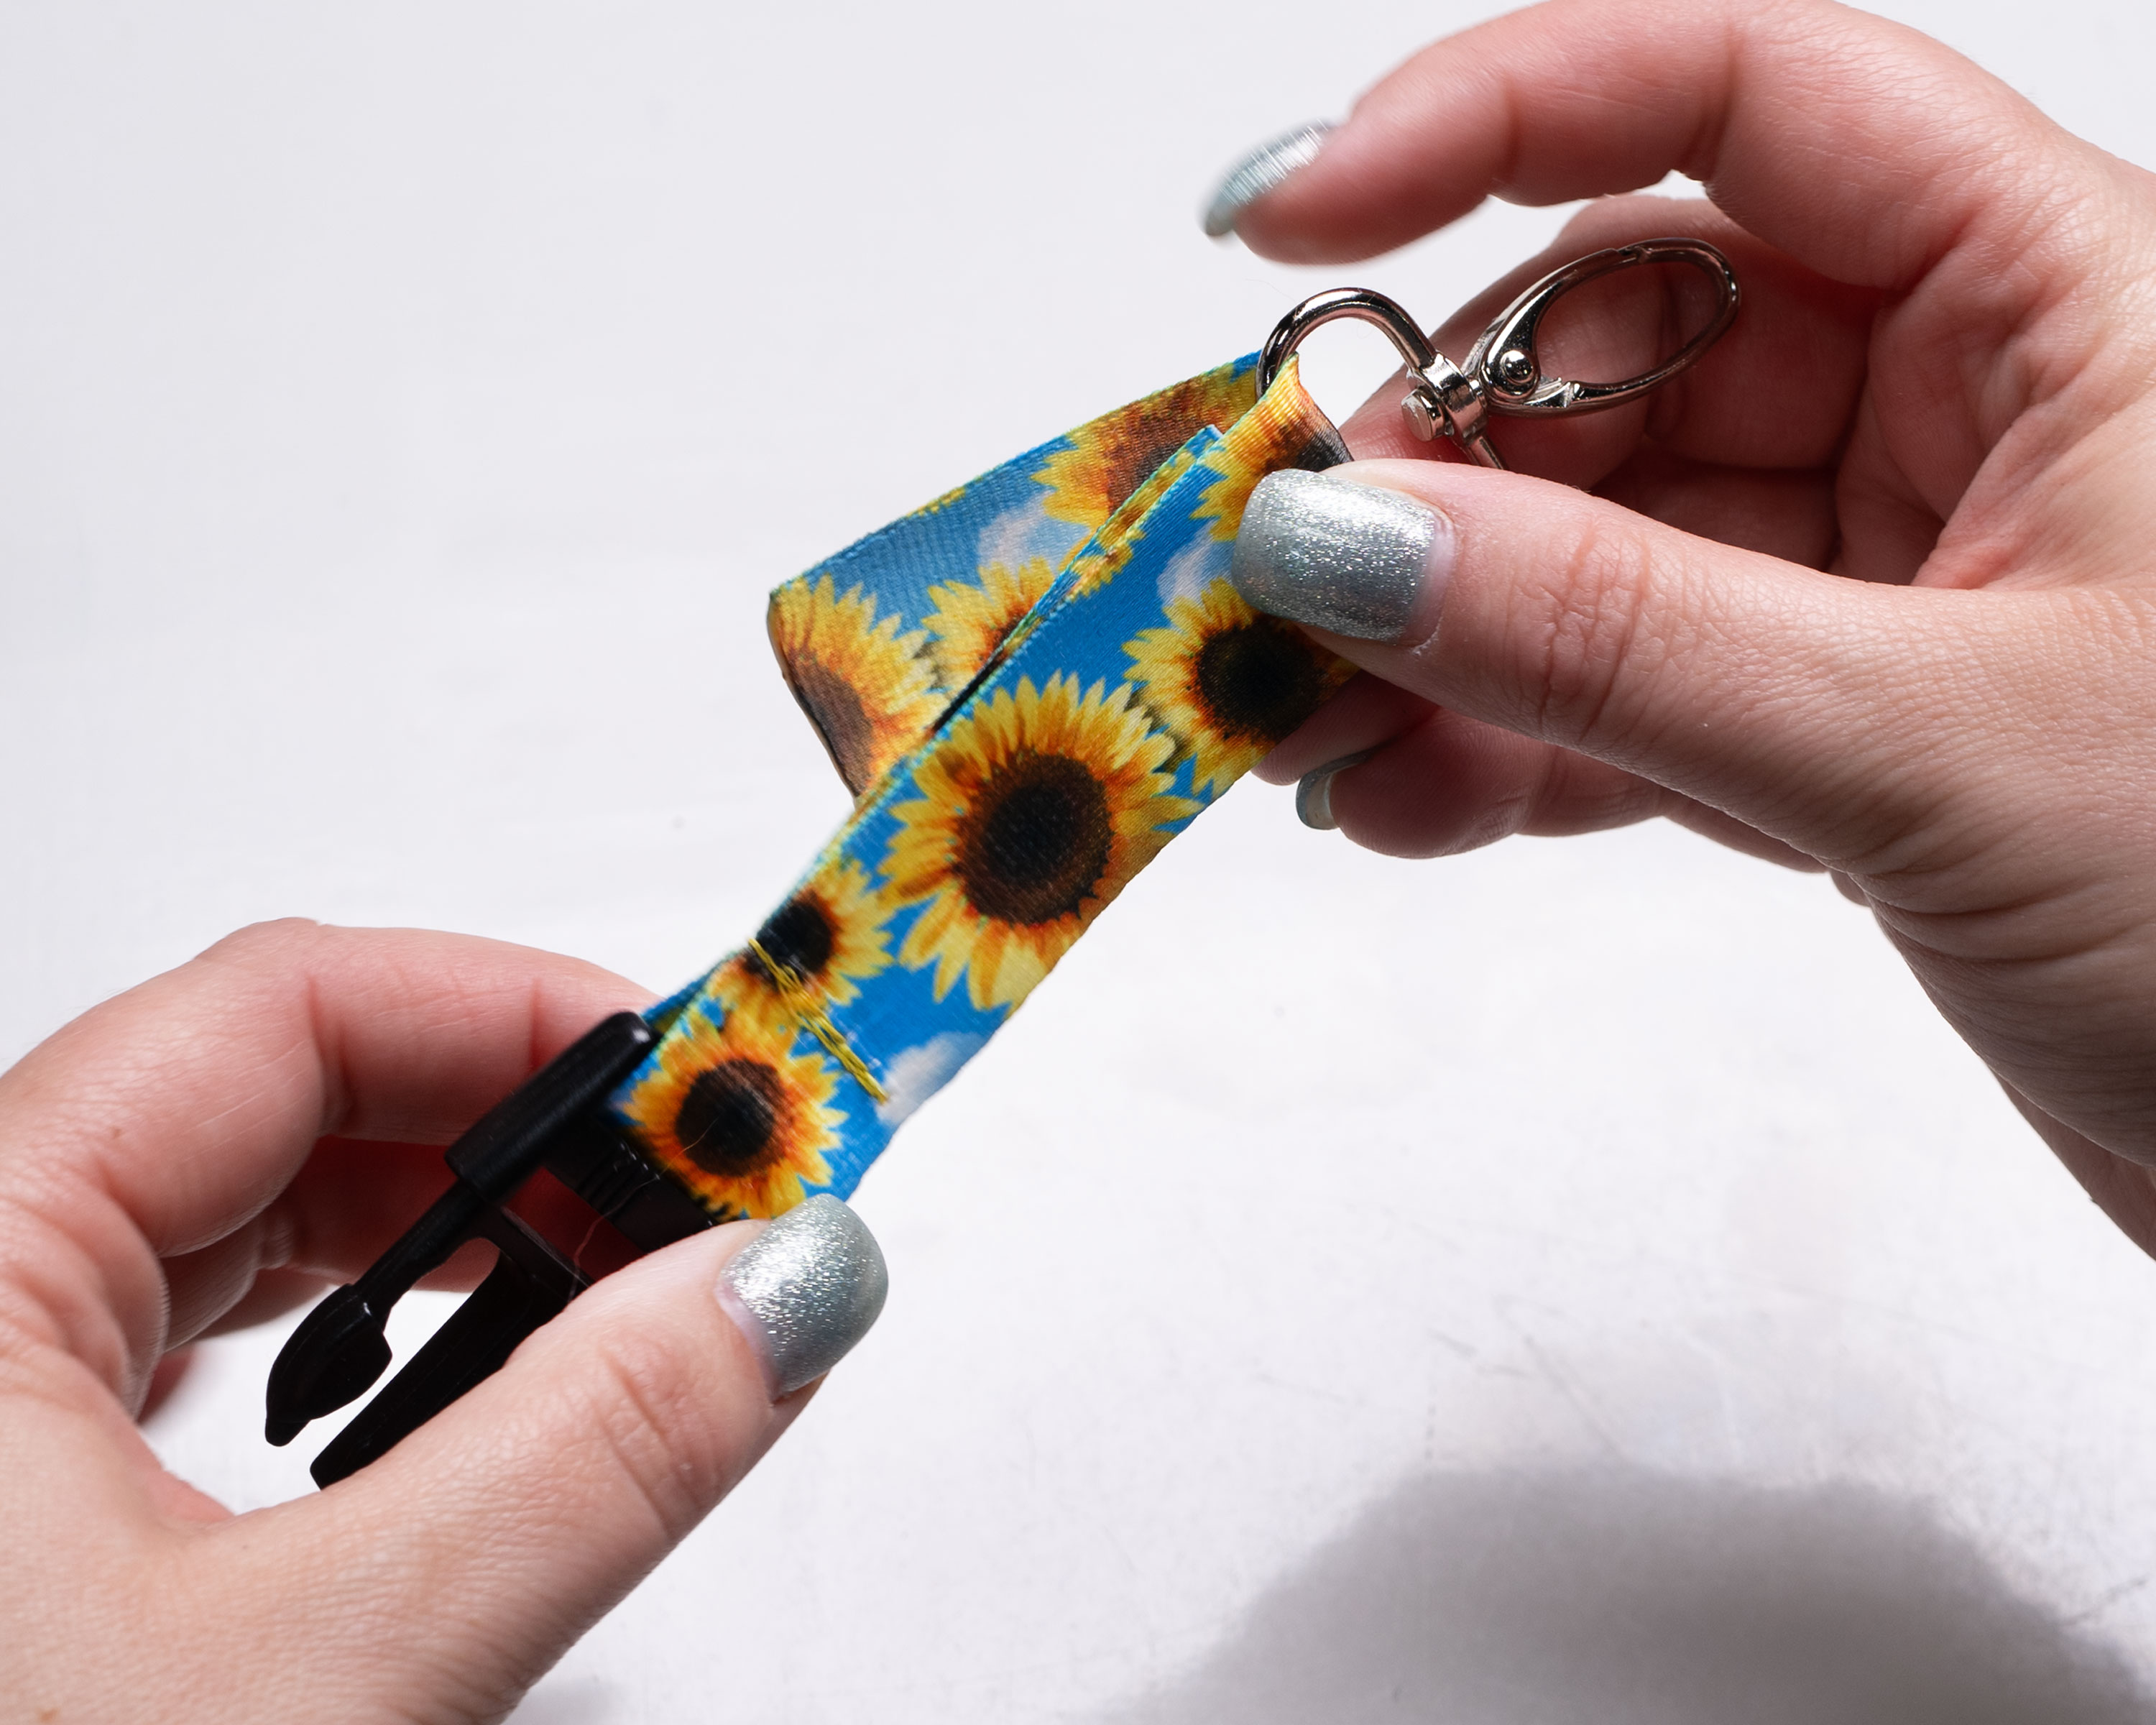
1. Take the free end of the small webbing piece.
Hold the section so the buckle is hanging downward and the loose end is facing upward. Make sure the webbing is flat and not twisted before threading it through the hardware.
2. Insert it through the snap hook (lobster claw).
Slide the webbing through the opening of the snap hook, pulling it through far enough to allow room to fold it back over itself.
3. Fold the webbing over.
Bring the loose end back toward the stitched section, creating a clean loop around the snap hook. Pull it snug so the hardware sits firmly in place without gaps.
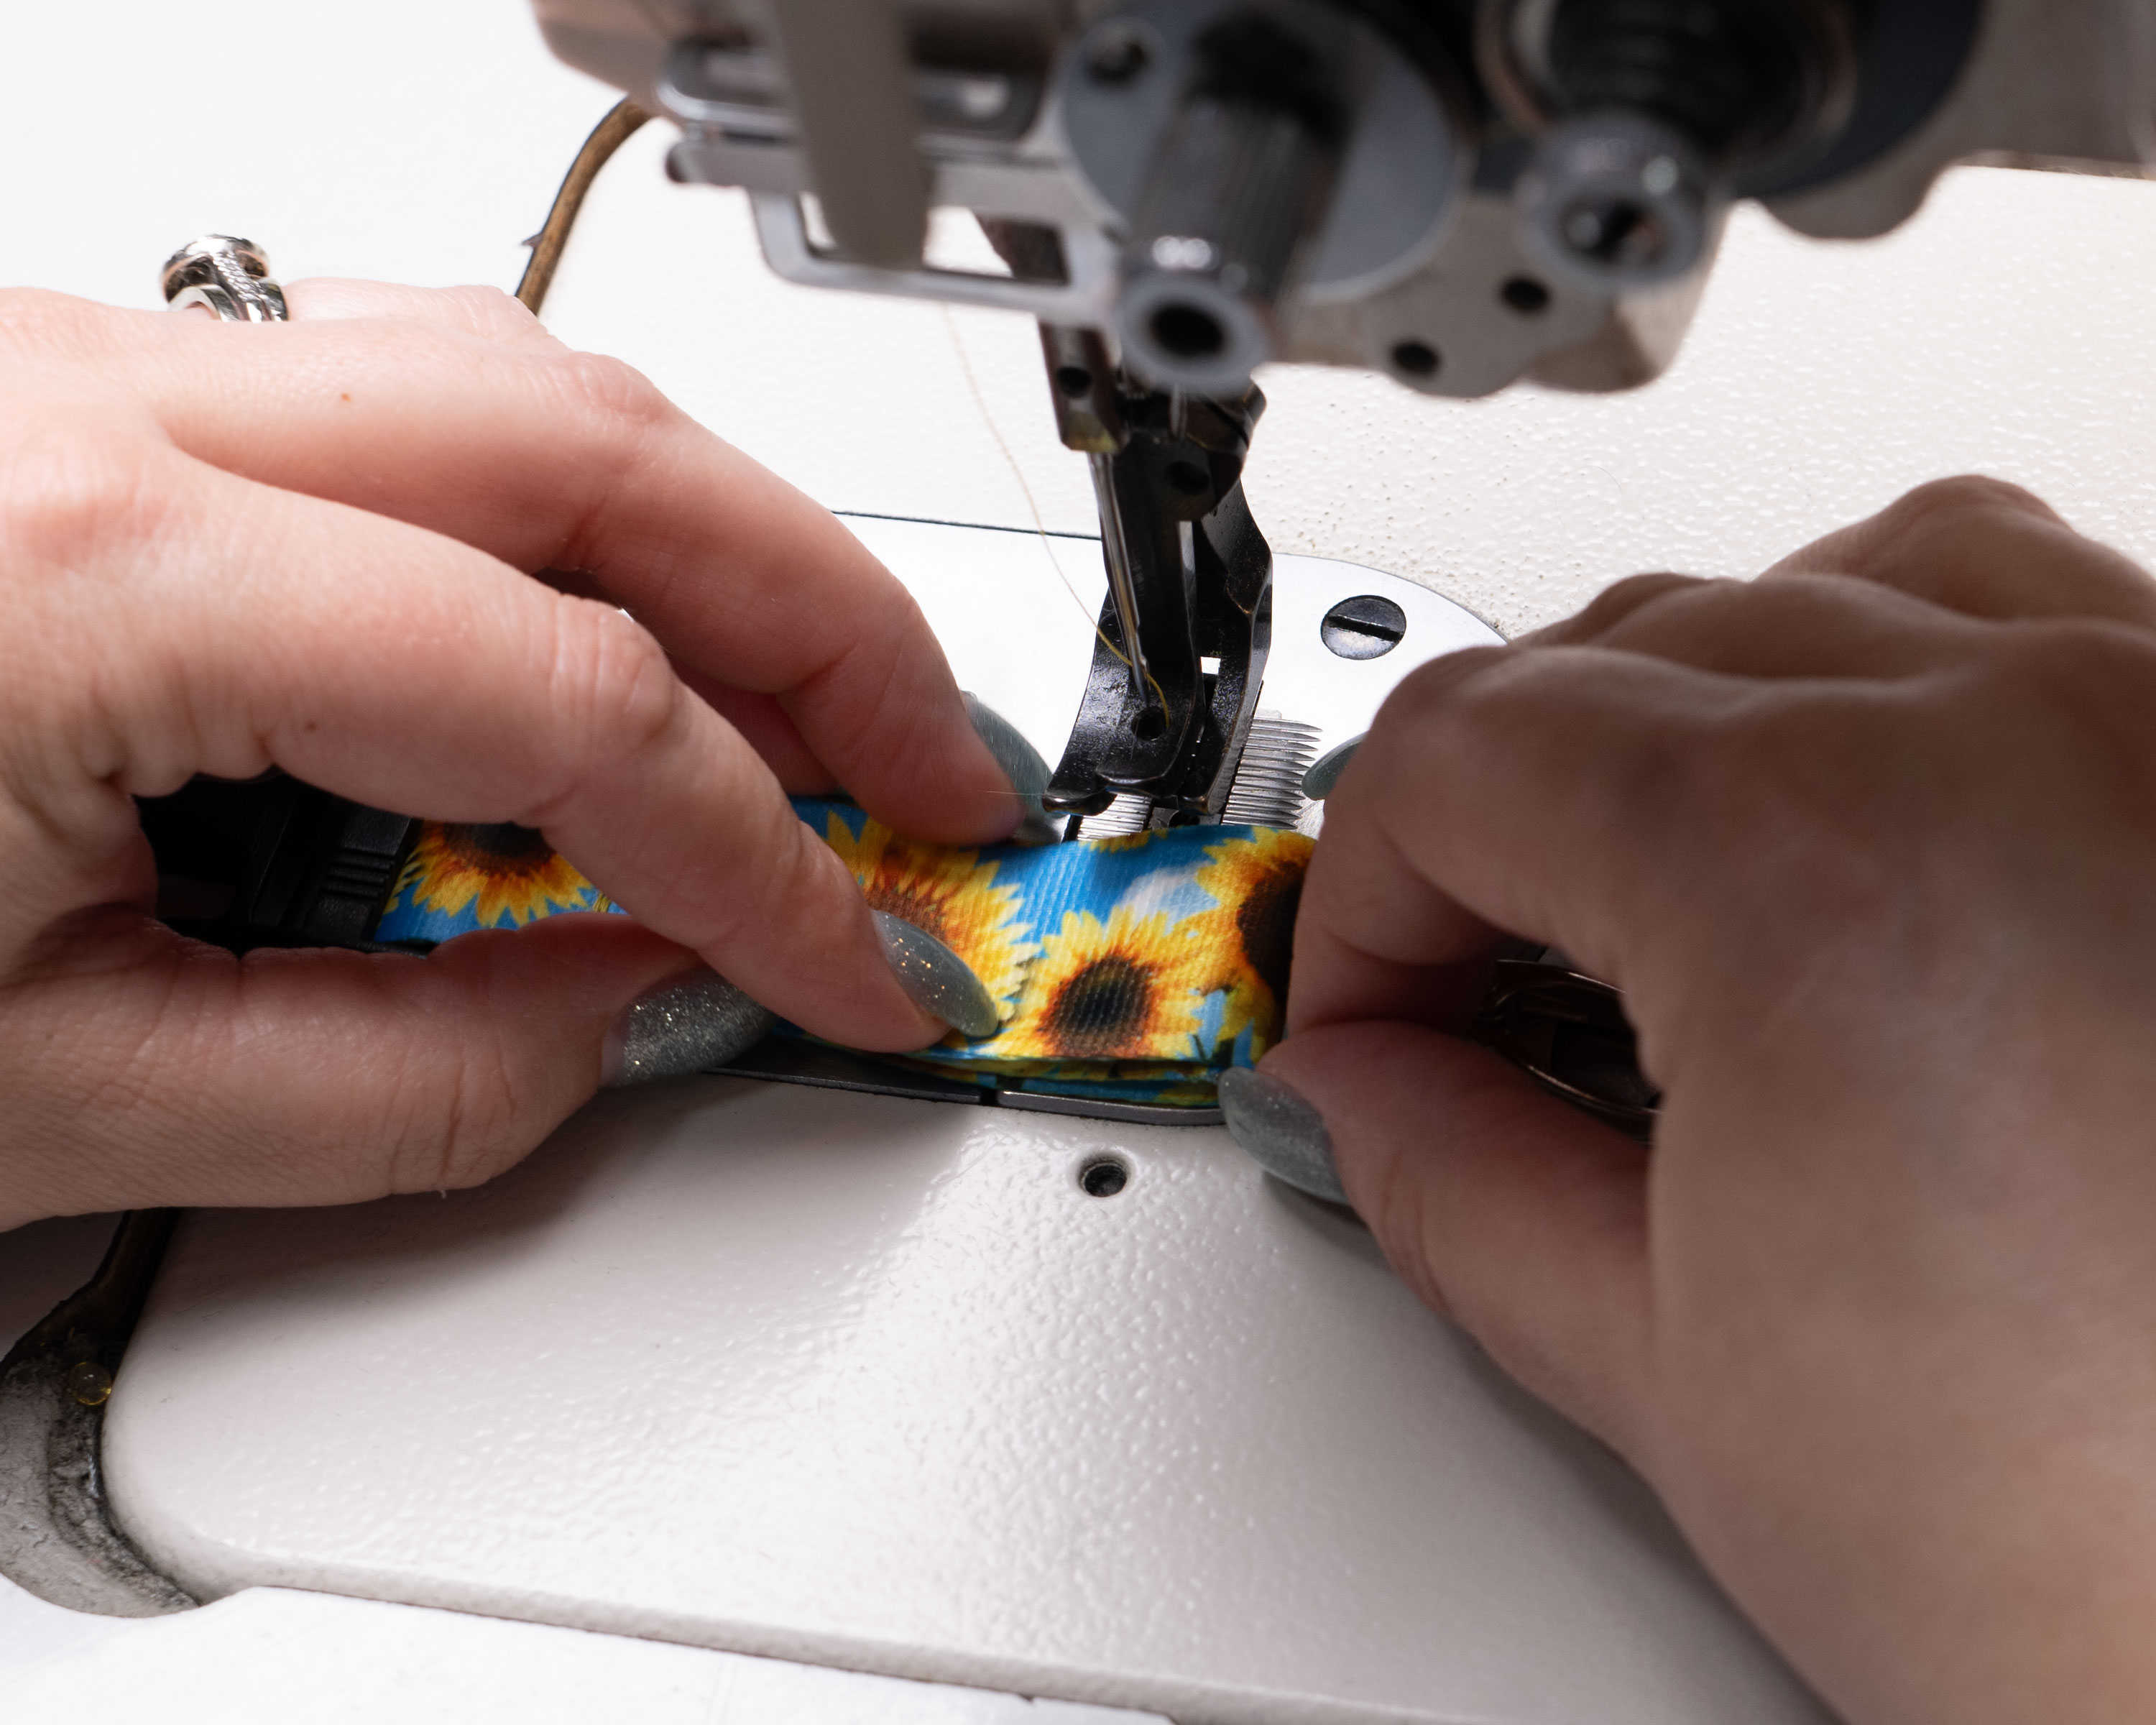
4. Sew across the folded section.
Position the folded webbing under your sewing machine foot and stitch straight across both layers, keeping your stitch line even and aligned with the edge for a professional finish.
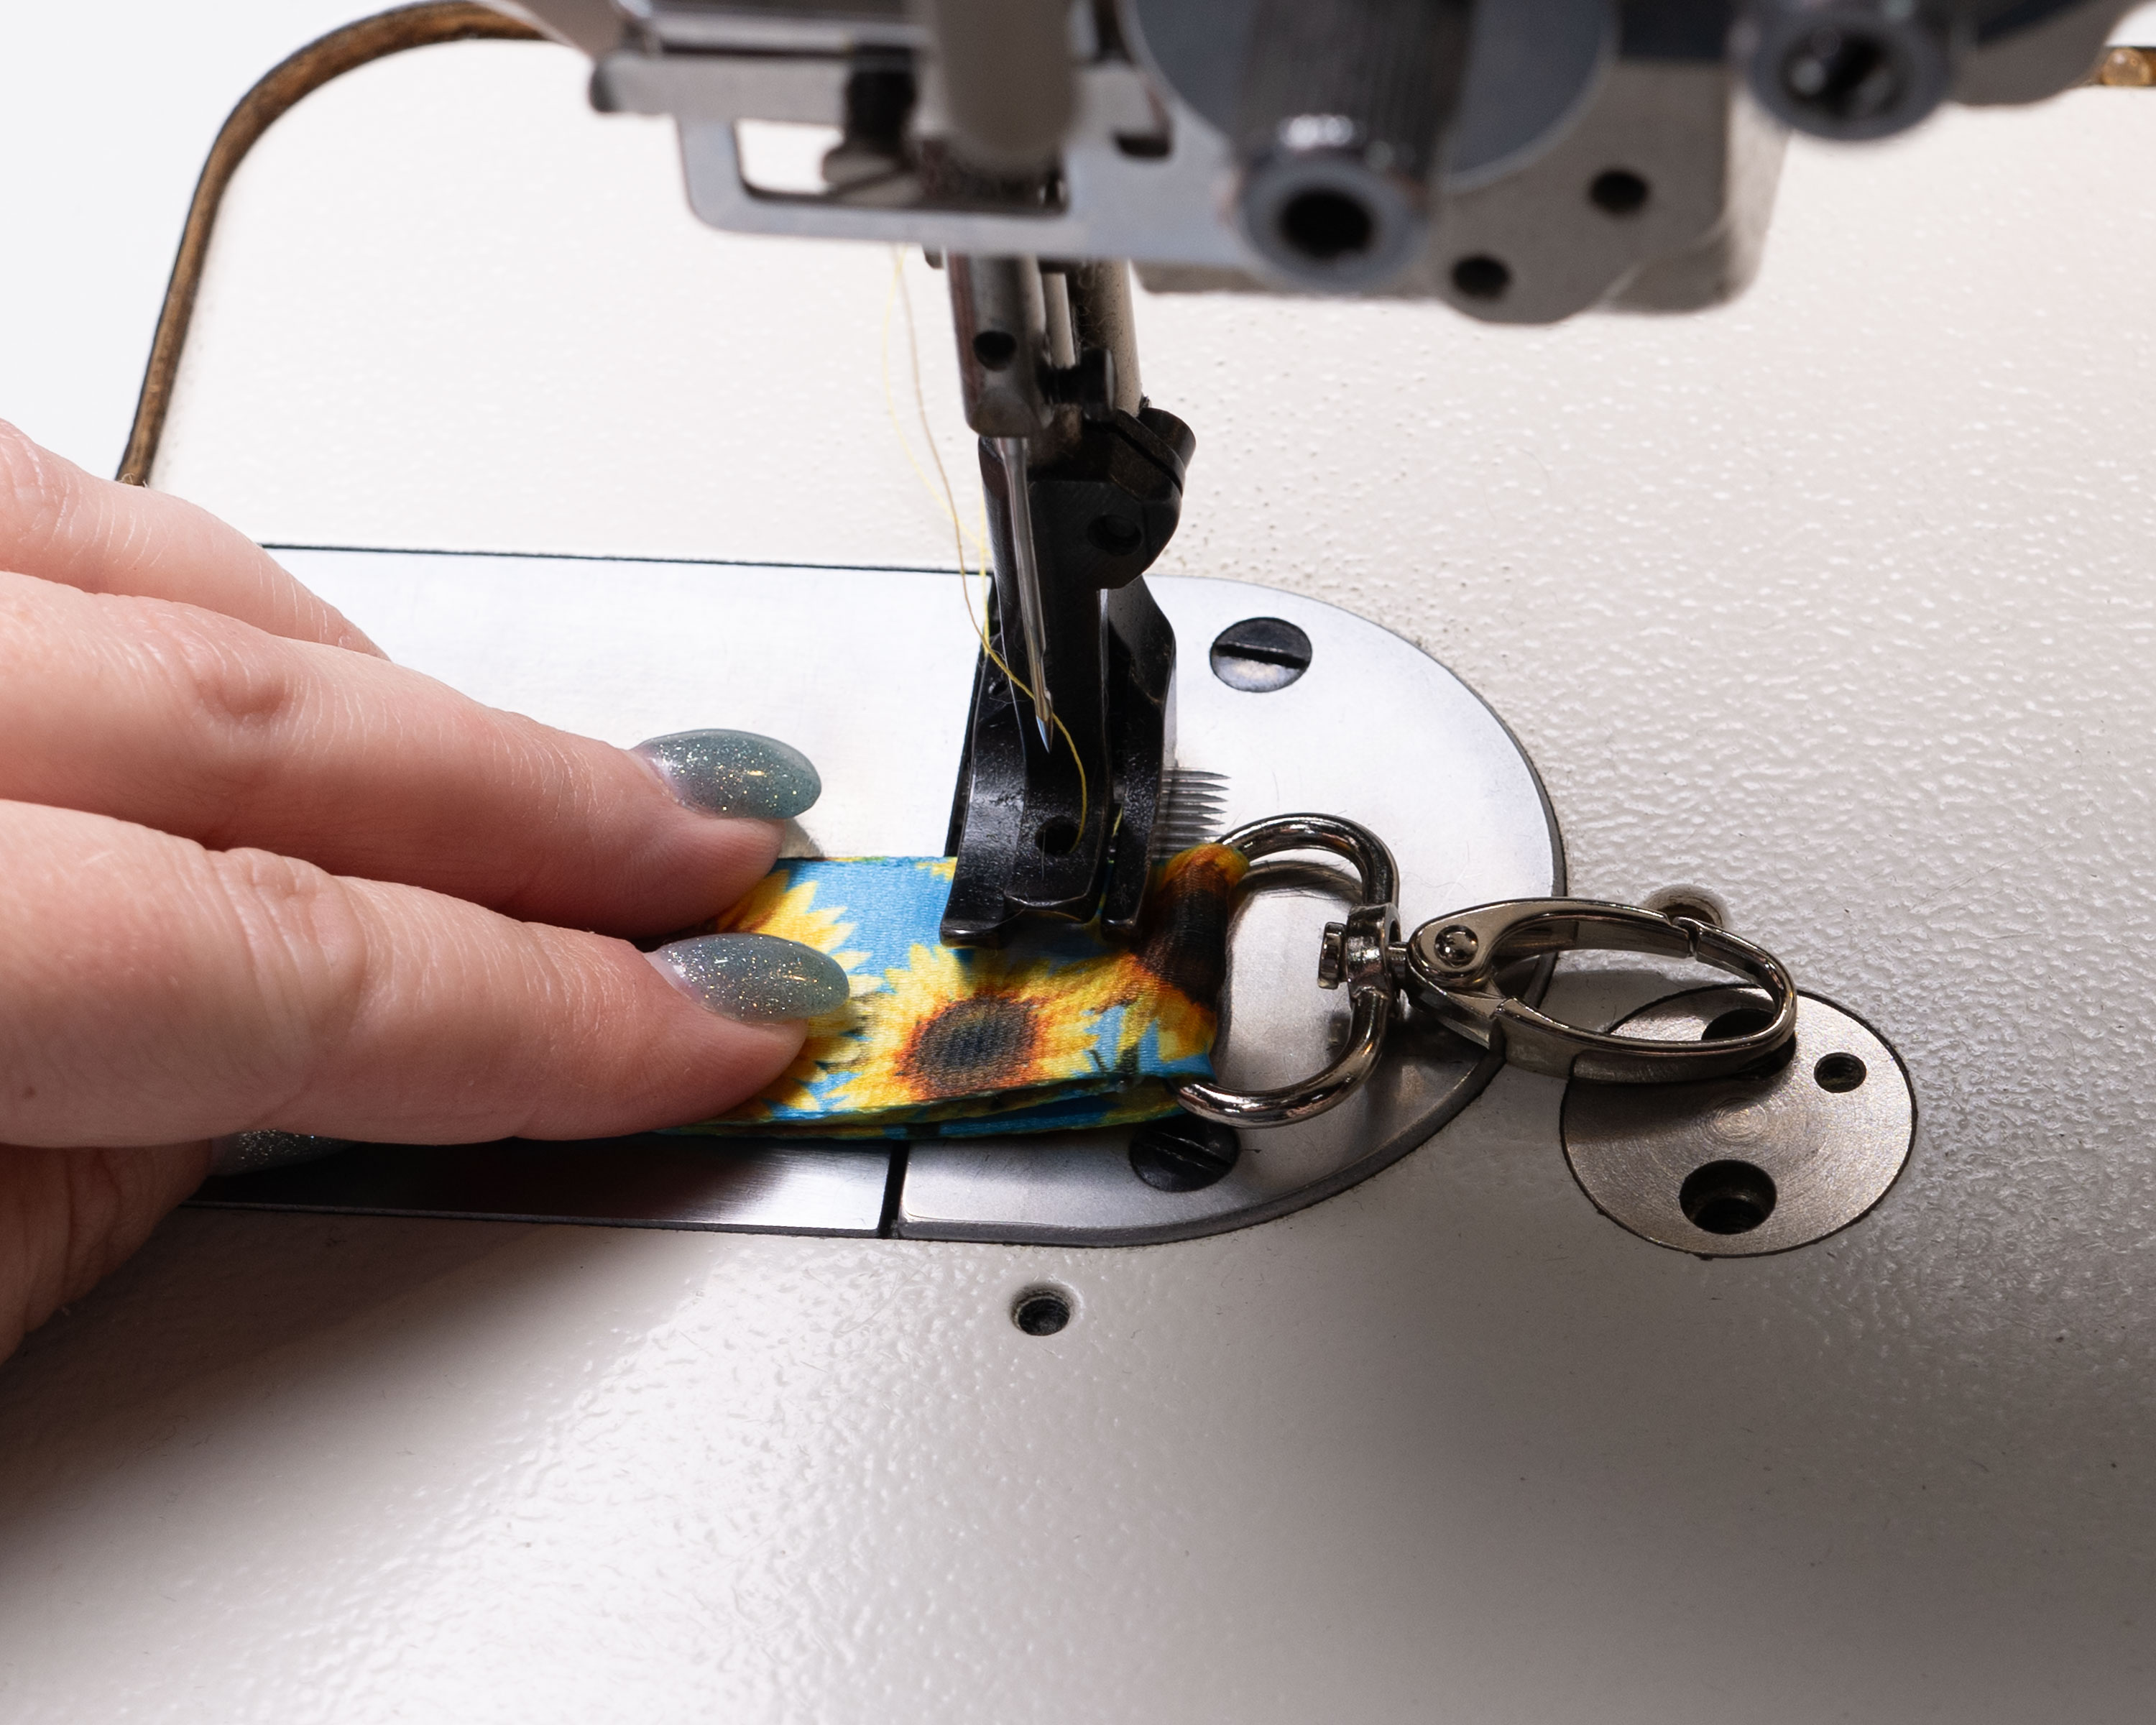
5. Stitch forward and back three times.
Reinforcing the seam is important since this area will carry weight from keys, badges, or other attachments. Backstitching strengthens the connection and helps prevent pulling or separation over time.
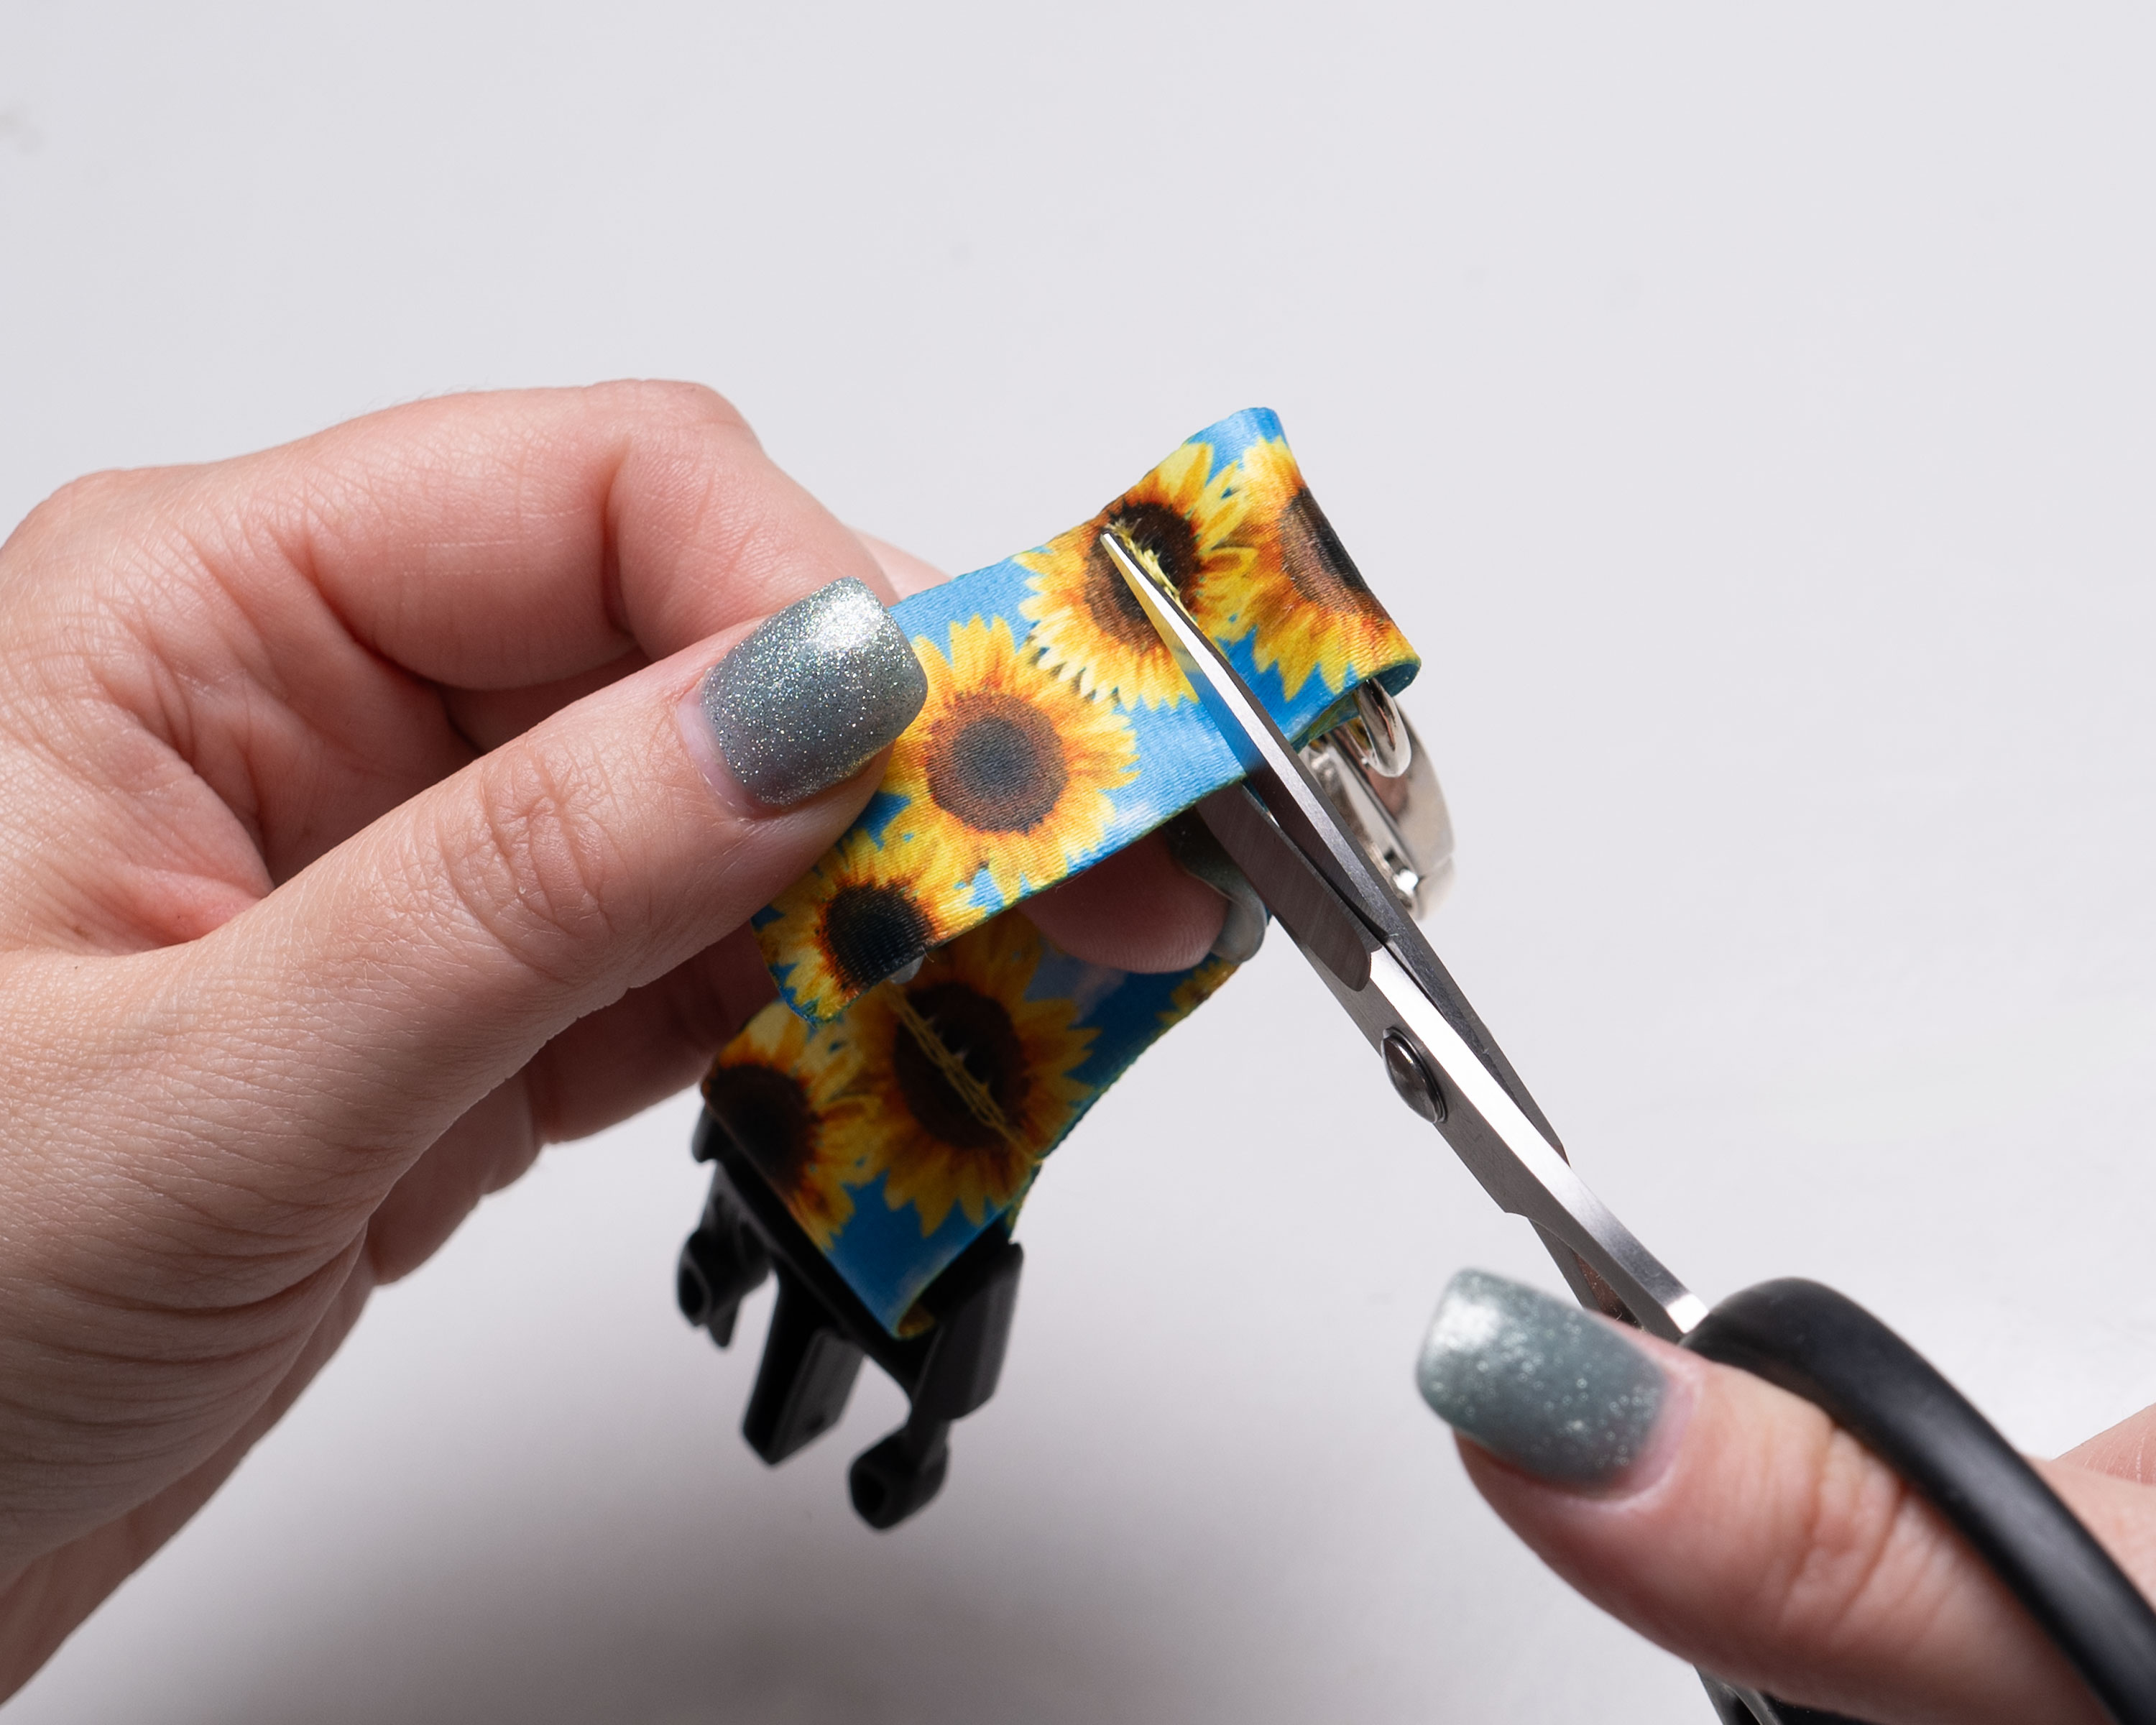
6. Trim any excess thread.
After sewing, carefully cut away loose threads to keep the piece looking neat and finished.
7. Trim any webbing if needed.
If there is extra material extending beyond your stitch line, trim it evenly with scissors so the edge is clean and straight.
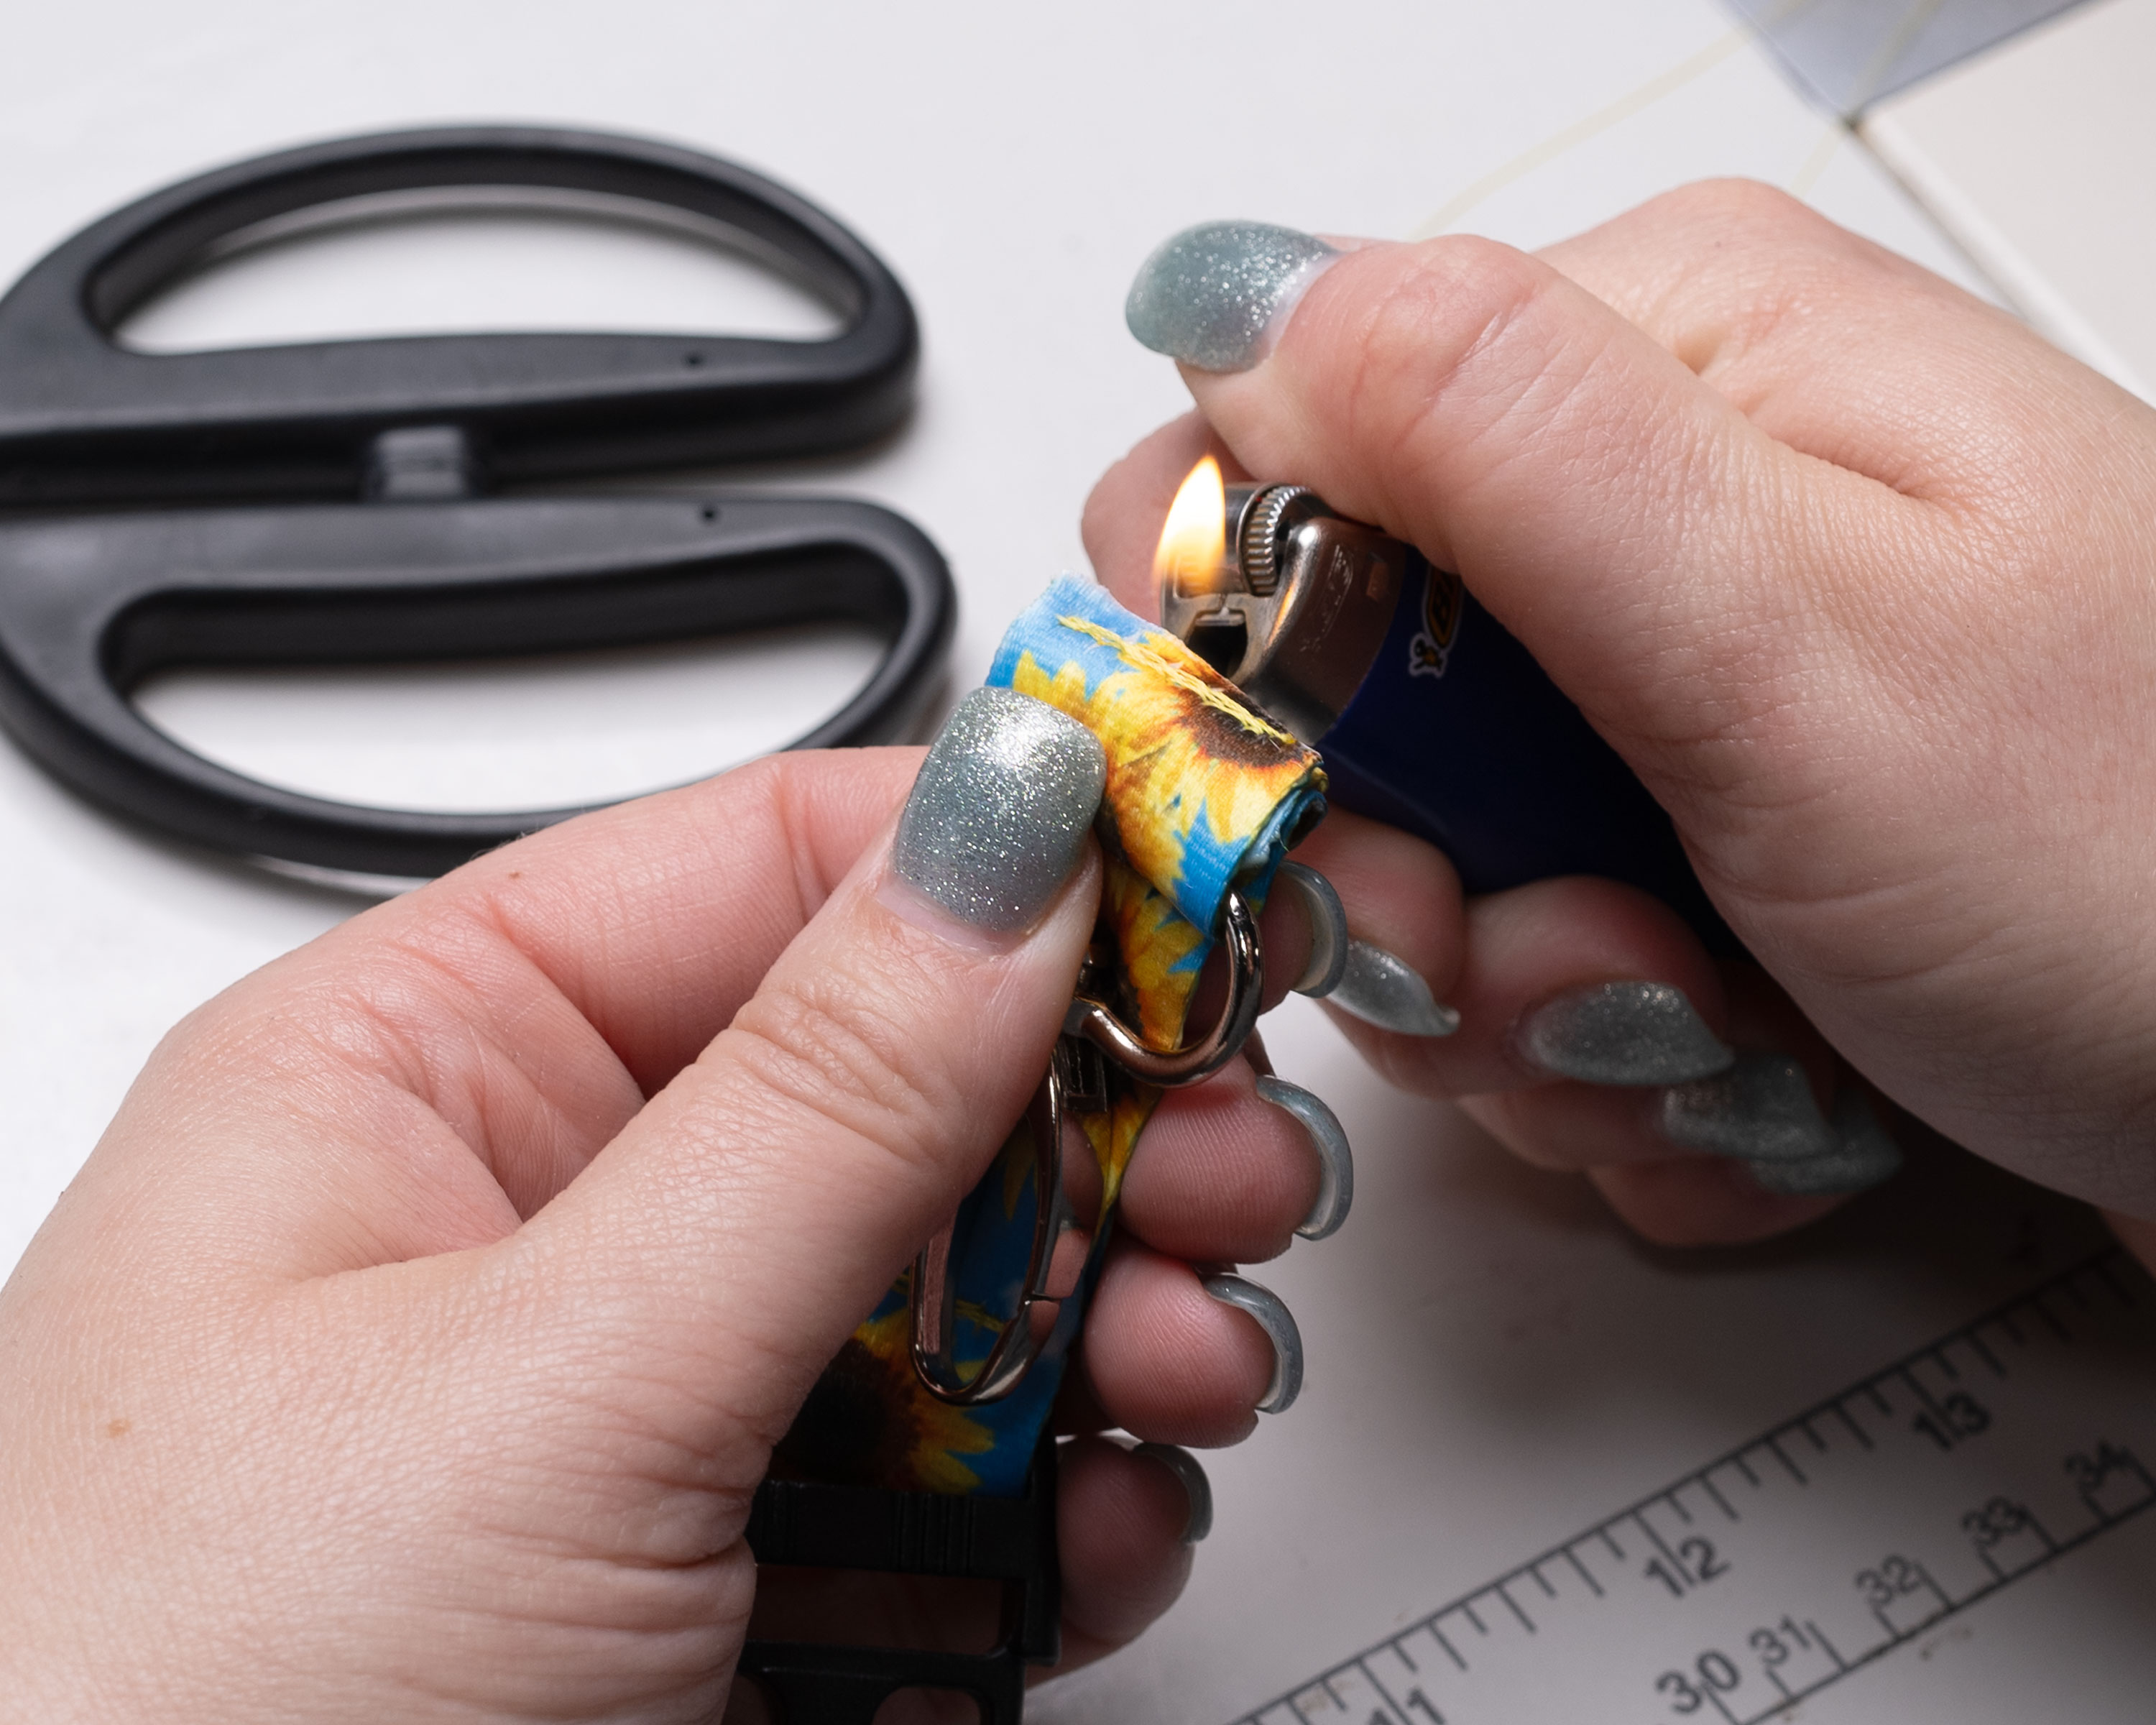
8. Carefully seal the cut edge with a lighter.
Lightly apply heat to the trimmed edge just until the fibers melt. This prevents fraying and gives the webbing a smooth, sealed finish. Be careful not to overheat or scorch the material.
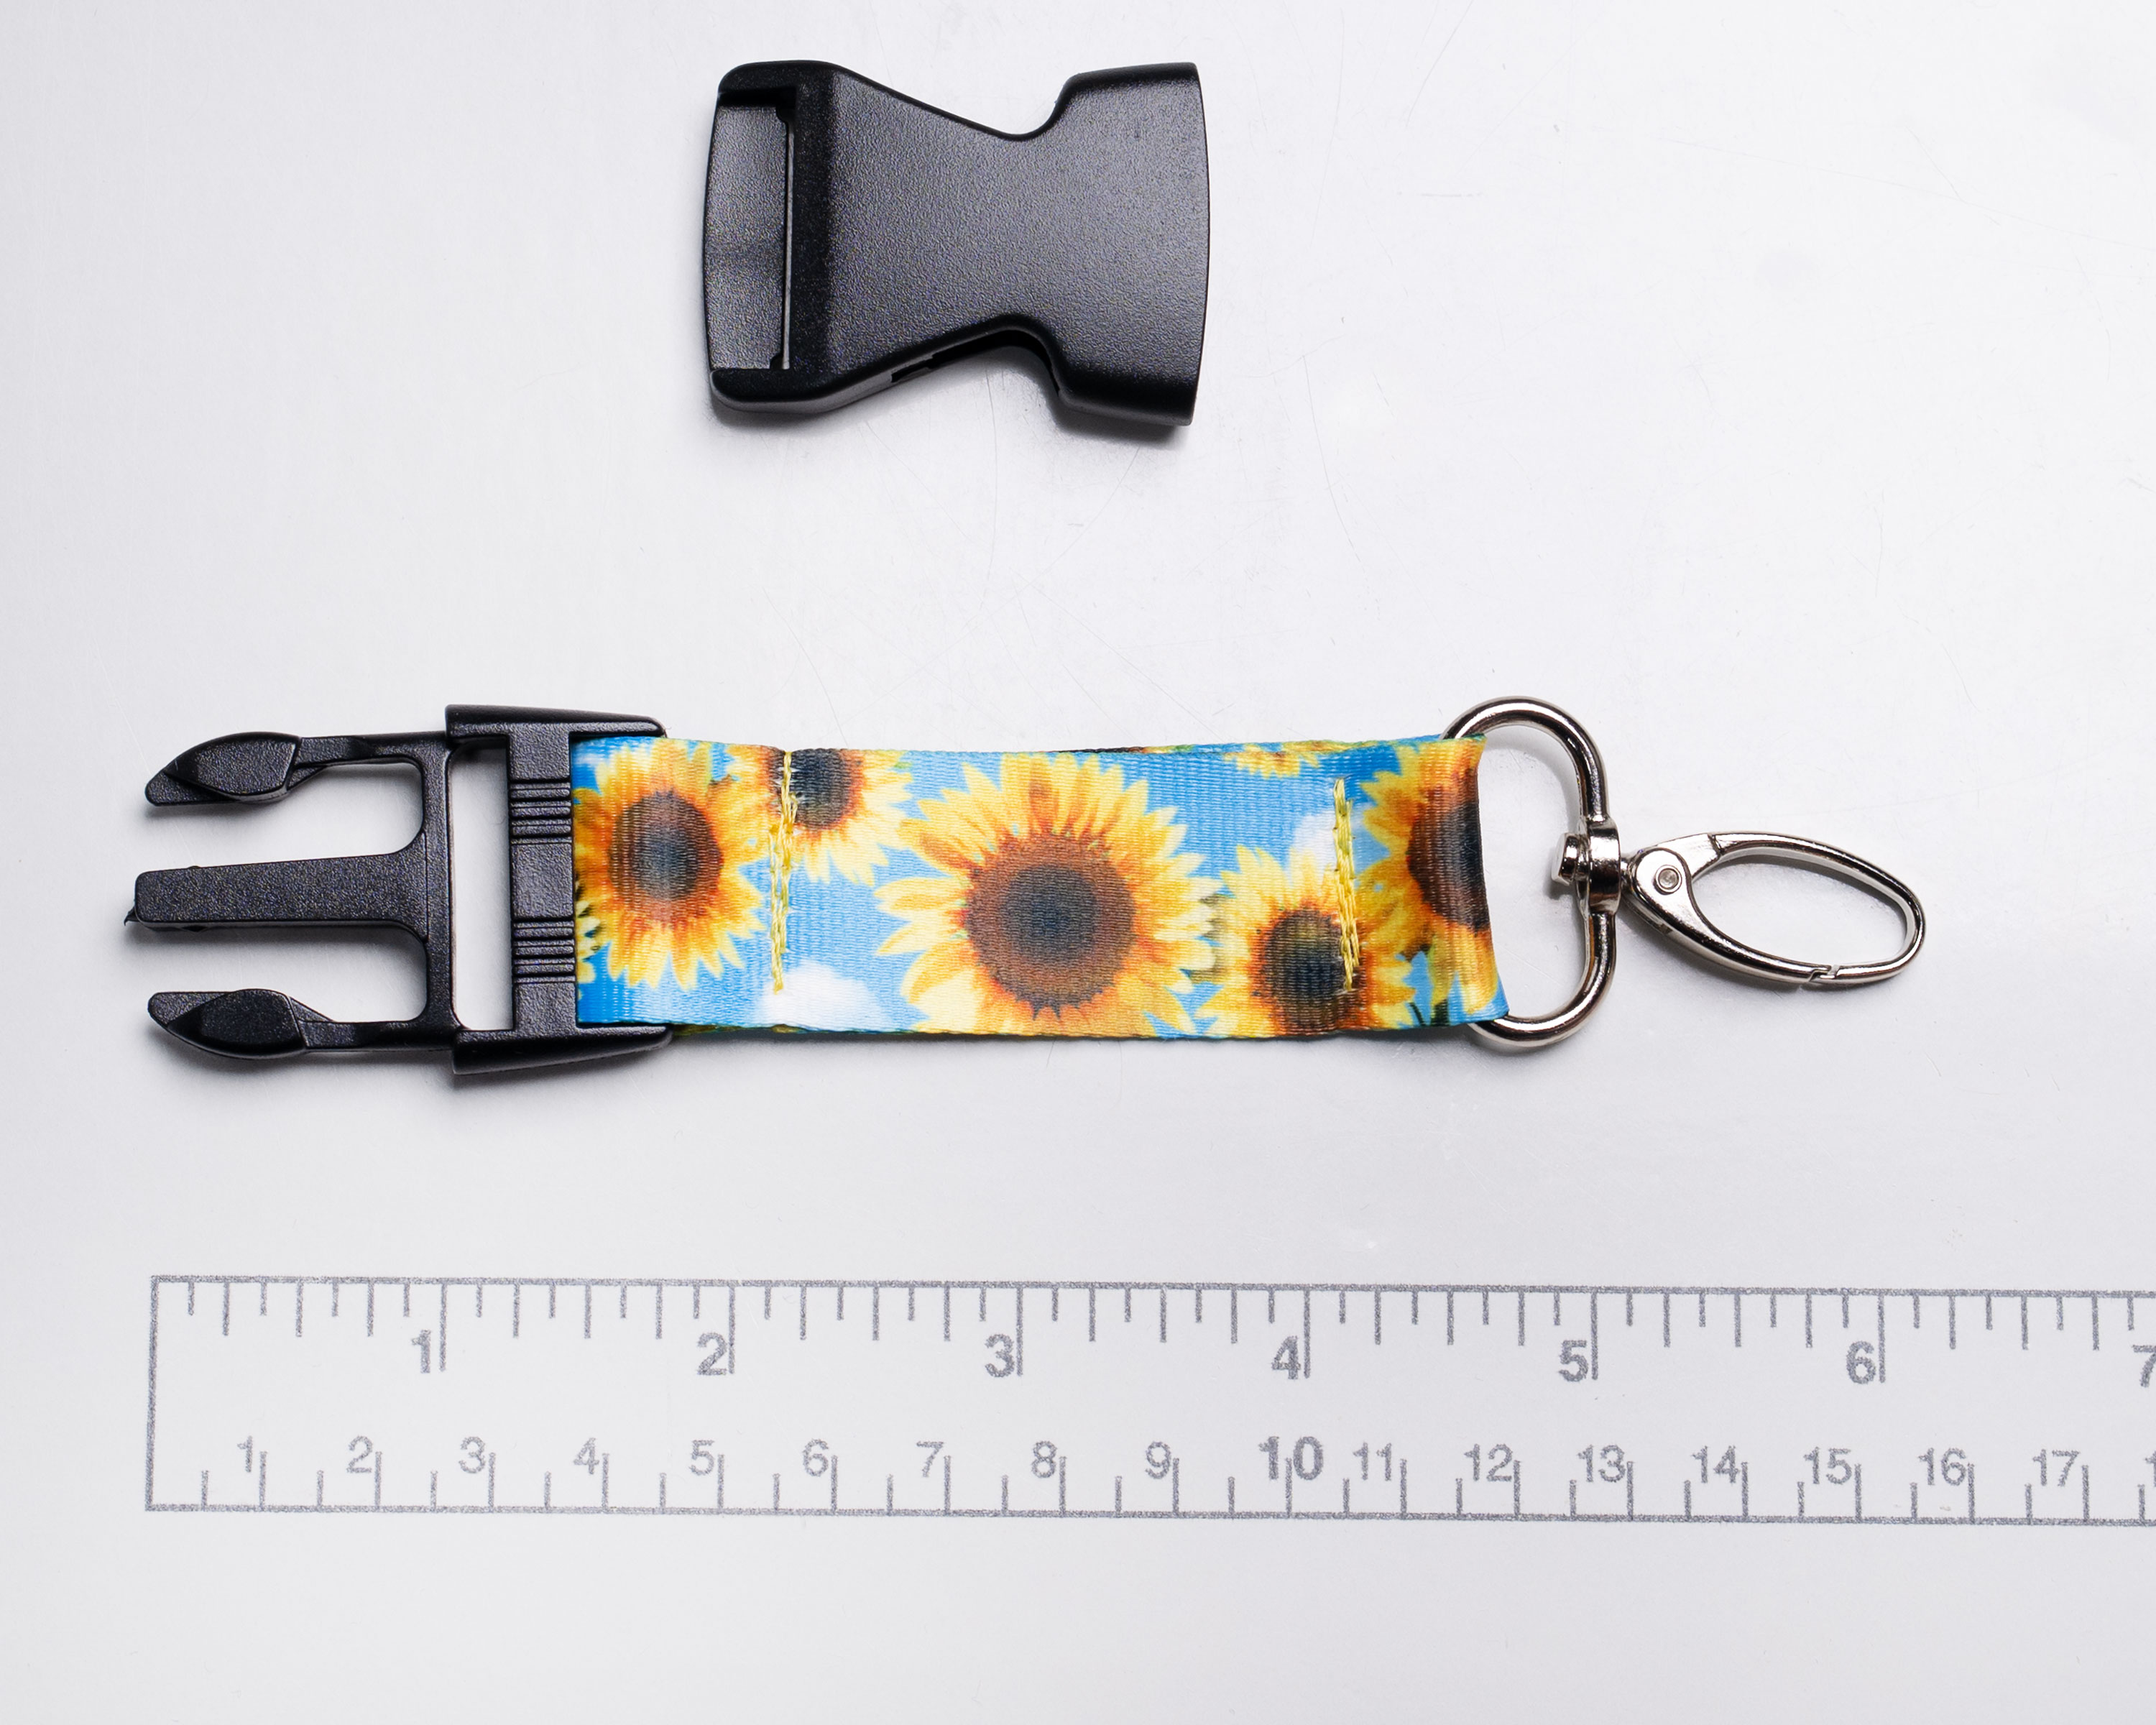
You should now have the male buckle piece with the snap hook securely attached, creating a strong and functional hardware section for your lanyard.
Step 5: Attach The Long Webbing Piece
Now it’s time to attach the main body of the lanyard using the 36-inch webbing piece.
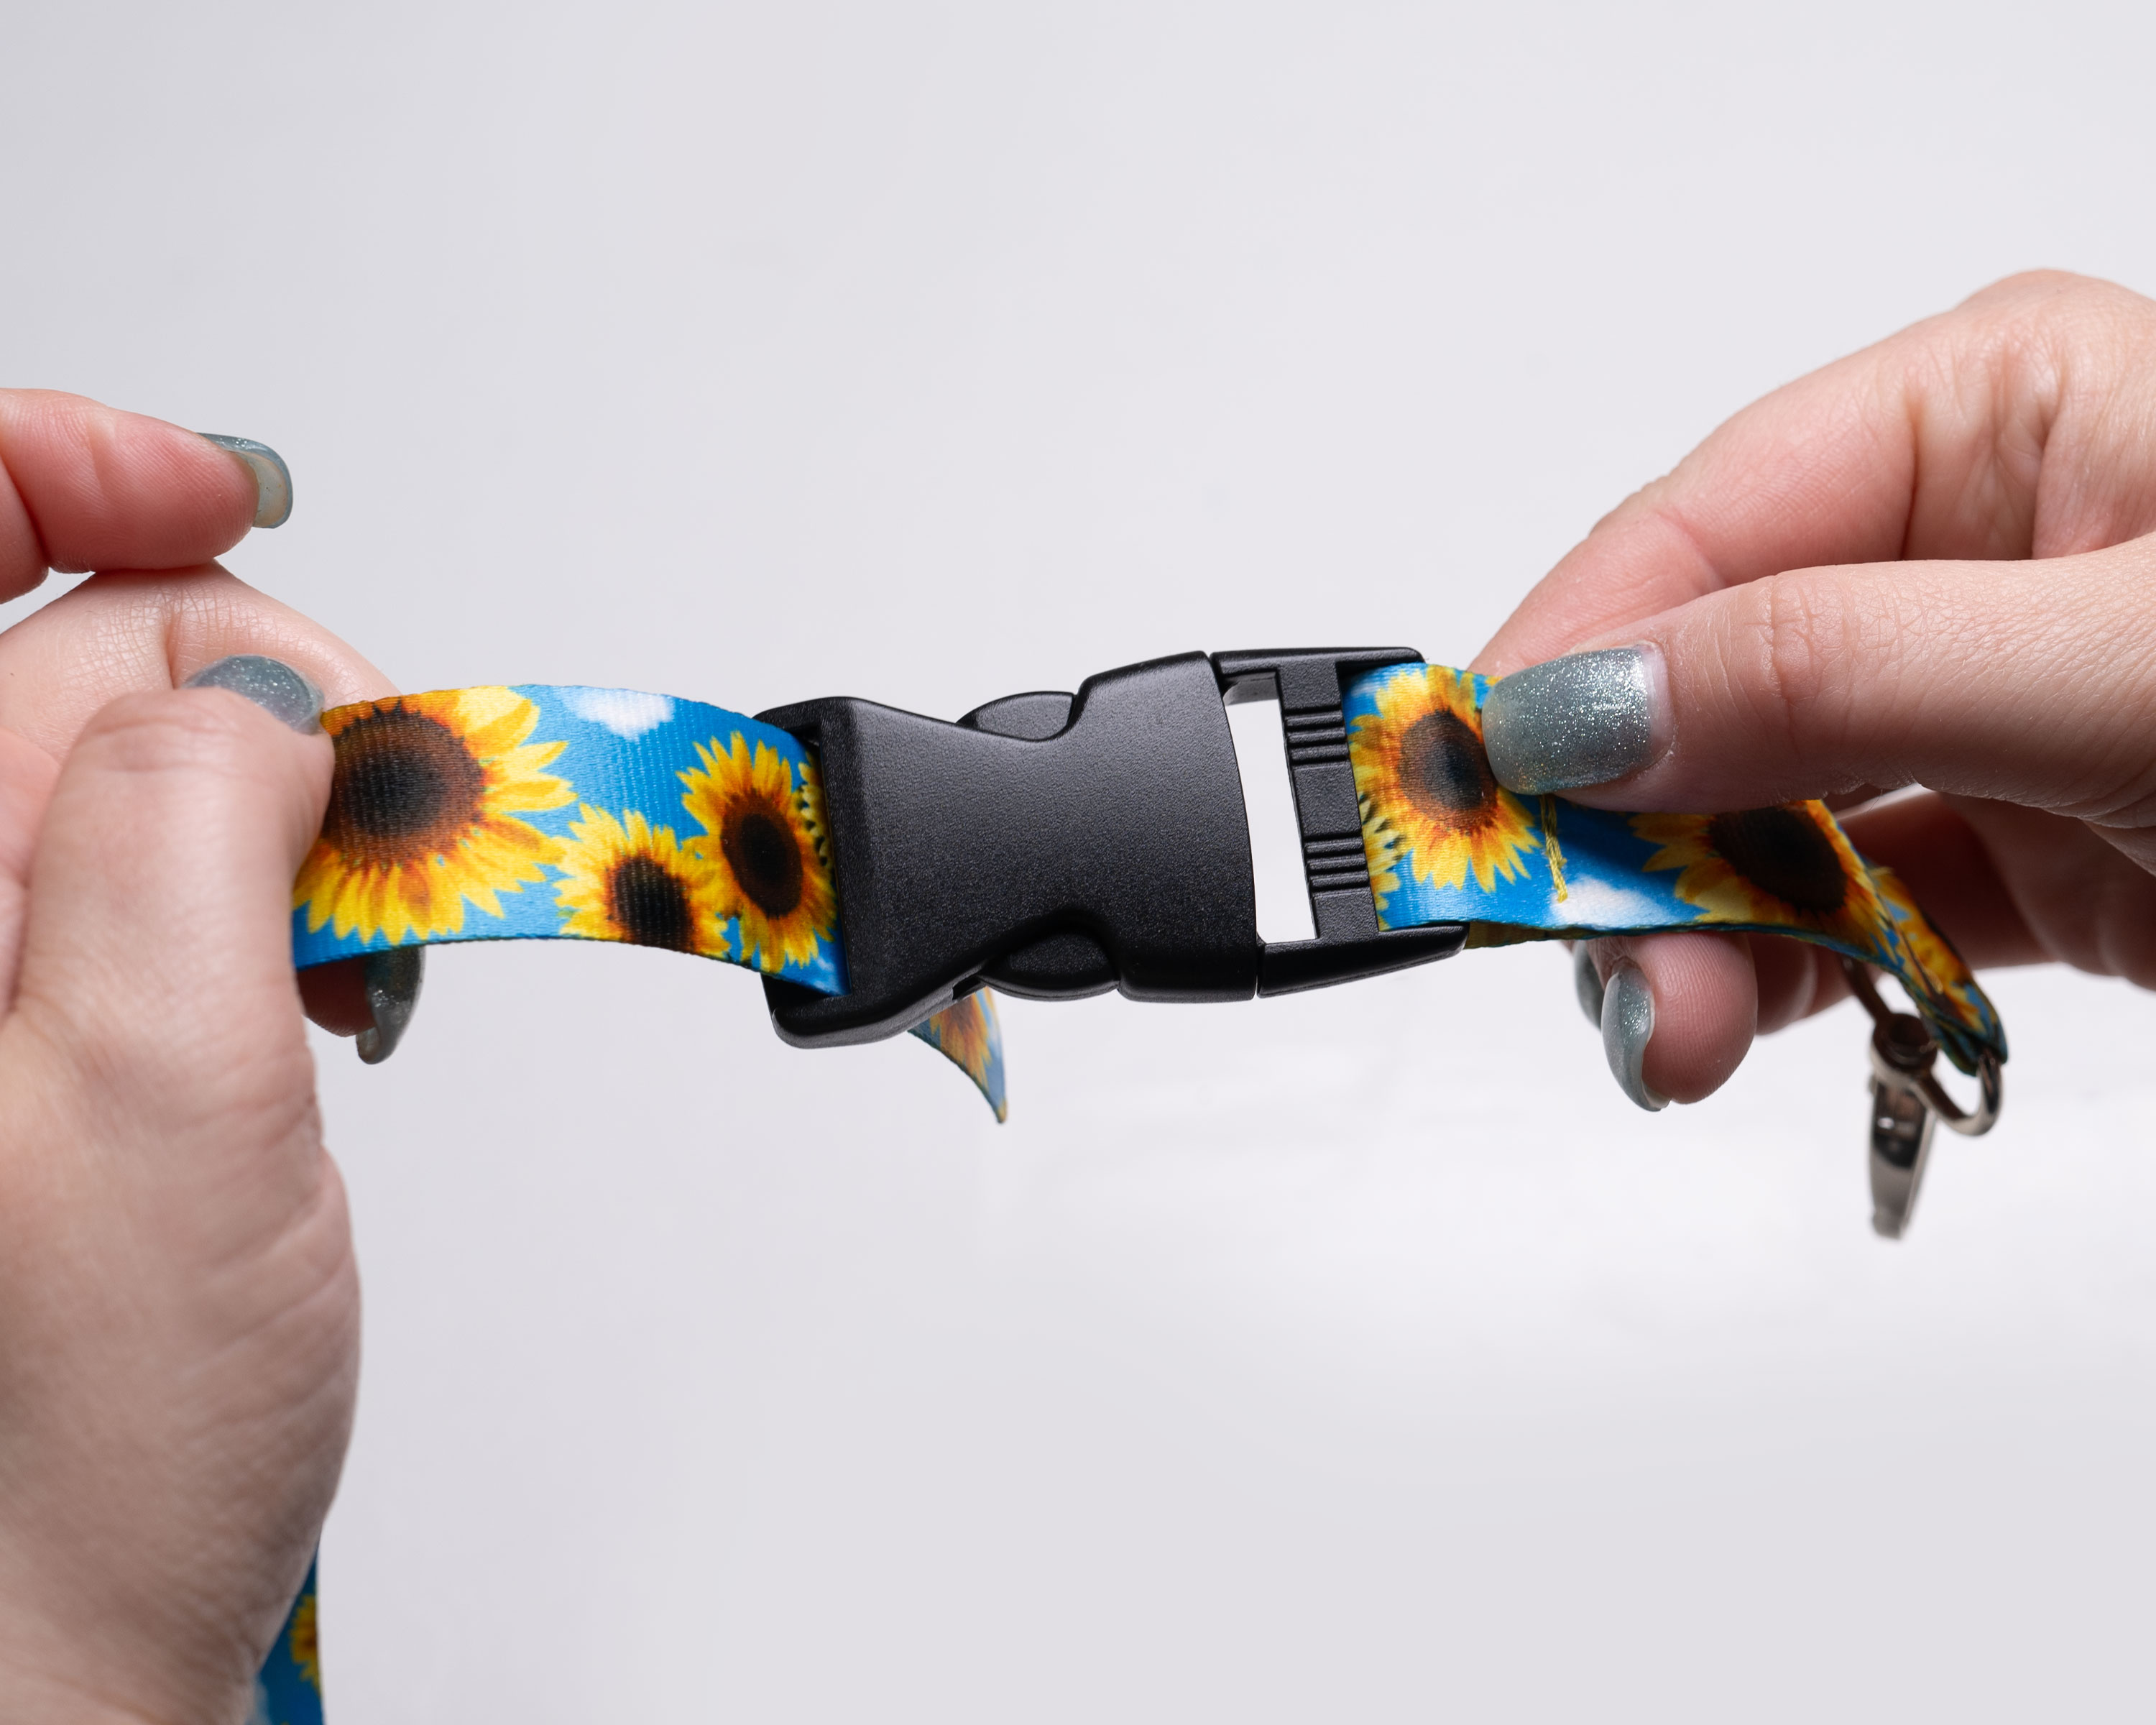
1. Connect the male buckle to the female buckle.
Snap the buckle together so it is fully secured. This helps ensure everything stays aligned properly as you assemble the full lanyard.
2. Take the 36-inch webbing piece.
Lay it flat on your work surface and make sure there are no twists along the length of the webbing. If your webbing has a printed or finished side, confirm it is facing the correct direction.
3. Insert one end into the female side of the buckle.
Thread the webbing through the slot on the female side of the buckle, pulling it through smoothly and keeping the webbing flat as it passes through.
4. Pull the webbing through until the ends meet evenly.
Adjust the webbing so both loose ends align. This will form the main loop of your lanyard and ensure the finished length is even on both sides.
Step 6: Create the Lanyard Loop
Form The Twist
1. Twist the end of the webbing you are holding.
Take one loose end and create a single, clean twist. This twist allows the webbing to lay flat when worn around the neck and prevents the lanyard from flipping outward.
2. Pull the twisted end inward so that about 2 inches remain exposed.
Guide the twisted section toward the overlapped area, leaving approximately 2 inches extending past the main body of the lanyard. This extra length will be secured in the final stitch.

3. Insert the twisted end between the two layers of webbing.
Tuck the twisted portion neatly between the front and back layers. Smooth the webbing so everything lies flat and aligned before moving on.
Set The Final Length
4. Adjust so the finished lanyard measures approximately 16 ½ inches long.
Lay the lanyard flat and use a ruler or measuring tape to confirm the finished length from the buckle to the top of the loop. Make any small adjustments now to ensure both sides are even before stitching.
Step 7: Final Stitch
This final stitch secures the entire lanyard together and locks the loop in place.
1. Sew through all three layers of webbing to secure the lanyard.
Position the overlapped section under your sewing machine foot and stitch straight across, making sure you are catching all layers evenly.
2. Stitch forward and back three times for durability.
Reinforcing this seam is important, as this connection supports the full weight of whatever is attached to your lanyard.
3. Trim any excess thread.
Carefully cut any loose threads for a clean, finished appearance.
4. Trim any excess webbing.
If any webbing extends beyond the stitched area, trim it evenly with scissors to create a smooth edge.
5. Carefully seal the cut edge with a lighter.
Lightly apply heat to the trimmed edge just until the fibers melt. This prevents fraying and gives the lanyard a polished, professional finish. Avoid overheating to prevent discoloration.
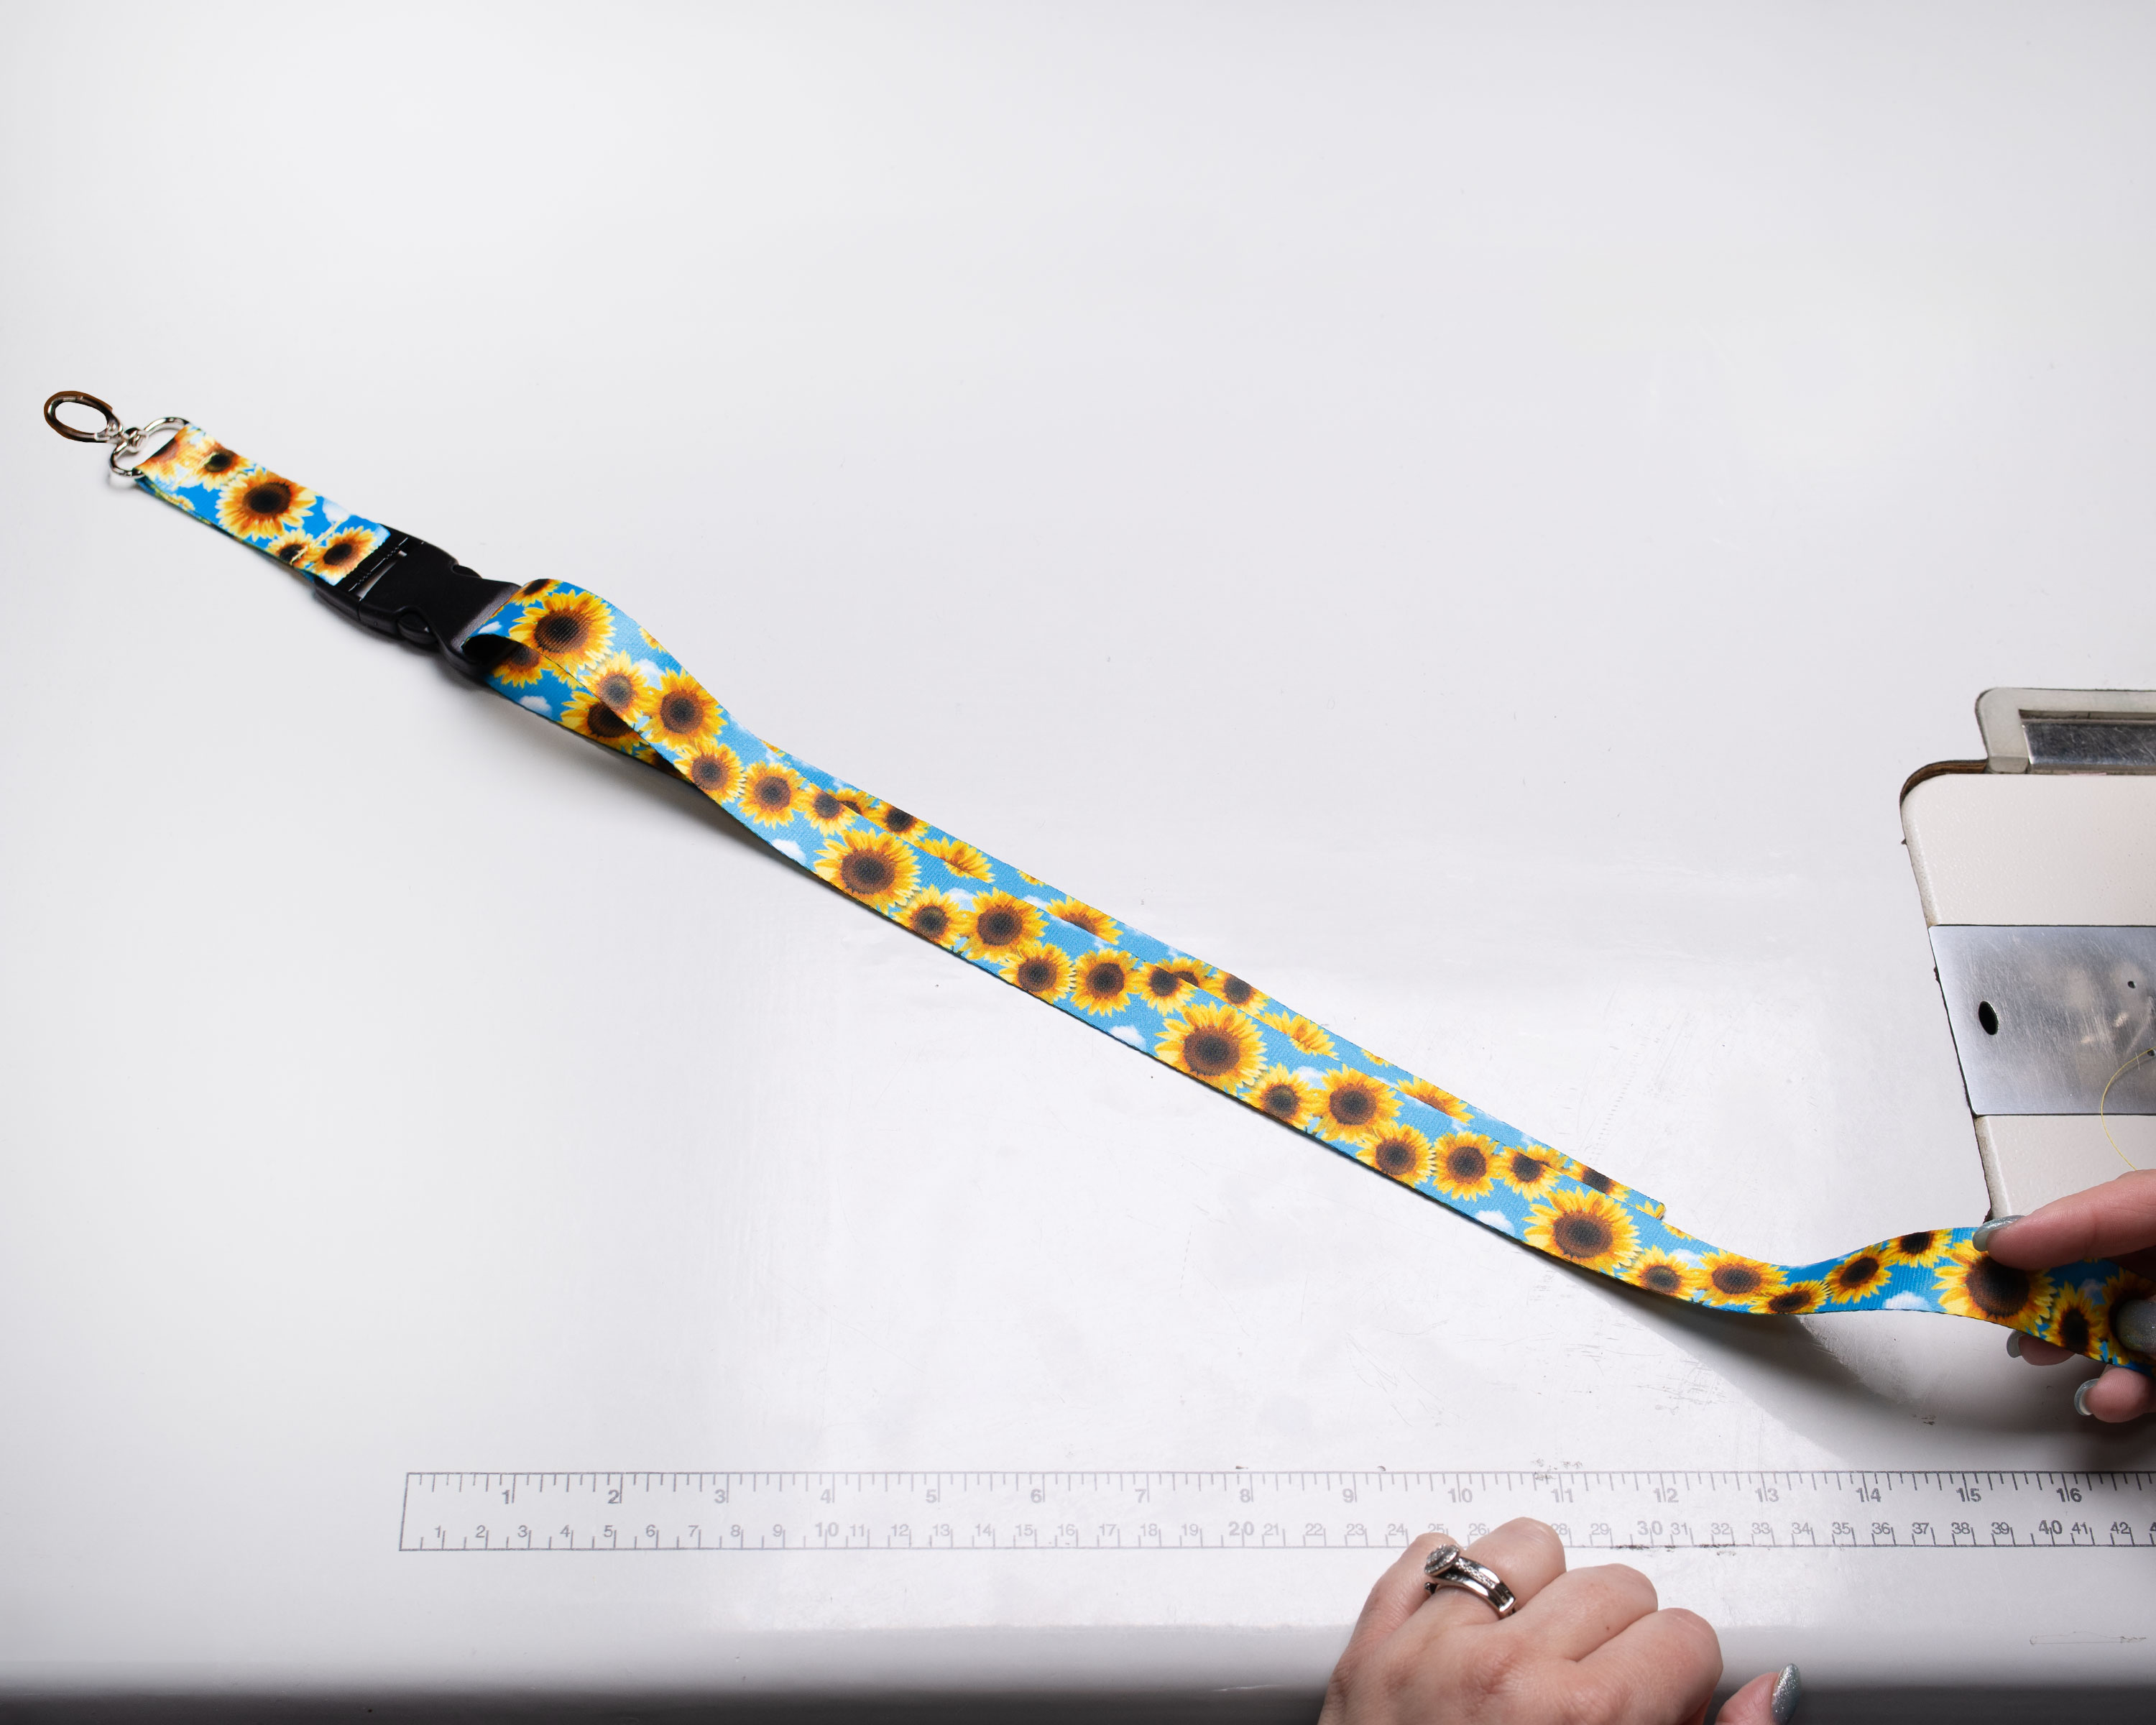
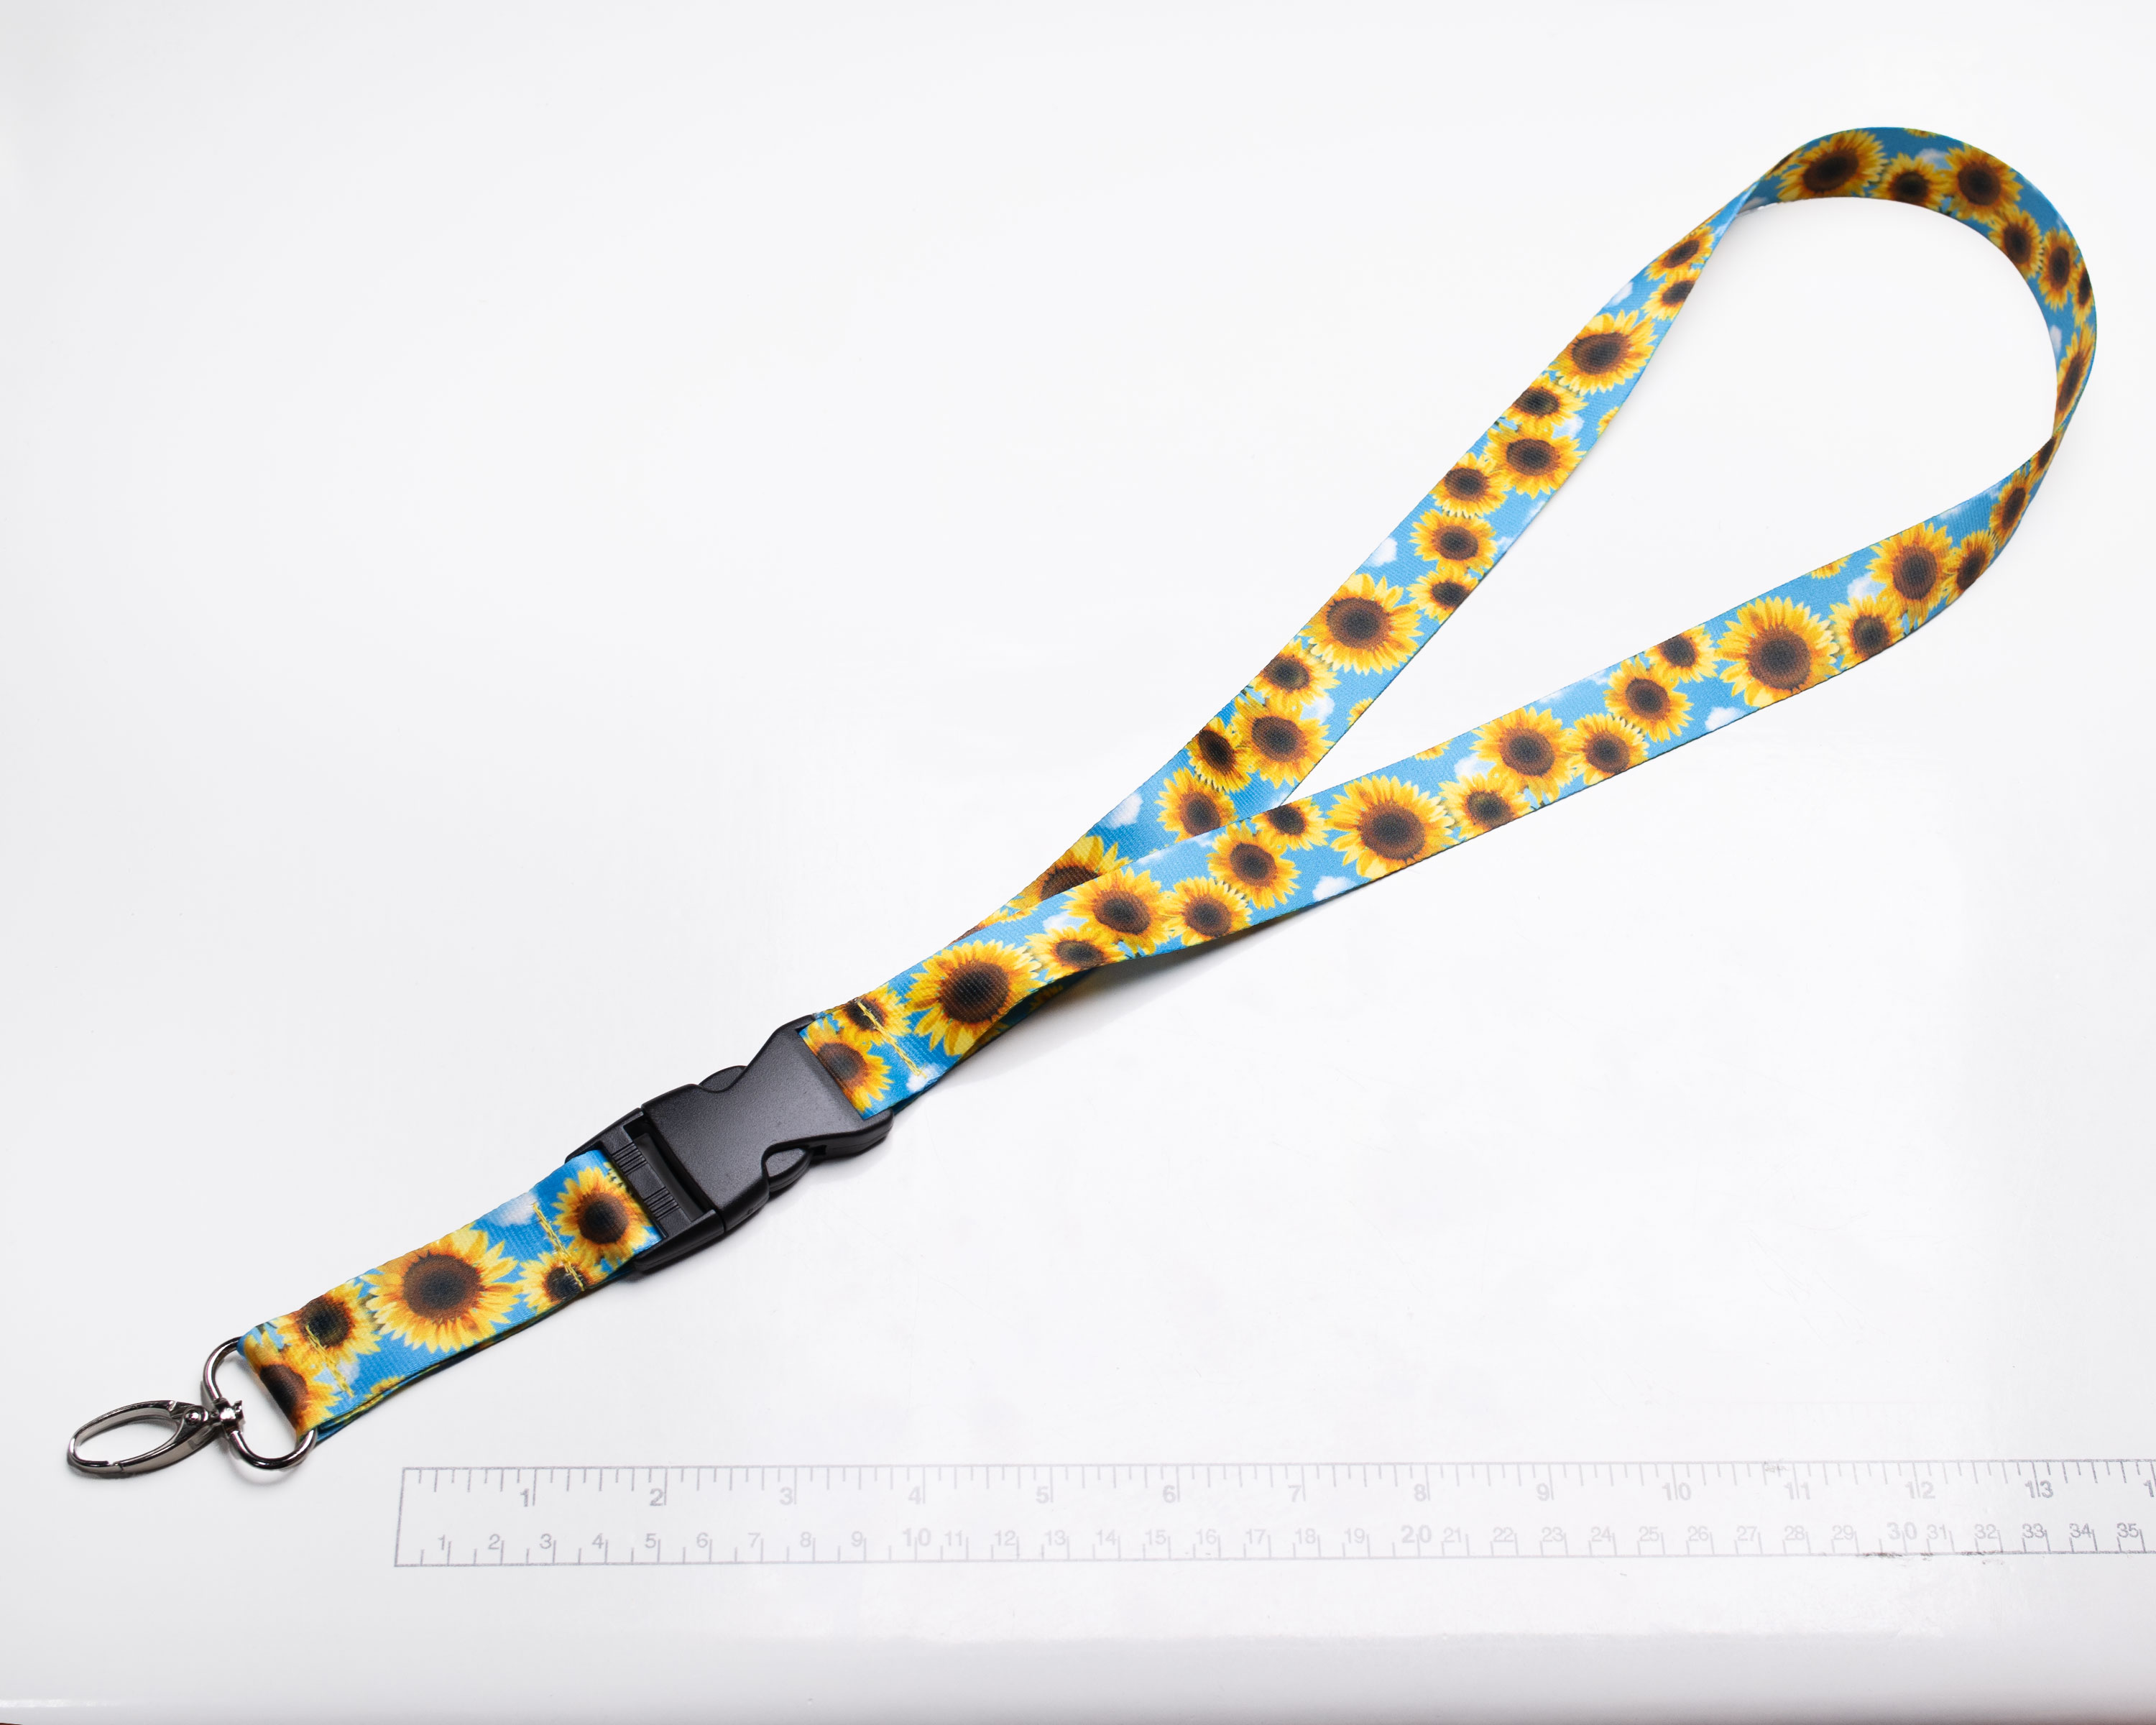
Finished Product
Your lanyard is now complete and ready to use! You’ve created a durable, functional lanyard that’s perfect for holding keys, ID badges, whistles, or small accessories.
Ready to make another?
Browse our selection of polyester webbing, side-release buckles, and snap hooks to create your next custom lanyard. With a wide variety of colors, patterns, and hardware styles available, it’s easy to design something that fits your exact project needs.
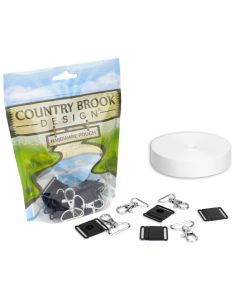
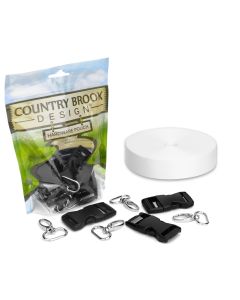
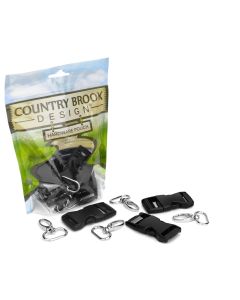
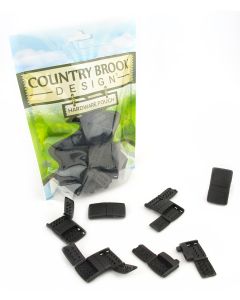
Prefer a Ready-to-Go Option? Try a Lanyard Crafting Kit
If you’d rather skip gathering individual components, our Lanyard Crafting Kits make it easy to get started. Each kit includes matching hardware designed to work perfectly with standard 1-inch or ¾-inch webbing — so you don’t have to worry about sizing or compatibility.
Depending on the kit you choose, you’ll receive:
- Snap hooks and side-release buckles
- Breakaway components
- Or complete sets that include Printable Heat Set Lanyard Polyester Webbing
✓ These kits are ideal for beginners, quick projects, craft nights, classrooms, or anyone who wants a convenient all-in-one solution.
✓ Everything is sized correctly and packaged together, making it simple to start your next lanyard project with confidence.
Browse our available kits below to find the one that fits your needs.