How to Make Suspenders

Stuck for a gift to make the man in your life? Make your own suspenders! Making gifts for the more masculine side of the family can be tricky. No stress though - with these great suspenders (braces to us Brits!), he'll be super smart and won't lose his trousers all at the same time!!
The best bit is that you can buy all the supplies to make your own suspenders in one place and in only a few steps you can whip up a pair in no time.
These would make an awesome Father's Day gift, or why not make them to match wedding colours for your wedding party?
Suspender (Braces) tutorial:
You will need:
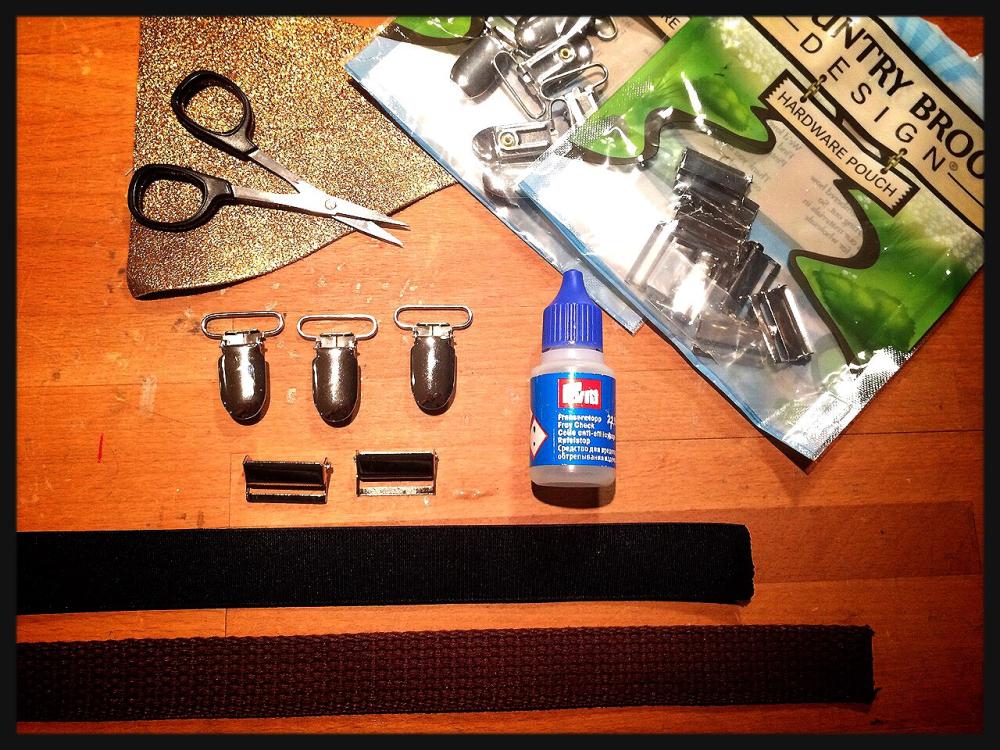
- 3 x Suspender clips
- Cotton webbing (I used 80"/ 104 cm)
- A small scrap of leather - this could be repurposed from a second hand purse or similar
- 2 x Suspender adjusters
- Thread to match the leather and webbing
- 1" Elastic ( I used 12"/ 31 cm)
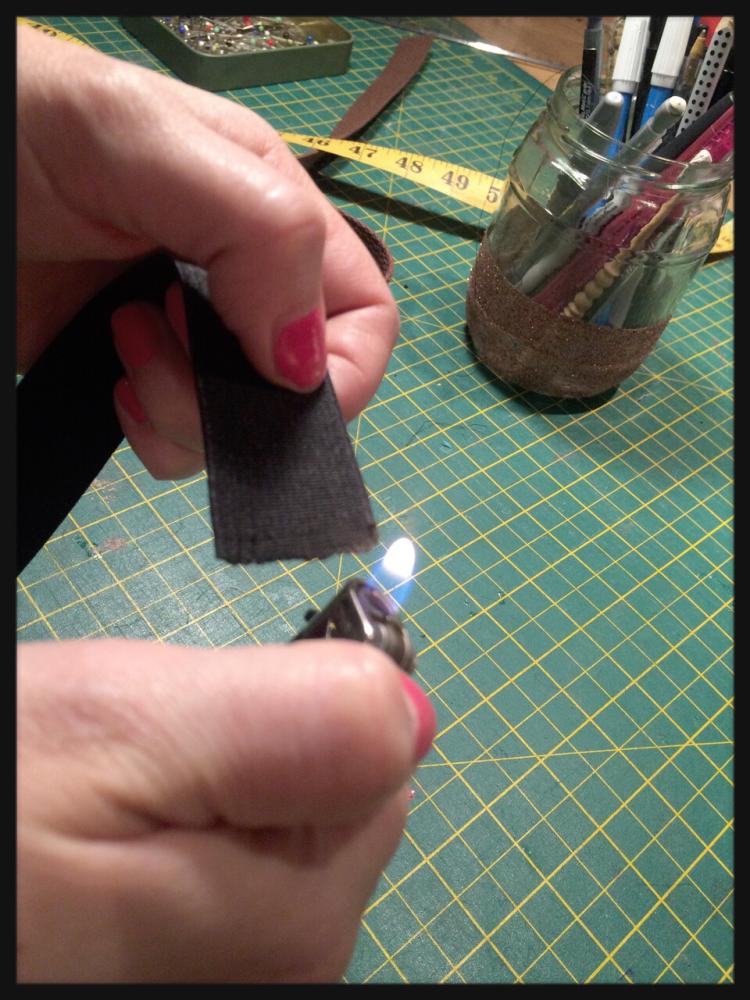
- A lighter
Step 1:
Measure the person who you'd like to make the suspenders for:
(If this isn't possible as it's a surprise, you can use the measurements I have used as a guide).
Measure how high you would like the leather connection at the back to be, then take off 1"/2.5 cm - this will be your elastic length.
Then measure for the adjustable section of the braces. To do this, measure from the center of his back at the trouser line and up and over his shoulders to the front (to the place where the suspender clips will clip to his trousers). Then add an extra length for the overlap for adjustment of the braces and also an extra 1" for seam allowance (where the webbing overlaps when it's sewn).
Step 2:
Once you have your measurements, cut the elastic and the two lengths of webbing.
To give you an idea, my suspenders were made using 12"/31cm of elastic and two lengths of 40"/ 52 cm of webbing. (These measurements include the seam allowances). These fit a 5' 11" tall man.
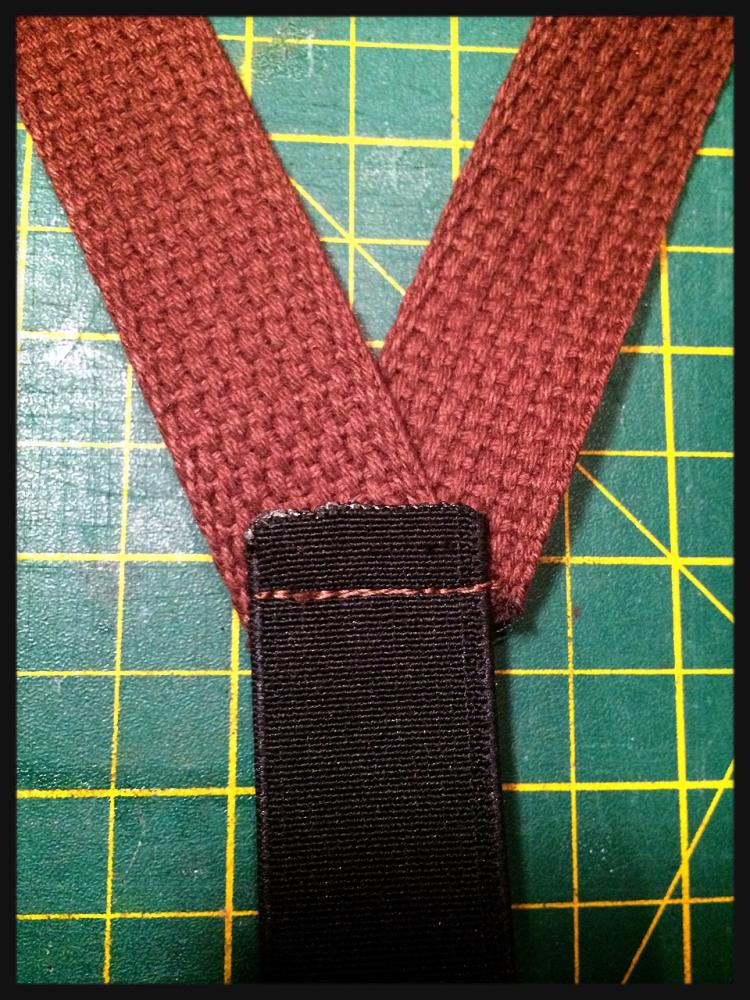
Step 3:
Pin the two bits of webbing at the angle that you'd like and pin the elastic over it. Stitch these pieces together.
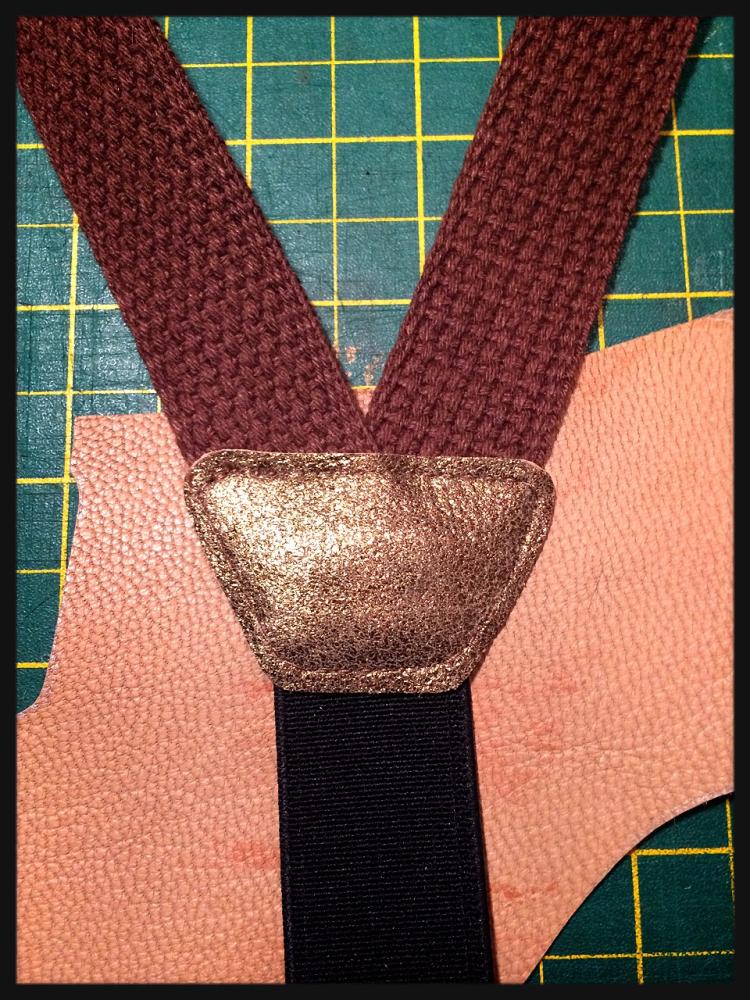
Then place the leather shape you have just cut out over these three lengths and another piece of leather (larger than the leather shape) underneath. Stitch through all of these along the edge of the leather shape. Trim the underneath layer of leather to match the top shape.
Step 4:
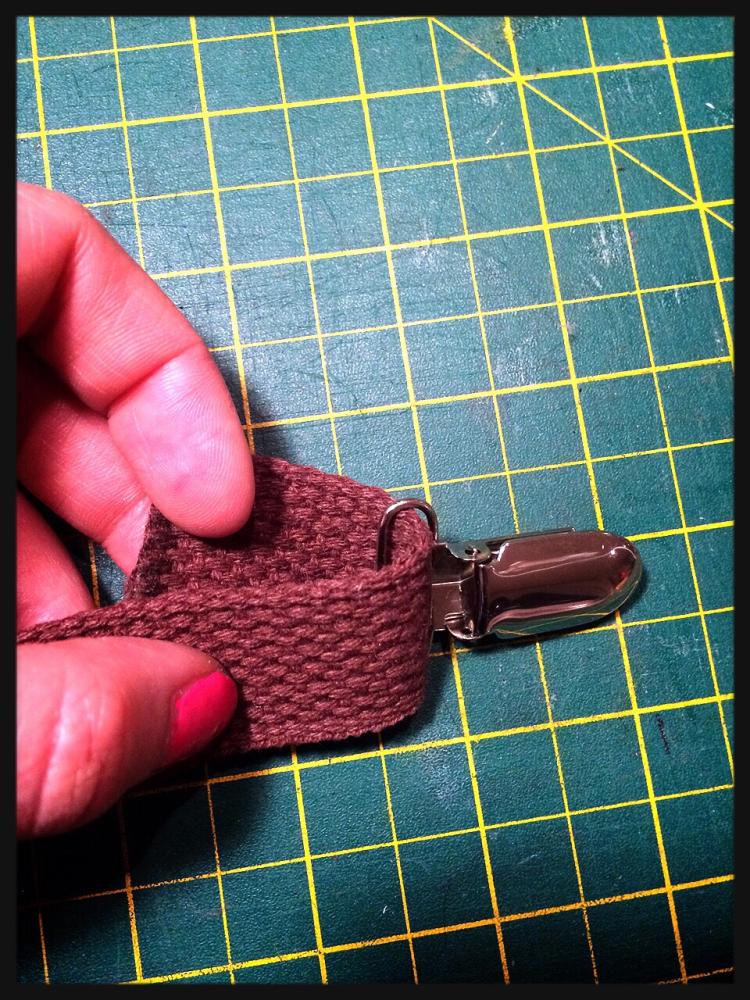
Thread the webbing through the suspender adjusters, then through the suspender clips...
...and back through the adjusters.
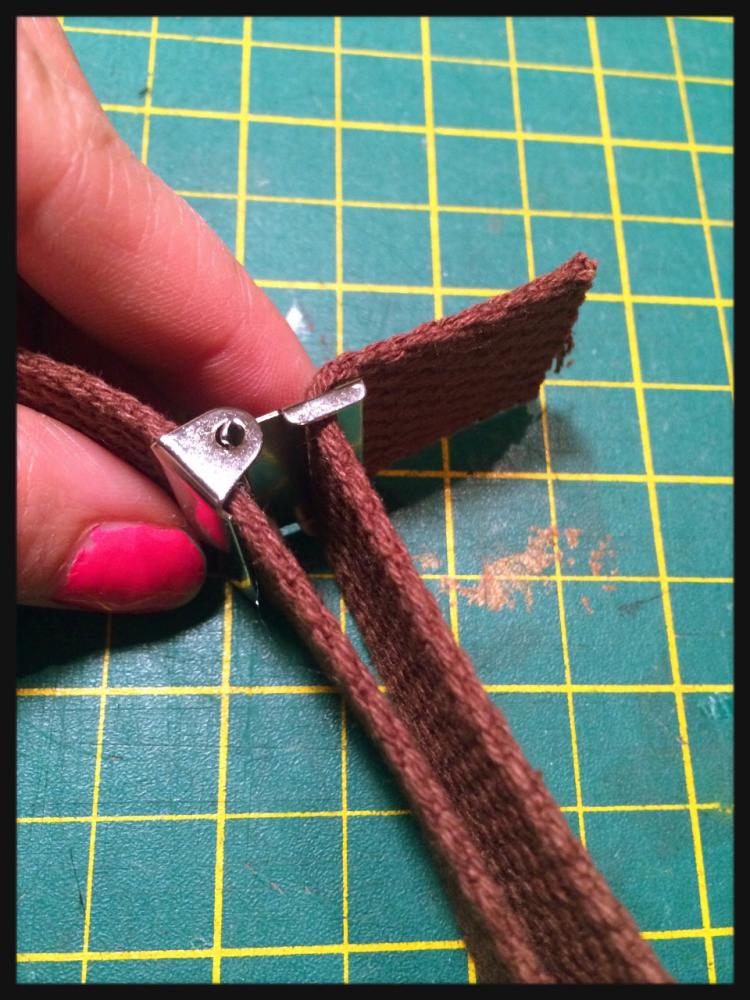
Finally, stitch the webbing to itself so that it forms a loop around the adjuster. (I stitched a barn door configuration which is the strongest way to stitch webbing to itself).
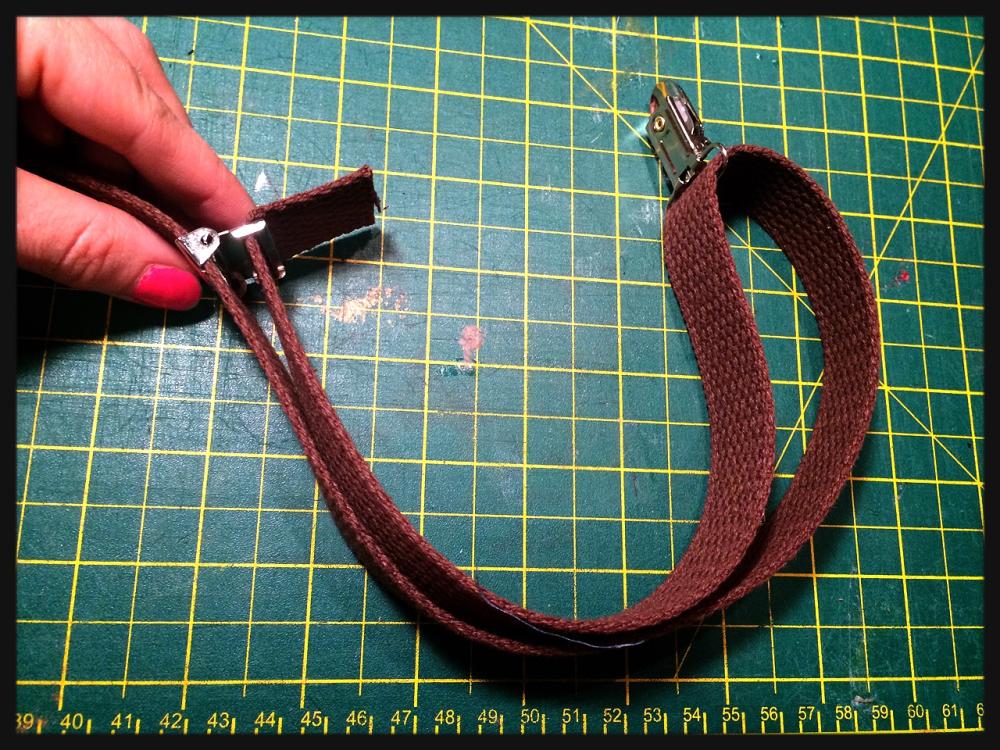
You can then adjust the length at the front of the suspenders to fit perfectly.

Have you made anything cool with Country Brook Design's supplies? We'd love to see it and hear about it, please do let us know