
How to Make Bag Straps That Look Store-Bought
The difference between a handmade bag that looks homemade and one that looks professionally crafted often comes down to one detail: the strap. A well-made strap transforms the entire piece. It signals durability, careful construction, and a real understanding of how things are built to last.
Getting there isn’t about expensive equipment or years behind a machine. It comes down to understanding a few key principles, choosing the right materials, and following techniques that account for how straps actually get used. A strap that looks polished is usually one built with attention to structural integrity, clean finishing, and thoughtful hardware placement.
At Country Brook, we’ve spent over two decades in Moulton, Alabama supplying webbing and hardware to everyone from small-batch bag makers to large production operations. The guidance below reflects what we’ve seen work, again and again, in real bags made for real use.
Choose the Right Foundation Material
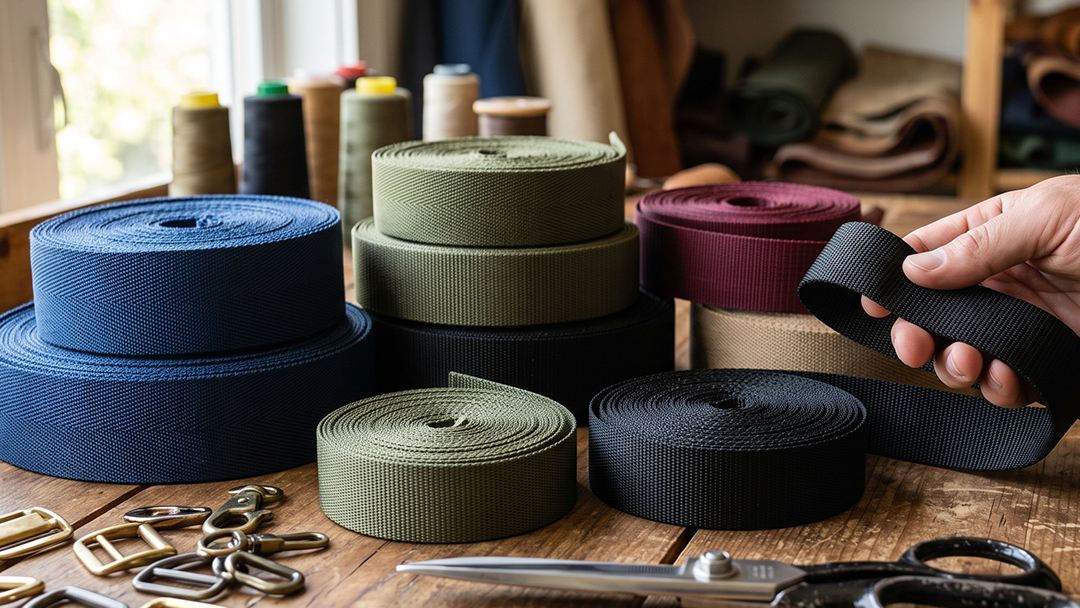
The foundation of any strap determines how it performs over time. Fabric straps can work for lightweight bags, but they stretch, fray, and lose shape under repeated use. Webbing is designed specifically to bear weight without deforming.
Not all webbing is equal. Polypropylene webbing is affordable and widely available, but it tends to feel stiff and can become brittle with extended sun exposure. Nylon webbing is softer, more flexible, and handles moisture and UV exposure considerably better.
For bags that will see heavy use or outdoor conditions, nylon webbing in 1-inch or 1.5-inch widths offers the strongest combination of durability and shoulder comfort.
The weave matters too. Tubular webbing has a softer hand and rounded edges, which makes it more comfortable to carry. Flat webbing with a tight weave resists fraying and holds a cleaner edge when cut and finished.
When sourcing webbing, look for material that feels dense and consistent. A loose weave may look fine at first but tends to separate or pill with repeated handling. After handling as much webbing as we have across our years in this business, quality reveals itself fast.
Webbing that feels substantial in your hand, holds a clean edge when cut, and maintains consistent width across the full length will always outperform budget alternatives that cut corners on construction.
Cut and Finish Edges Cleanly
One of the clearest signs of rushed construction is a frayed or unfinished strap end. Even if the rest of the bag is well-made, raw edges undermine the whole impression.
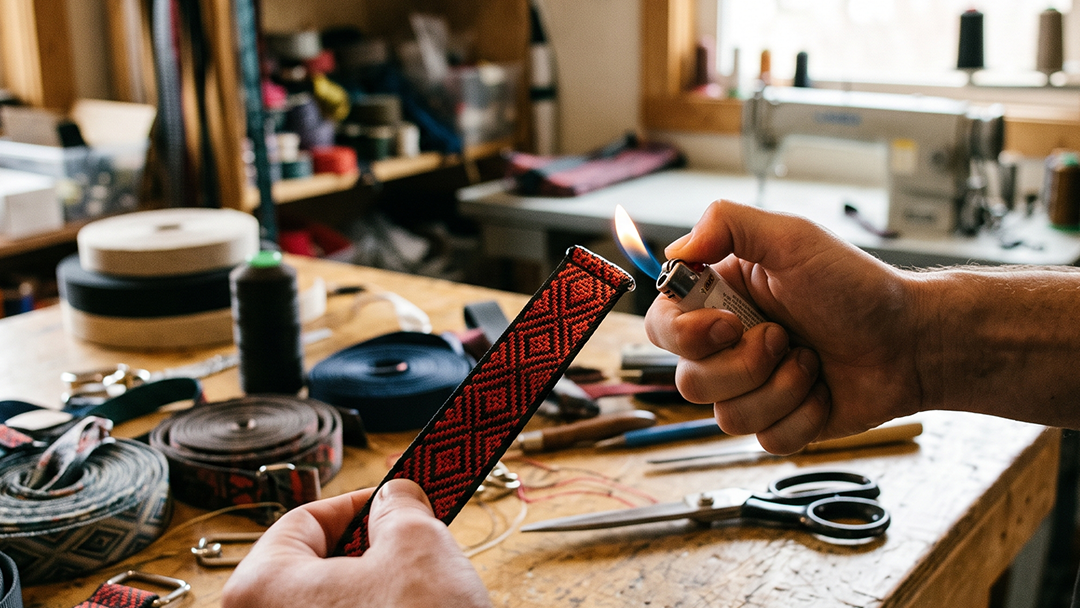
For synthetic webbing like nylon or polypropylene, a quick pass with a flame seals the cut edge and prevents fraying. Use a lighter or heat tool and move quickly, just enough to melt the fibers without creating a hard, uneven bead. Practice on scrap first.
Too much heat produces a stiff, unattractive ridge. Too little leaves loose fibers that will keep fraying.
Natural fiber webbing like cotton can’t be heat-sealed. Instead, finish the edges with a tight zigzag stitch, or fold the raw edge under and secure it with a straight stitch. If the webbing will be hidden inside hardware or a fold, a simple backstitch at the cut point is enough to prevent unraveling.
Clean edges aren't just cosmetic. They prevent the strap from catching on hardware, clothing, or bag contents. A sealed or stitched edge tells you the maker understood how materials behave and took the time to account for it.
Use the Right Hardware
Hardware makes or breaks a strap’s appearance. Mismatched finishes, flimsy clips, or poorly sized rings create visual noise and undermine otherwise solid construction.
Choose hardware that matches the scale of your strap. A 1-inch strap needs 1-inch hardware. Oversized clips look clumsy. Undersized rings stress the webbing and create failure points. Swivel clips, D-rings, slider buckles, and rectangle rings all need to be proportional to strap width to function and look correct.
Metal finish should be consistent across all hardware on a single bag. Mixing antique brass with nickel-plated steel looks unintentional. Stainless steel and nickel-plated hardware offer clean, modern finishes. Antique brass or gunmetal read warmer and more vintage. Pick based on the aesthetic you’re building toward, and stay consistent.
Hardware quality matters just as much as finish. Thin metal bends under stress. Poorly welded rings develop gaps. Plastic clips crack. Solid, well-made hardware doesn’t add much to material cost, but it significantly improves durability and the finished look.
We stock our hardware to a standard we’d want on our own bags, and it shows in how our customers’ work holds up over time.
Secure Hardware with Reinforced Stitching
High-quality hardware will still fail if it isn’t attached securely. The connection points between strap and hardware take the most stress, so those areas need reinforcement.
The standard method for attaching webbing to hardware is the box-and-X stitch. Fold the webbing through the hardware, overlap the cut end over the main strap by at least 1.5 inches, and stitch a rectangular box around the perimeter of the overlap. Then stitch an X from corner to corner inside the box.
This distributes stress across multiple thread paths and keeps the strap from pulling free under load.
Use a heavy-duty thread, bonded nylon or polyester, in a weight appropriate for your material. For webbing, size 69 or 92 thread works well paired with a size 16 or 18 needle. Backstitch at the start and end of every seam to lock the thread.
For bags that will carry significant weight, consider a second row of stitching around the box perimeter, or a bartack if your machine has the capability. Bartack stitching creates a tight, dense block of thread that handles repeated stress without breaking down. This is the kind of detail that separates a bag built to last from one that just looks that way at first glance.
Finish Straps with Consistent Topstitching
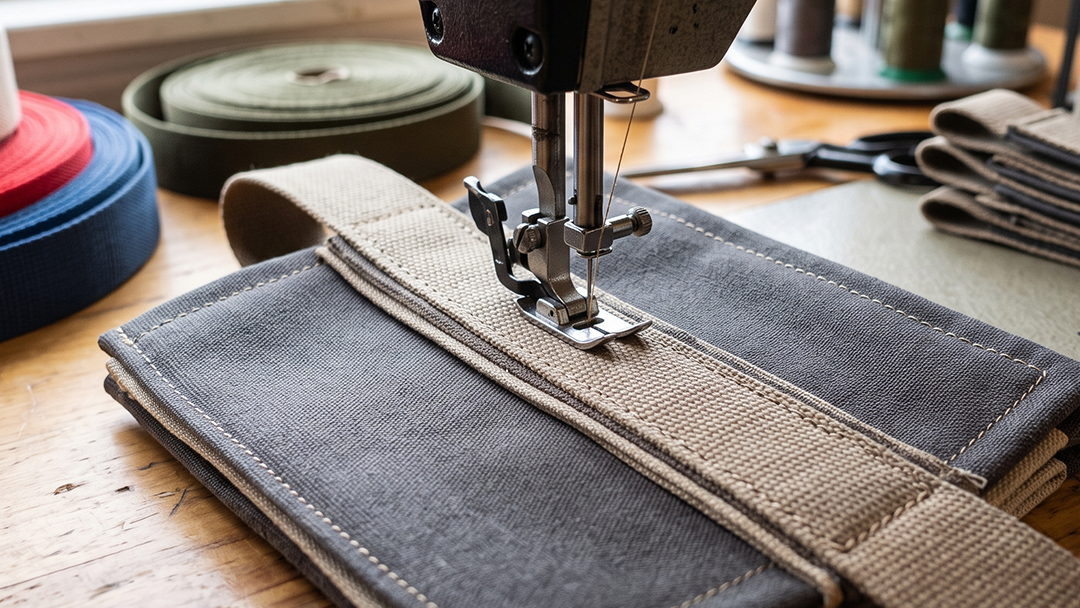
Topstitching along the length of the strap adds both visual refinement and structural stability. It prevents the strap from twisting under load and gives the whole piece a cleaner, more deliberate appearance.
For padded straps, fold fabric over foam or batting, encase the webbing, and topstitch along both edges. Keep the stitching lines parallel and evenly spaced from the edge. A walking foot or even-feed foot keeps the fabric from shifting as you sew.
For unpadded straps, a single or double row of topstitching along each edge of the webbing prevents curling and sharpens the finished look. Match the thread to the webbing for a subtle effect, or use a contrasting color as an intentional design detail.
Consistency is what makes topstitching work. Uneven lines, wandering thread paths, or skipped stitches draw the eye directly to the problem. Go slowly. Guide the fabric rather than pushing it. If a line looks crooked, it’s usually worth pulling it out and resewing. The extra few minutes show.
A Note for the Intentional Maker
If you’re someone who thinks about why you make and not just what you make, straps are worth slowing down for. They’re functional, yes, but a well-constructed strap also carries information about how much care went into a bag, about whether the maker understood the materials, and about whether the whole thing was built to be used or just to be sold.
We work with a lot of makers who’ve moved away from fast craft, who are choosing materials with purpose and building things they expect to last. For that kind of making, the sourcing matters.
Knowing that the webbing in your strap came from a supplier who’s been handling this material for over twenty years in a small Alabama town isn’t just a nice story. It means someone along the supply chain cared enough to stock it right.
The techniques in this post aren’t shortcuts. They’re the slow way done correctly. That’s the point.
Test the Strap Under Real Conditions
A strap that looks good hanging on a hook may behave differently when loaded with weight or worn for an extended stretch. Before calling a project finished, test the strap as it will actually be used.
Load the bag with weight comparable to what it will carry in real use.
Wear it for a few minutes.
Does the strap twist?
Does the hardware shift or dig into your shoulder?
Does the stitching hold without puckering or pulling?
If the strap feels uncomfortable, consider widening it or adding padding. If it twists, check that the topstitching is evenly distributed and that the webbing wasn’t cut on a bias. If the hardware feels unstable, reinforce the attachment points.
Testing isn’t about chasing perfection. It’s about understanding how your materials and construction actually perform and making adjustments before the bag goes out into the world. That kind of iteration is how skill builds.
Frequently Asked Questions
What is the best width for a bag strap?
The right width depends on the bag’s weight and how it will be carried. For lightweight tote bags, 1-inch webbing is usually sufficient. For heavier bags or crossbody styles, 1.5-inch or 2-inch webbing distributes weight more comfortably across the shoulder. Wider straps reduce pressure and feel more stable under load.
Can I make a padded strap without a sewing machine?
Hand-sewing a padded strap is possible but time-intensive. You’ll need a strong needle, heavy-duty thread, and patience. A saddle stitch or backstitch works well for securing fabric around padding. A sewing machine makes the process faster and produces more consistent results, especially for topstitching.
How do I prevent my strap from twisting when I wear the bag?
Twisting is usually caused by uneven weight distribution or insufficient topstitching. Adding a row of stitching along each edge of the strap helps it hold its shape. Make sure the strap is also attached to the bag in a way that allows it to hang naturally without torque.
What type of thread should I use for stitching webbing?
Bonded nylon or polyester thread in size 69 or 92 is the right choice for webbing. These threads are strong, resistant to UV and moisture, and hold up under repeated stress. Use a size 16 or 18 needle designed for heavy fabrics to avoid skipped stitches or thread breakage.
How much webbing do I need for a crossbody bag strap?
Measure from where the strap will attach on one side of the bag, over your shoulder, and down to the attachment point on the other side. Add at least 6 to 8 inches for hardware attachment and adjustments. For an adjustable strap, you may need additional length depending on the hardware design.
Troy has helped Country Brook Craft Supply support their community of makers, crafters, sewers, small businesses, and DIYers from the Moulton, Alabama shop for over 15 years.


