How To Make A Martingale Collar
Updated November 8th, 2024
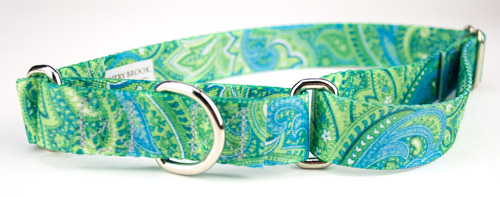
Take a close look at a Martingale dog collar. Notice the two loops, a D-ring, a tri-glide slide for adjustment and two rectangle rings. The larger loop lies against your dog's throat area and the smaller loop rests on the top of your dog's neck. When the short loop is pulled, the large loop is affected. This is what keeps your dog from slipping a collar and it works unbelievably well!
Depending on where you buy retail collars, you may not be familiar with a Martingale collar for dogs. To learn more, read A Martingale for Dogs on Country Brook Craft Supply's blog.
If you are the do-it-yourself type, you make dog collars to sell to pet owners, or if you want to make a donation to your local shelter, you really should try making a Martingale using our easy-to-follow tutorial. All you need is some hardware, webbing material, and our clear written instructions below that include great photos for every step of the way. You've got this!


Before You Begin
Our How To Make A Martingale Dog Collar guide assumes you are already familiar with the use of your sewing machine. If you are not, please familiarize yourself with its basic operation before continuing.
Necessary Stitches
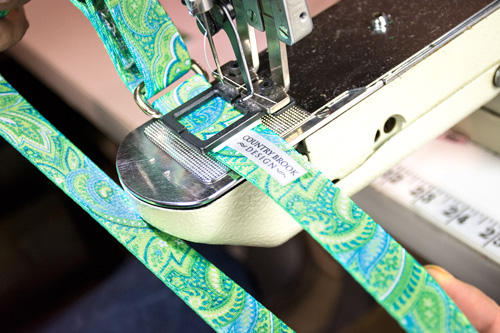
Time to review your stitching. These stitches will be used in a minute to create a secure and sturdy dog collar. If you are a new sewer, you may want to practice these stitches on some scrap fabric before trying it on your new dog collar. You'll need to be able to perform both a Triple Stitch and a Box Stitch.
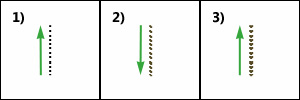
Figure 1: Triple Stitch
- Stitch forward about 1".
- Next, backstitch the same length.
- Now, stitch forward the same length.
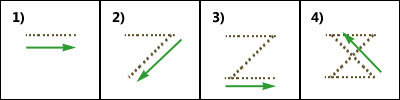
Figure 2: Box Stitch
- Perform a triple stitch.
- Turn piece diagonally ~45° and backstitch.
- Next, perform another triple stitch.
- Turn piece diagonally again ~45°. Close the "box" by stitching back to your original stitches.
Supplies Needed To Make A Martingale Dog Collar:
- 2 Lengths of Nylon Webbing *
- 2 Rectangle Rings *
- 1 Triglide Slide *
- 1 D-Ring *
- Sewing Machine
- B69 sewing thread in your choice of color
- Scissors
- Measuring Tape
- Lighter
- Optional: your choice of fabric

* You can shop for these items individually or just pick up our easy Do it Yourself Dog Collar Kits that includes a printed copy of these instructions.
You will need to determine what your dog's collar size is so that you can cut your materials to the correct lengths.
Refer to this chart to determine the correct lengths for webbing:
| Collar Size | Small Loop | Large Loop | Webbing Width | Neck Size |
| Extra Large | 12" | 35" | 1" | 23" - 31" |
| Large | 12" | 29" | 1" | 18" - 26" |
| Medium | 12" | 24" | 3/4" or 1" | 15" - 21" |
| Small | 9" | 19" | 3/4" | 11" - 15" |
| Extra Small | 8" | 17" | 5/8" | 9" - 12" |
| Mini | 6" | 12" | 3/8" | 7" - 10" |
Your hardware size needs to match the webbing width for your particular collar. For example, if you are constructing a medium collar, you can choose to use either 3/4" or 1" rectangle rings, triglide, and D-ring but you should use matching 3/4" or 1" webbing for the same rectangle rings, triglide, and D-ring sizes.
Prepare Your Webbing
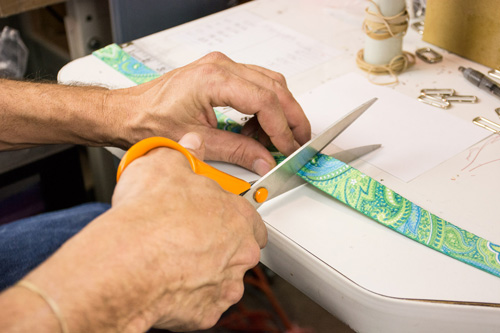
1. Cut Fabric For The Large And Small Loops
Refer to the table above for correct measurements. Cut your webbing to length. Remember to measure twice and cut once!
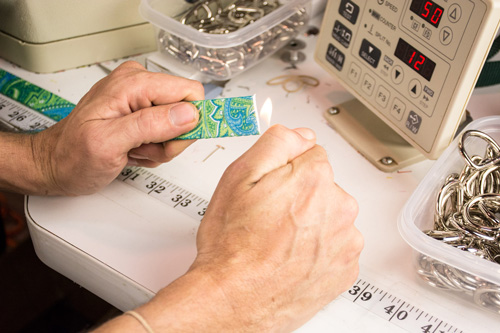
2. Melt Every Raw End Of Webbing To Prevent Fraying
Also, heat all the cut ends of webbing with the lighter so the individual nylon fibers melt together. If you're not quite sure how to do all that, don't worry! We have a handy guide here to help you cut your webbing properly.
Fabric Collar Alternative
For directions showing how to create a designer fabric Martingale dog collar, visit our directions for creating fabric-covered webbing and follow steps 1 through 8. Once you have finished, click to close and continue to Stage One of the Martingale instructions.
Stage One: Create The Small Loop
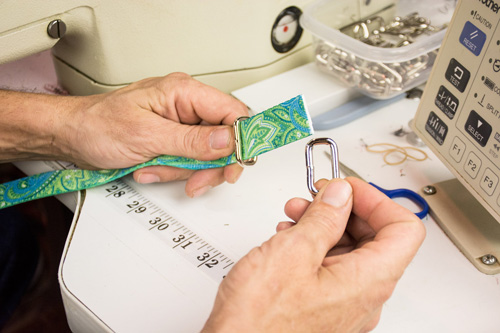
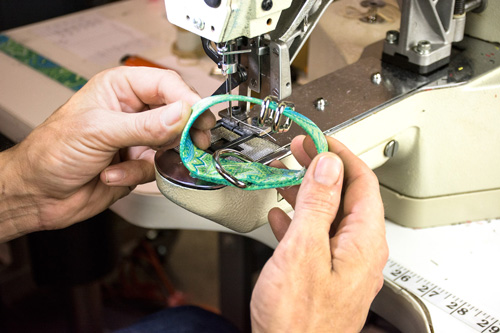
3. Place Webbing Through Rectangle Rings
Insert the short piece of webbing through the two rectangle pieces.
4. Box Stitch
Fold the left end over the right end by about 3" - 4".
On the right side, sew a box stitch (Figure 2) 1/8" from the webbing end.
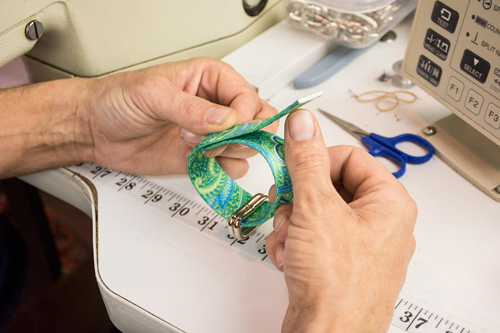
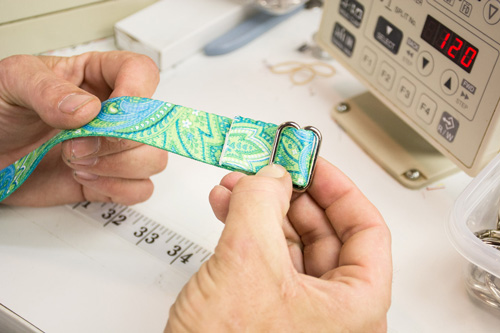
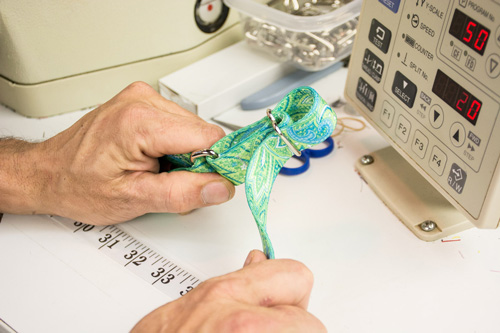
5. D-Ring Placement
Insert the D-ring between the two overlapped pieces with the straight side against the webbing and the curved part pointing inside the loop.
6. Box Stitch D-Ring
Snug the D-ring against the first box stitch and then sew another box stitch about 1/8" from the webbing end on the left side (open end). (This creates a small channel that will allow the D-ring some side-to-side movement.)
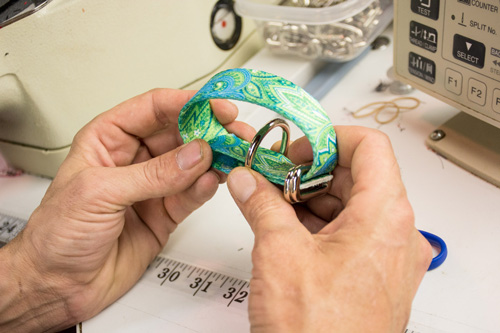
7. D-Ring Outside The Loop
Now, turn the loop inside-out so the D-ring is on the outside for leash and/or ID tag attachment.
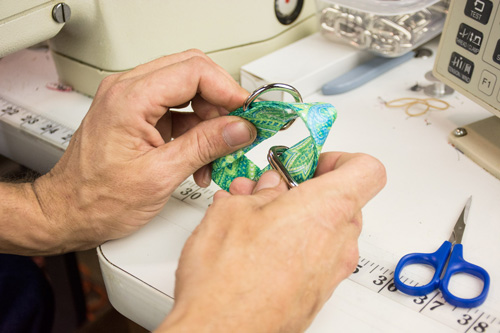
8. Loop Is Completed
You should now have a small loop with two rectangle rings and a D-ring. Place the completed loop to the side.
Stage Two: Construct The Large Loop, Part One
9. Weave Strap Through Triglides
Insert one end of the long piece of webbing through both openings of the triglide.
10. Fold Webbing
Fold webbing back about 2".
11. Stitch Triglide Into Place
Sew a Box Stitch 1/8" from the end to secure the triglide on the webbing strap.

Stage Three: Construct The Large Loop, Part Two
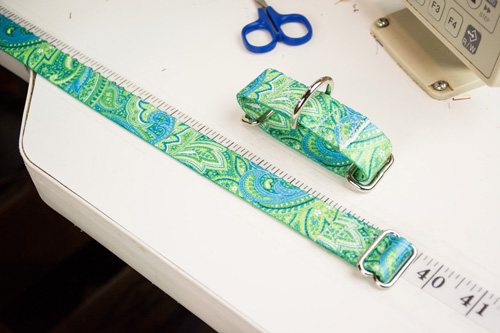
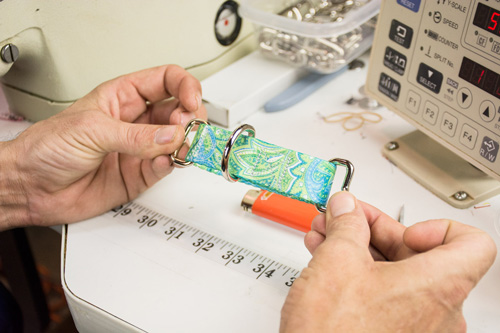
12. Getting Ready To Connect The Two Loops
Place the long piece in front of you with triglide and box-stitched end to your right. The raw webbing end should be on top.
13. Insert Strap Through A Rectangle Ring
Pick up the completed short loop. With the D-ring facing you, take the long piece and insert the unstitched end through the rectangle ring on the right side of the short loop.
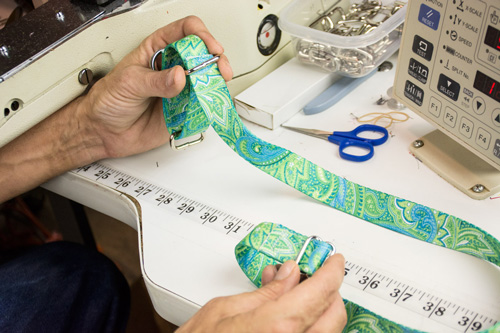
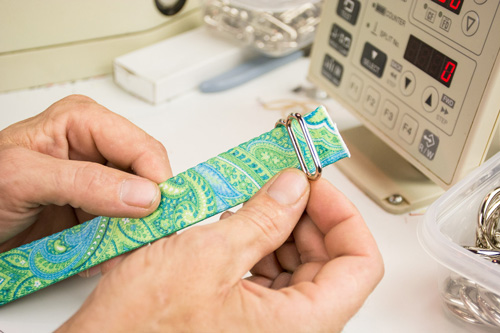
14. Insert Strap Through Triglide Slide
Push the end of long webbing strap up through the "empty" slot on the triglide slide.
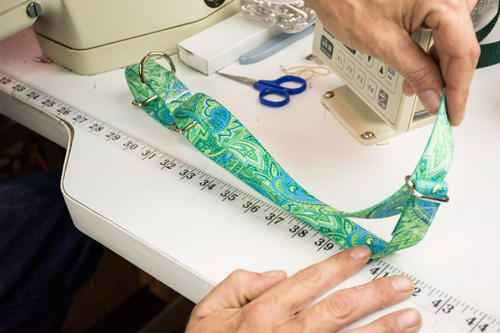
15. Insert Strap Through Other Side Of Triglide
Bring the end to the triglide and insert from beneath the triglide, over and down through the other side of the triglide. There should now be a double thickness of webbing on the triglide.
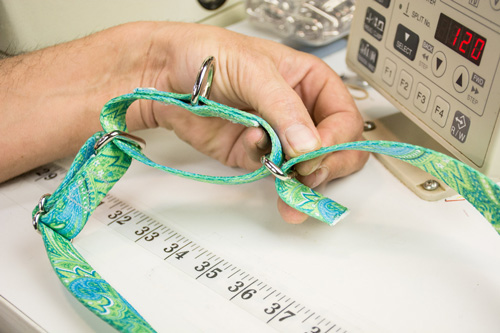
16. Push Webbing Through Ring & Fold
From above, put the unstitched end of the long strap down through the remaining rectangle ring.
17. Box Stitch
Fold about 2" and box stitch 1/8" from webbing end to secure. (We insert the Country Brook Craft Supply label between the layers of webbing at this stage.)
Congratulations on your success!
You have just completed a Martingale dog collar, just like the ones the artisans make here at Country Brook Craft Supply. Let us know how it went; your feedback is always welcome and helpful.
Better yet, take a picture of your collar on a dog and share it with our friends on Facebook, on our Good Job! board on Pinterest.
You'll encourage other readers to try their hand at a custom collar and you'll help us spread the word about this great collar. Sounds like a great partnership for all involved.